Creating an OCIR
Creation of OCIR
Push all the required images to OCIR and use from OCIR. Follow the below steps before pushing the images to OCIR
Create an “Auth token”
Create an “Auth token” which will be used as docker password to push/pull images from OCIR
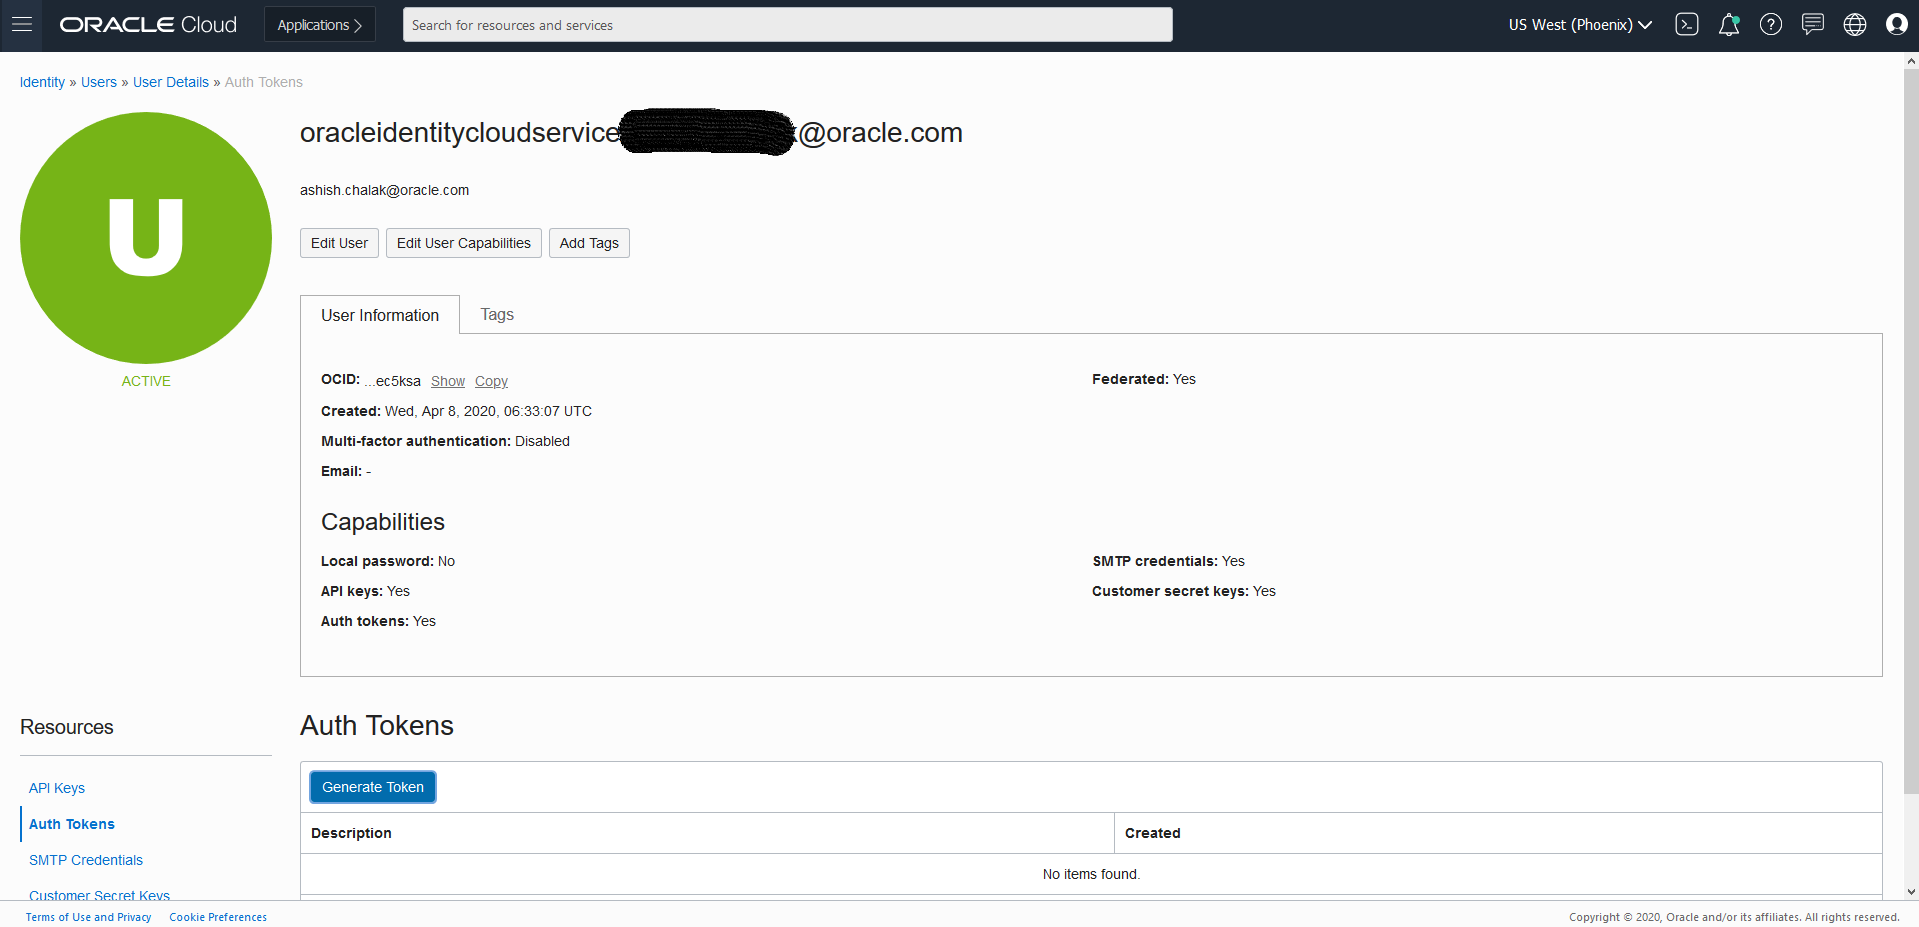
Login to Console and navigate to User Settings, which is in the drop down under your OCI username in the top nav

- On User Details page, select “Auth Tokens” in the left nav and then Click the “Generate Token” button:
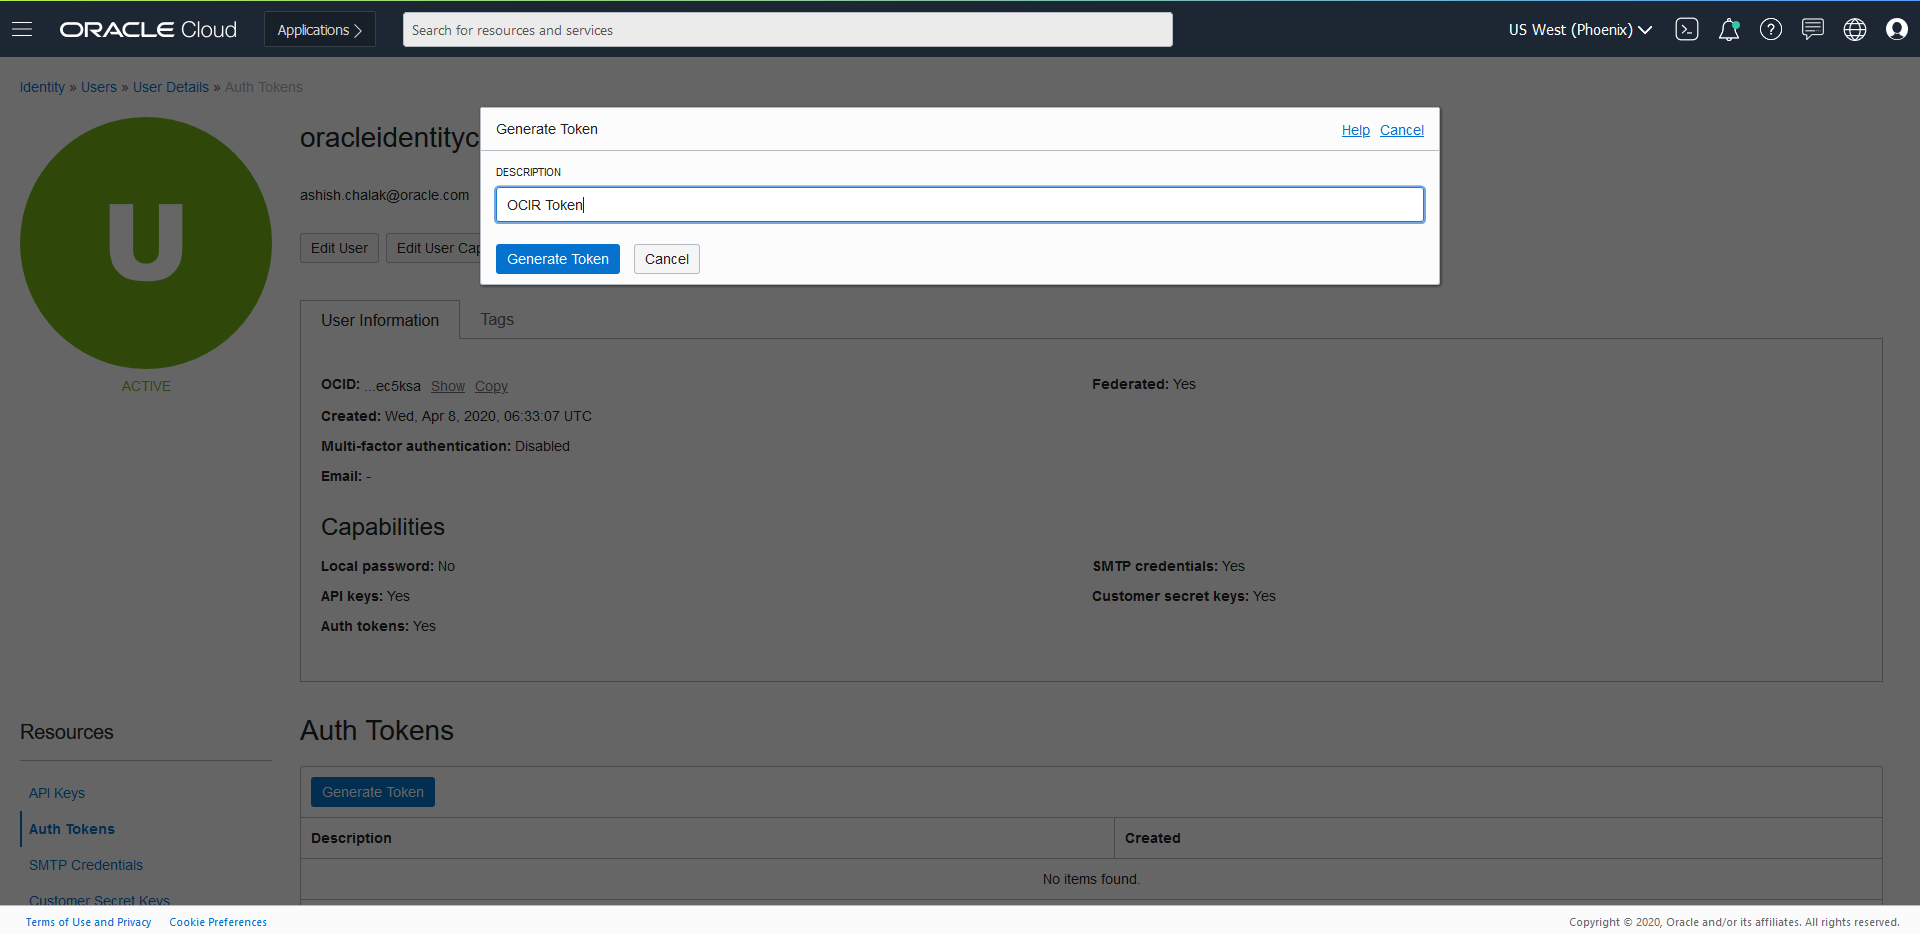
Enter a Name and Click “Generate Token”
- Token will get generated
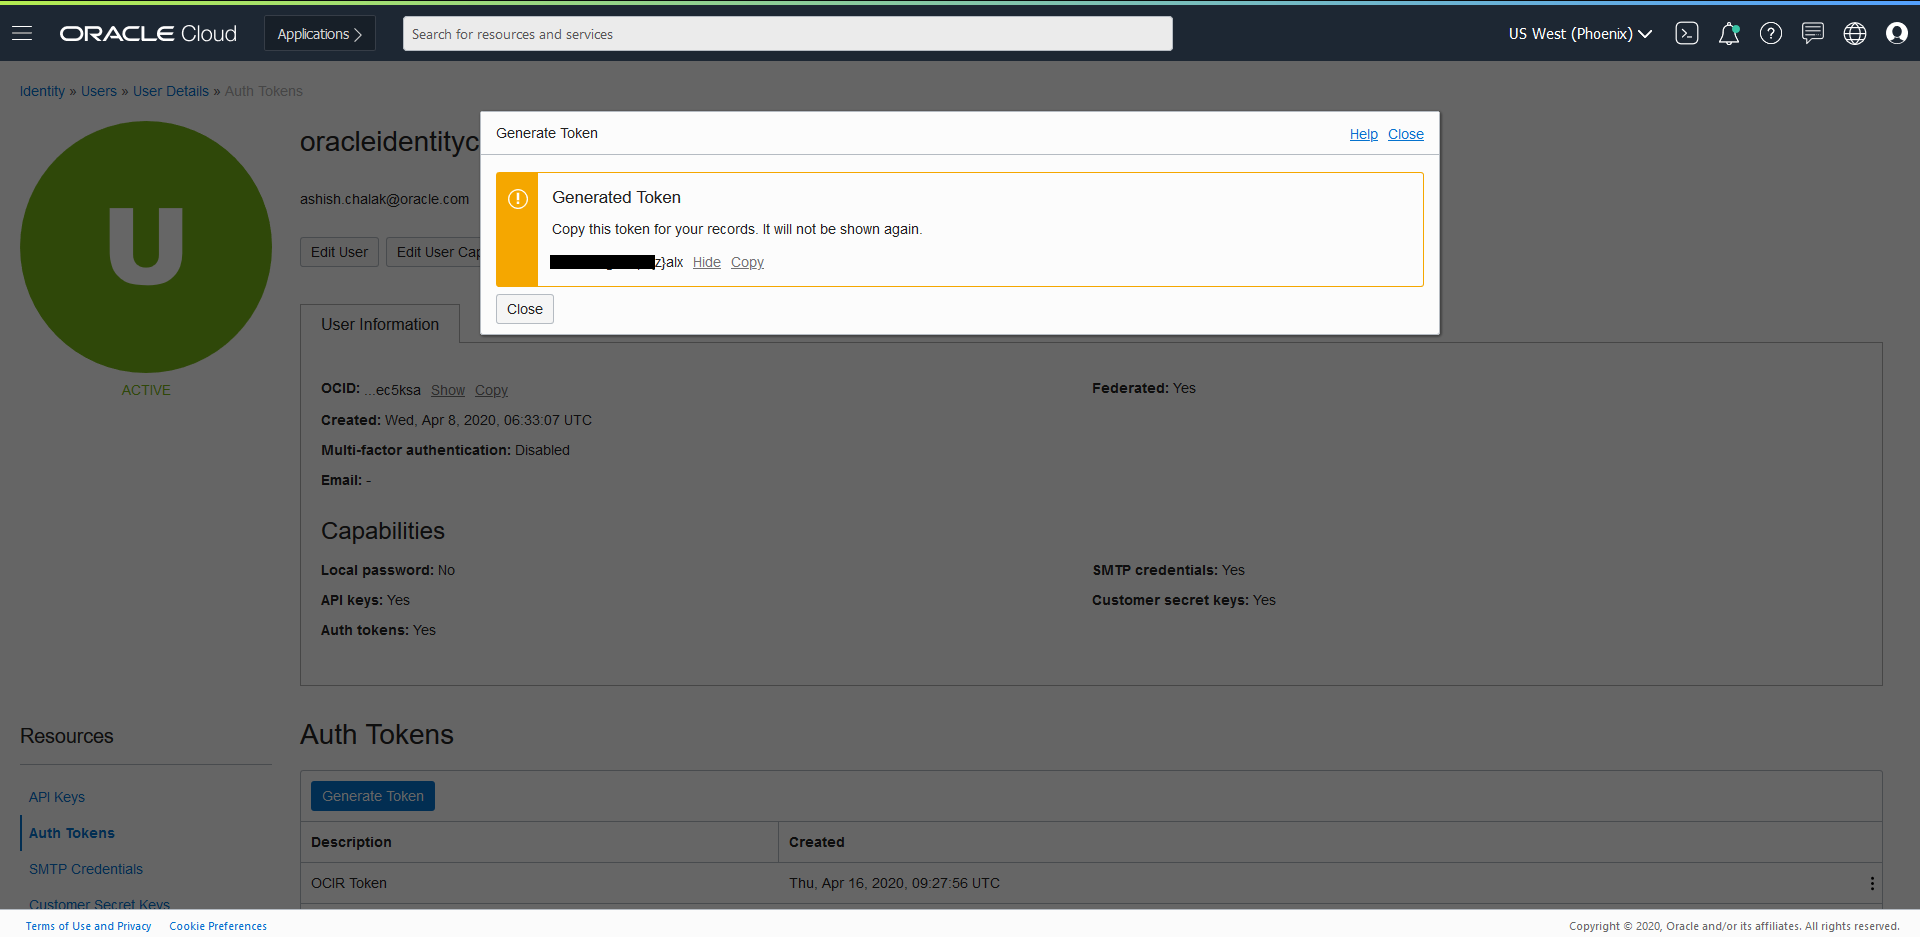
- Copy the generated token. NOTE: It will only be displayed this one time, and you will need to copy it to a secure place for further use. NOTE: It will only be displayed this one time, and you will need to copy it to a secure place for further use.
Get the OCIR name
Get the OCIR Repo Name by Log in to Oracle Cloud Infrastructure Console. In he OCI Console, open the Navigation menu. Under Solutions and Platform, go to Developer Services and click Registry (OCIR).

Using the OCIR
Using the Docker CLI to login to OCIR ( for phoenix : phx.ocir.io , ashburn: iad.ocir.io etc) a. docker login phx.ocir.io b. When promoted for username enter docker username as OCIR RepoName/oci username ( eg., axcmmdmzqtqb/oracleidentitycloudservice/myemailid@oracle.com) c. When prompted for your password, enter the generated Auth Token i.e p[3k;pYePDSTD:-(LlAS Now you can tag the images and push to OCIR.
$ docker login phx.ocir.io
$ username - axcmmdmzqtqb/oracleidentitycloudservice/myemailid@oracle.com
$ password - p[3k;pYePDSTD:-(LlAS     (Token Generated for OCIR using user setting)
This has to be done on Bastion Node for all the images.