Set up Kubernetes

Contents

Cheat sheet for setting up Kubernetes

If you need some help setting up a Kubernetes environment to experiment with the operator, please read on! The supported environments are either an on-premises installation of Kubernetes, for example, on bare metal, or on a cloud provider like Oracle Cloud, Microsoft Azure, Google, or Amazon. Cloud providers allow you to provision a managed Kubernetes environment from their management consoles. You could also set up Kubernetes manually using compute resources on a cloud. There are also a number of ways to run a Kubernetes single-node cluster that are suitable for development or testing purposes. Your options include:

“Production” options:

  • Set up your own Kubernetes environment on bare compute resources on a cloud.
  • Use your cloud provider’s management console to provision a managed Kubernetes environment.
  • Install Kubernetes on your own compute resources (for example, “real” computers, outside a cloud).

“Development/test” options:

  • Install Docker for Mac or Docker for Windows and enable its embedded Kubernetes cluster.
  • We do not recommend or support other development/test options like Minikube, Minishift, kind, and so on.

We have provided our hints and tips for several of these options in the following sections.

Set up Kubernetes on bare compute resources in a cloud

Follow the basic steps from the Terraform Kubernetes installer for Oracle Cloud Infrastructure.

Prerequisites

  1. Download and install Terraform (v0.10.3 or later).
  2. Download and install the Terraform Provider for Oracle Cloud Infrastructure (v2.0.0 or later).
  3. Create an Terraform configuration file at ~/.terraformrc that specifies the path to the Oracle Cloud Infrastructure provider:
    providers {
      oci = "<path_to_provider_binary>/terraform-provider-oci"
    }
    
  4. Ensure that you have kubectl installed if you plan to interact with the cluster locally.

Quick start

  1. Do a git clone of the Terraform Kubernetes Installer project:

    $ git clone https://github.com/oracle/terraform-kubernetes-installer.git
    
  2. Initialize your project:

    $ cd terraform-kubernetes-installer
    
    $ terraform init
    
  3. Copy the example terraform.tvfars:

    $ cp terraform.example.tfvars terraform.tfvars
    
  4. Edit the terraform.tvfars file to include values for your tenancy, user, and compartment. Optionally, edit the variables to change the Shape of the VMs for your Kubernetes master and workers, and your etcd cluster. For example:

    #give a label to your cluster to help identify it if you have multiple
    label_prefix="weblogic-operator-1-"
    
    #identification/authorization info
    tenancy_ocid = "ocid1.tenancy...."
    compartment_ocid = "ocid1.compartment...."
    fingerprint = "..."
    private_key_path = "/Users/username/.oci/oci_api_key.pem"
    user_ocid = "ocid1.user..."
    
    #shapes for your VMs
    etcdShape = "VM.Standard1.2"
    k8sMasterShape = "VM.Standard1.8"
    k8sWorkerShape = "VM.Standard1.8"
    k8sMasterAd1Count = "1"
    k8sWorkerAd1Count = "2"
    
    #this ingress is set to wide-open for testing **not secure**
    etcd_ssh_ingress = "0.0.0.0/0"
    master_ssh_ingress = "0.0.0.0/0"
    worker_ssh_ingress = "0.0.0.0/0"
    master_https_ingress = "0.0.0.0/0"
    worker_nodeport_ingress = "0.0.0.0/0"
    
    #create iscsi volumes to store your etcd and /var/lib/docker info
    worker_iscsi_volume_create = true
    worker_iscsi_volume_size = 100
    etcd_iscsi_volume_create = true
    etcd_iscsi_volume_size = 50
    
  5. Test and apply your changes:

    $ terraform plan
    
    $ terraform apply
    
  6. Test your cluster using the built-in script scripts/cluster-check.sh:

    $ scripts/cluster-check.sh
    
  7. Output the SSH private key:

    # output the ssh private key for use later
    
    $ rm -f generated/instances_id_rsa && terraform output ssh_private_key > generated/instances_id_rsa && chmod 600 generated/instances_id_rsa
    
  8. If you need shared storage between your Kubernetes worker nodes, enable and configure NFS:

In the current GA version, the Oracle Container Engine for Kubernetes supports network block storage that can be shared across nodes with access permission RWOnce (meaning that only one can write, others can read only). If you choose to place your domain on a persistent volume, you must use a shared file system to store the WebLogic domain configuration, which MUST be accessible from all the pods across the nodes. Oracle recommends that you use the Oracle Cloud Infrastructure File Storage Service (or equivalent on other cloud providers). Alternatively, you may install an NFS server on one node and share the file system across all the nodes.

Currently, we recommend that you use NFS version 3.0 for running WebLogic Server on Oracle Container Engine for Kubernetes. During certification, we found that when using NFS 4.0, the servers in the WebLogic domain went into a failed state intermittently. Because multiple threads use NFS (default store, diagnostics store, Node Manager, logging, and domain_home), there are issues when accessing the file store. These issues are removed by changing the NFS to version 3.0.

$ terraform output worker_public_ips
IP1,
IP2
$ terraform output worker_private_ips
PRIVATE_IP1,
PRIVATE_IP2
$ ssh -i `pwd`/generated/instances_id_rsa opc@IP1
worker-1$ sudo su -
worker-1# yum install -y nfs-utils
worker-1# mkdir /scratch
worker-1# echo "/scratch PRIVATE_IP2(rw)" >> /etc/exports
worker-1# systemctl restart nfs
worker-1# exit
worker-1$ exit
# configure worker-2 to mount the share from worker-1
$ ssh -i `pwd`/generated/instances_id_rsa opc@IP2
worker-2$ sudo su -
worker-2# yum install -y nfs-utils
worker-2# mkdir /scratch
worker-2# echo "PRIVATE_IP1:/scratch /scratch  nfs nfsvers=3 0 0" >> /etc/fstab
worker-2# mount /scratch
worker-2# exit
worker-2$ exit

Install Kubernetes on your own compute resources

For example, on Oracle Linux servers outside a cloud.

These instructions are for Oracle Linux 7u2+. If you are using a different flavor of Linux, you will need to adjust them accordingly.

These steps must be run with the root user, until specified otherwise! Any time you see YOUR_USERID in a command, you should replace it with your actual userid.

  1. Choose the directories where your Docker and Kubernetes files will be stored. The Docker directory should be on a disk with a lot of free space (more than 100GB) because it will be used for the /var/lib/docker file system, which contains all of your images and containers. The Kubernetes directory will be used for the /var/lib/kubelet file system and persistent volume storage.

    $ export docker_dir=/scratch/docker
    
    $ export k8s_dir=/scratch/k8s_dir
    
  2. Create a shell script that sets up the necessary environment variables. You should probably just append this to the user’s .bashrc so that it will get executed at login. You will also need to configure your proxy settings here if you are behind an HTTP proxy:

    #!/bin/bash
    export PATH=$PATH:/sbin:/usr/sbin
    pod_network_cidr="10.244.0.0/16"
    
    k8s_dir=$k8s_dir
    
    ## grab my IP address to pass into  kubeadm init, and to add to no_proxy vars
    # assume ipv4 and eth0
    ip_addr=`ip -f inet addr show eth0  | egrep inet | awk  '{print $2}' | awk -F/ '{print $1}'\`
    
    export HTTPS_PROXY=http://proxy:80
    export https_proxy=http://proxy:80
    export NO_PROXY=localhost,127.0.0.1,.my.domain.com,/var/run/docker.sock,$pod_network_cidr,$ip_addr
    export no_proxy=localhost,127.0.0.1,.my.domain.com,/var/run/docker.sock,$pod_network_cidr,$ip_addr
    export HTTP_PROXY=http://proxy:80
    export http_proxy=http://proxy:80
    
    export KUBECONFIG=$k8s_dir/admin.conf
    

    Source that script to set up your environment variables:

    $ . ~/.bashrc
    

    If you want command completion, you can add the following to the script:

    [ -f /usr/share/bash-completion/bash_completion ] && . /usr/share/bash-completion/bash_completion
    source <(kubectl completion bash)
    
  3. Create the directories you need:

    $ mkdir -p $docker_dir $k8s_dir/kubelet
    
    $ ln -s $k8s_dir/kubelet /var/lib/kubelet
    
  4. Set an environment variable with the Docker version you want to install:

    $ docker_version="18.09.1.ol"
    
  5. Install Docker, removing any previously installed version:

    ### install docker and curl-devel (for git if needed)
    
    $ yum-config-manager --enable ol7_addons ol7_latest
    
    # we are going to just uninstall any docker-engine that is installed
    
    $ yum -y erase docker-engine docker-engine-selinux
    
    # now install the docker-engine at our specified version
    
    $ yum -y install docker-engine-$docker_version curl-devel
    
  6. Update the Docker options:

    # edit /etc/sysconfig/docker to add custom OPTIONS
    
    $ cat /etc/sysconfig/docker | sed "s#^OPTIONS=.*#OPTIONS='--selinux-enabled --group=docker -g $docker_dir'#g" > /tmp/docker.out
    
    $ diff /etc/sysconfig/docker /tmp/docker.out
    
    $ mv /tmp/docker.out /etc/sysconfig/docker
    
  7. Set up the Docker network, including the HTTP proxy configuration, if you need it:

    # generate a custom /setc/sysconfig/docker-network
    
    $ cat <<EOF > /etc/sysconfig/docker-network
    # /etc/sysconfig/docker-network
    DOCKER_NETWORK_OPTIONS="-H tcp://0.0.0.0:4243 -H unix:///var/run/docker.sock"
    HTTP_PROXY="http://proxy:80"
    HTTPS_PROXY="http://proxy:80"
    NO_PROXY="localhost,127.0.0.0/8,.my.domain.com,/var/run/docker.sock"
    EOF
    
  8. Add your user to the docker group:

    $ usermod -aG docker YOUR_USERID
    
  9. Enable and start the Docker service that you just installed and configured:

    $ systemctl enable docker && systemctl start docker
    
  10. Install the Kubernetes packages:

    #!/bin/bash
    # generate the yum repo config
    cat <<EOF > /etc/yum.repos.d/kubernetes.repo
    [kubernetes]
    name=Kubernetes
    baseurl=http://yum.kubernetes.io/repos/kubernetes-el7-x86_64
    enabled=1
    gpgcheck=1
    repo_gpgcheck=1
    gpgkey=https://packages.cloud.google.com/yum/doc/yum-key.gpg
           https://packages.cloud.google.com/yum/doc/rpm-package-key.gpg
    EOF
    
    setenforce 0
    # install kube* packages
    v=${1:-1.17.0-0}
    old_ver=`echo $v | egrep "^1.7"`
    yum install -y kubelet-$v kubeadm-$v kubectl-$v kubernetes-cni
    
    # change the cgroup-driver to match what docker is using
    cgroup=`docker info 2>&1 | egrep Cgroup | awk '{print $NF}'`
    [ "$cgroup" == "" ] && echo "cgroup not detected!" && exit 1
    
    cat /etc/systemd/system/kubelet.service.d/10-kubeadm.conf | sed "s#KUBELET_CGROUP_ARGS=--cgroup-driver=.*#KUBELET_CGROUP_ARGS=--cgroup-driver=$cgroup\"#"> /etc/systemd/system/kubelet.service.d/10-kubeadm.conf.out
    diff  /etc/systemd/system/kubelet.service.d/10-kubeadm.conf  /etc/systemd/system/kubelet.service.d/10-kubeadm.conf.out
    mv /etc/systemd/system/kubelet.service.d/10-kubeadm.conf.out  /etc/systemd/system/kubelet.service.d/10-kubeadm.conf
    
    if [ "$old_ver" = "" ] ; then
    
    # run with swap if not in version 1.7* (starting in 1.8, kubelet
    # fails to start with swap enabled)
    #
    cat <<EOF > /etc/systemd/system/kubelet.service.d/90-local-extras.conf
    [Service]
    Environment="KUBELET_EXTRA_ARGS=--fail-swap-on=false"
    EOF
    
    fi
    
  11. Enable and start the Kubernetes Service:

    $ systemctl enable kubelet && systemctl start kubelet
    
  12. Install and use Flannel for CNI:

    #!/bin/bash
    # run kubeadm init as root
    echo Running kubeadm init --skip-preflight-checks --apiserver-advertise-address=$ip_addr  --pod-network-cidr=$pod_network_cidr
    echo " see /tmp/kubeadm-init.out for output"
    kubeadm init --skip-preflight-checks --apiserver-advertise-address=$ip_addr  --pod-network-cidr=$pod_network_cidr > /tmp/kubeadm-init.out 2>&1
    if [ $? -ne 0 ] ; then
      echo "ERROR: kubeadm init returned non 0"
      chmod a+r  /tmp/kubeadm-init.out
      exit 1
    else
      echo; echo "kubeadm init complete" ; echo
      # tail the log to get the "join" token
      tail -6 /tmp/kubeadm-init.out
    fi
    
    cp /etc/kubernetes/admin.conf  $KUBECONFIG
    chown YOUR_USERID:YOUR_GROUP $KUBECONFIG
    chmod 644 $KUBECONFIG
    

    The following steps should be run with your normal (non-root) user.

  13. Configure CNI:

    $ sudo -u YOUR_USERID kubectl create clusterrolebinding permissive-binding --clusterrole=cluster-admin --user=admin --user=kubelet --group=system:serviceaccounts
    
    $ sudo -u YOUR_USERID kubectl apply -f https://raw.githubusercontent.com/coreos/flannel/master/Documentation/kube-flannel.yml
    

    Wait for kubectl get nodes to show Ready for this host:

    #!/bin/bash
    host=`hostname | awk -F. '{print $1}'`
    status="NotReady"
    max=10
    count=1
    while [ ${status:=Error} != "Ready" -a $count -lt $max ] ; do
      sleep 30
      status=`sudo -u YOUR_USERID kubectl get nodes | egrep $host | awk '{print $2}'`
      echo "kubectl status is ${status:=Error}, iteration $count of $max"
      count=`expr $count + 1`
    done
    
    status=`sudo -u YOUR_USERID kubectl get nodes | egrep $host | awk '{print $2}'`
    if [ ${status:=Error} != "Ready" ] ; then
      echo "ERROR: kubectl get nodes reports status=${status:=Error} after configuration, exiting!"
      exit 1
    fi
    
  14. Taint the nodes:

    $ sudo -u YOUR_USERID kubectl taint nodes --all node-role.kubernetes.io/master-
    
    $ sudo -u YOUR_USERID kubectl get nodes
    
    $ sudo -u YOUR_USERID kubeadm version
    

    Congratulations! Docker and Kubernetes are installed and configured!

Install Docker for Mac with Kubernetes

Docker for Mac 18+ provides an embedded Kubernetes environment that is a quick and easy way to get a simple test environment set up on your Mac. To set it up, follow these instructions:

  1. Install “Docker for Mac” https://download.docker.com/mac/edge/Docker.dmg
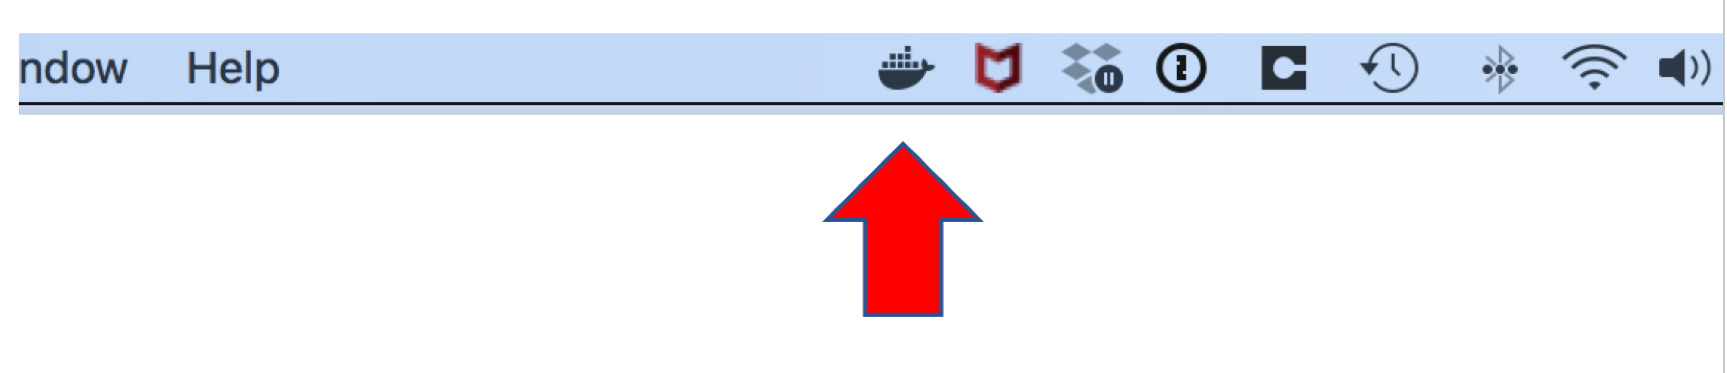
. Then start up the Docker application (press Command-Space bar, type in Docker and run it). After it is running you will see the Docker icon appear in your status bar:

    Docker icon in status bar
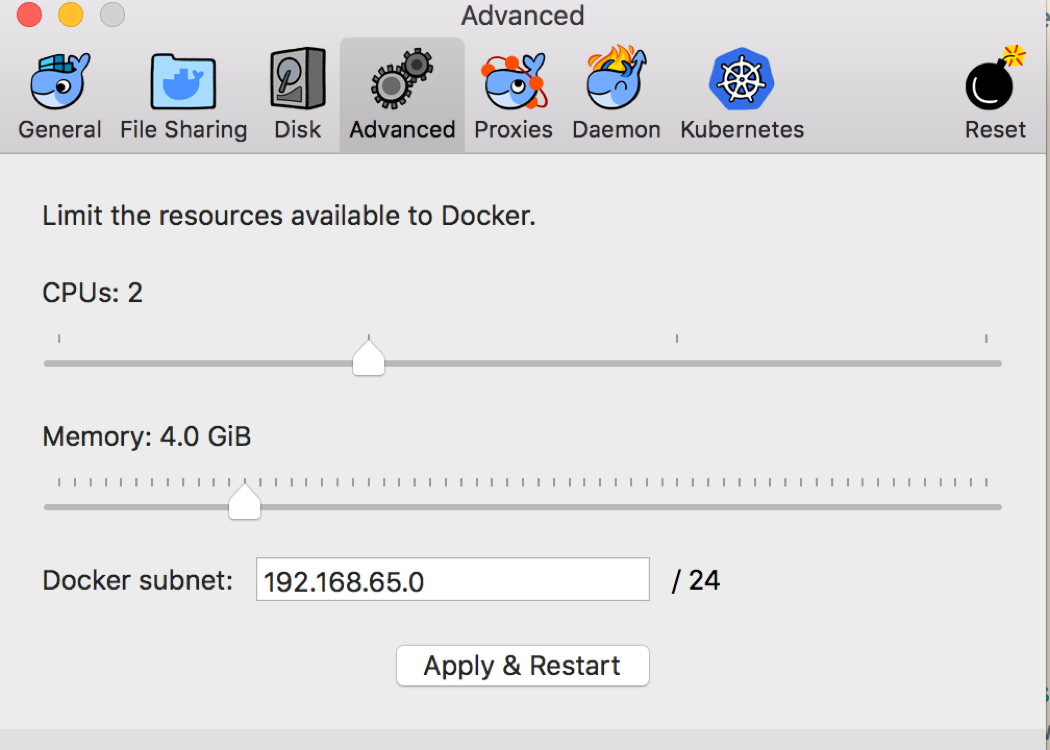
  2. Click the Docker icon and select “Preferences…” from the drop down menu. Go to the “Advanced” tab and give Docker a bit more memory if you have enough to spare:

    Docker memory settings
  3. Go to the “Kubernetes” tab and click on the option to enable Kubernetes:

    Enable Kubernetes setting

    If you are behind an HTTP proxy, then you should also go to the “Proxies” tab and enter your proxy details.

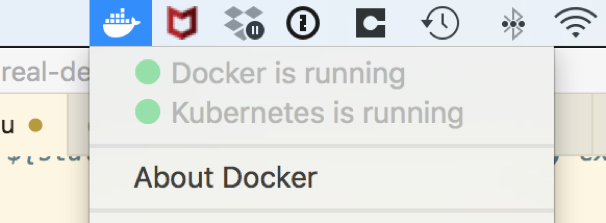
    Docker will download the Kubernetes components and start them up for you. When it is done, you will see the Kubernetes status go to green/running in the menu:

    Kubernetes running
  4. Ensure that kubectl on your Mac, is pointing to the correct cluster and context.

    $ kubectl config get-contexts
    
    CURRENT   NAME                          CLUSTER                      AUTHINFO             NAMESPACE
              docker-for-desktop            docker-for-desktop-cluster   docker-for-desktop
              kubernetes-admin@kubernetes   kubernetes                   kubernetes-admin
    
    $ kubectl config use-context docker-for-desktop
    
    Switched to context "docker-for-desktop".
    
    $ kubectl config get-clusters
    
    NAME
    kubernetes
    docker-for-desktop-cluster
    
    $ kubectl config set-cluster docker-for-desktop-cluster
    
    Cluster "docker-for-desktop-cluster" set.
    
  5. You should add docker-for-desktop to your /etc/hosts file entry for 127.0.0.1, as shown in this example, and you must be an admin user to edit this file:

    ##
    # Host Database
    #
    # localhost is used to configure the loopback interface
    # when the system is booting.  Do not change this entry.
    ##
    127.0.0.1	localhost docker-for-desktop
    255.255.255.255	broadcasthost
    ::1             localhost
    
  6. You may also have to tell kubectl to ignore the certificate by entering this command:

    $ kubectl config set-cluster docker-for-desktop --insecure-skip-tls-verify=true
    
  7. Then validate you are talking to the Kubernetes in Docker by entering these commands:

    $ kubectl cluster-info
    
    Kubernetes master is running at https://docker-for-desktop:6443
    
    To further debug and diagnose cluster problems, use 'kubectl cluster-info dump'.
    

Important note about persistent volumes

Docker for Mac has some restrictions on where you can place a directory that can be used as a HostPath for a persistent volume. To keep it simple, place your directory somewhere under /Users.