Select the Project Settings
-
Start WKT UI.
WKT UI uses the concept of a project that is like a project in an Integrated Development Environment (IDE). You will create a new project.
-
Using the
Filemenu, selectNew Project, choose a directory, and enter the file nametodo-list.wktproj.At this point, you will be on the
Project Settingspage that will look something like the one shown in the following image.Note: If you are not running on macOS, you will not see this top-most panel: For macOS, do you need to add directories to the PATH or define other environment variables for Docker/Podman or Kubernetes?
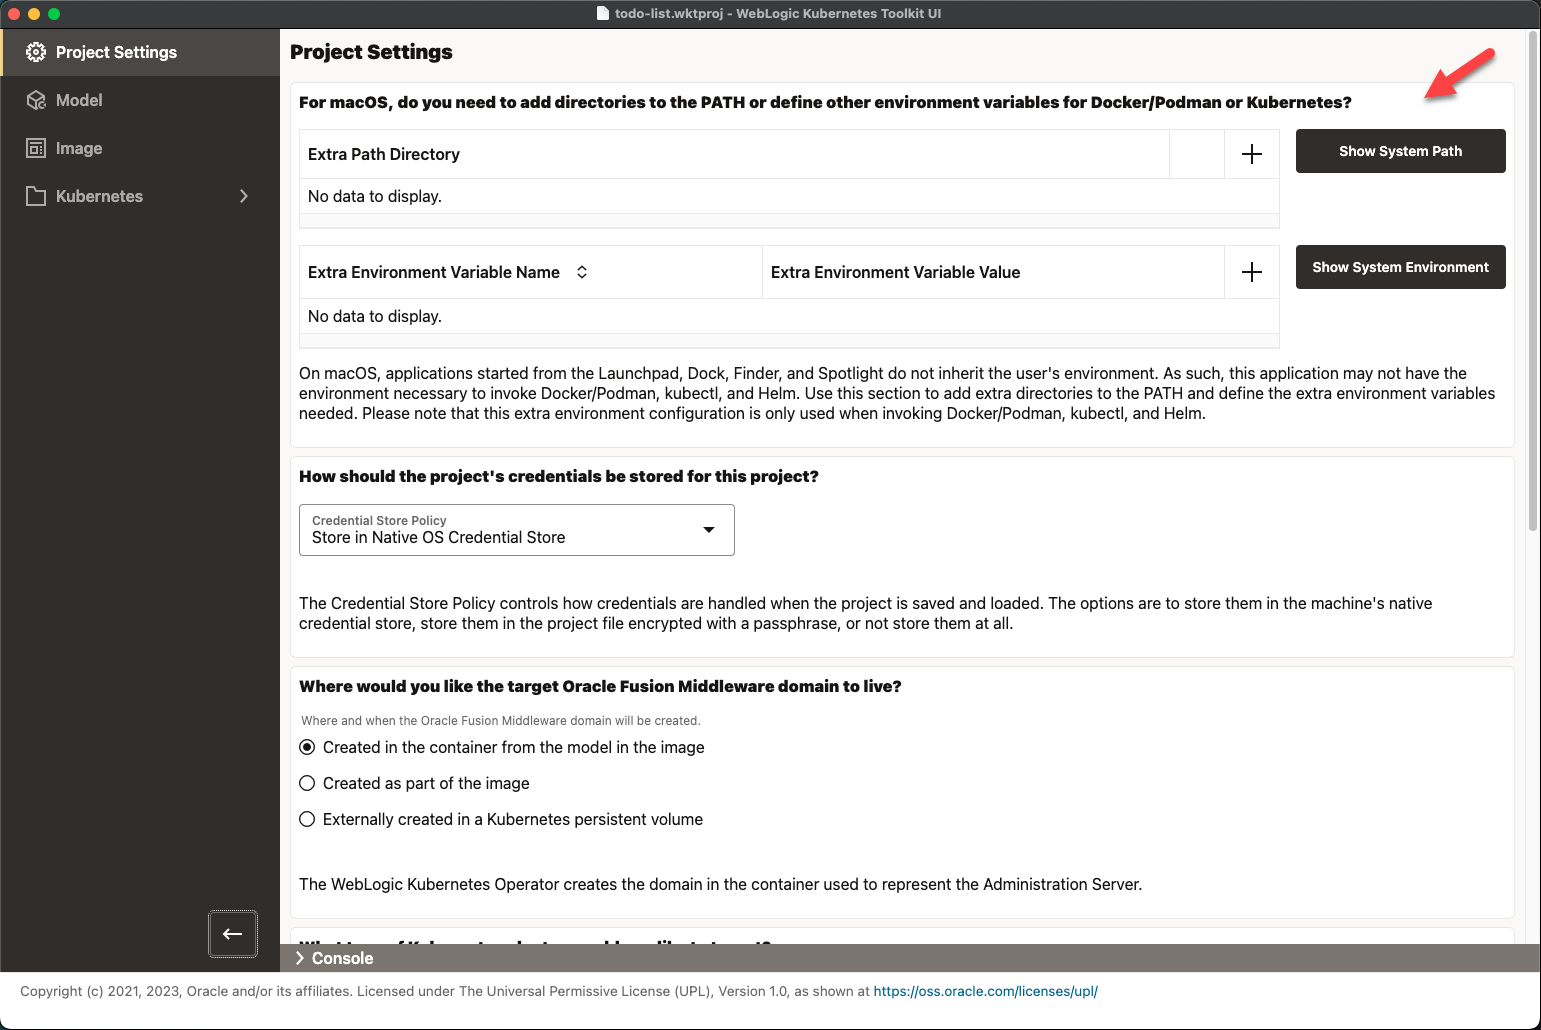
Extra Environment Settings (macOS only)
Unlike Windows or Linux, applications on macOS that are started from the Finder, Dock, or Launchpad, do not inherit the
user’s environment. To see the environment that WKT UI inherits from the operating system, select Show System Path and
Show System Environment. For now, you will not add any extra environment settings. Instead, you will return to add
these if you encounter an error that requires them.
Credential Store Policy
WKT UI realizes that different organizations and different projects have different security standards for storing credentials. As such, you have two options in WKT UI for how to store a project’s credentials:
-
Store Encrypted in Project File– This option lets you store the credentials directly in the project file. WKT UI encrypts each credential field using a passphrase that you provide and modern AES 256 bit encryption algorithms and techniques. On opening the project, WKT UI will prompt you for the encryption passphrase to use to decrypt the credential fields loaded into memory. If you remember the encryption passphrase, you can easily move the project files from machine to machine without losing the project credentials. -
Not Stored– This option is the most secure in that the credentials are never stored. Of course, this means that you must re-enter the credentials every time you open the project.
For this project, you will choose the Store Encrypted in Project File option to make it easier.
Oracle Fusion Middleware Target Domain Location
WebLogic Kubernetes Operator (WKO) has two mechanisms for storing the WebLogic domain directory for use in Kubernetes:
-
Model-in-Image with Auxiliary Image– With this option, you provide a WebLogic Deploy Tooling (WDT) model of the domain and a WDT installer in an auxiliary image, and the WebLogic Kubernetes Operator will create and update the domain for you. This option is also called Model-in-Image (MII) and WKO calls it FromModel. -
Domain on Persistent Volume– With this option, you must create a Kubernetes persistent volume and create the domain on that persistent volume. This option is also called Domain-on-PV (DoPV) and WKO calls it PersistentVolume.
The ToDo List application requires only WebLogic Server and fits well with the Model-in-Image mechanism, so select
Model-in-Image with Auxiliary Image.
WebLogic Deploy Tooling Archive Plug-in
The application has 3 different plug-ins for handling the WebLogic Deployment Tooling model archive file with differing trade-offs.
JavaScript JSZip Library- This is the original JavaScript module used to handling the archive file. It has a limitation of only working with archive files smaller than 2 GB.JavaScript zip.js Library- Added in 2.0.0, this JavaScript module eliminates theJSZip2 GB limitation, but it does not support in-place editing. As such, it requires extra disk place to temporarily hold the updated archive file before it is moved to overwrite the original archive file.WebLogic Deploy Tooling Archive Helper Tool- Added in 2.0.0, this option uses theWDT Archive Helper Toolto handle the large file, which eliminates both theJSZip2 GB andzip.jslack of in-place editing support. However, it does require a validJava Homelocation to be provided.
Since the ToDo List application and domain has a very small archive file, leave the default selection of
JavaScript JSZip Library.
Java Installation
You need to tell WKT UI which Java installation to use when running actions that require the WebLogic Deploy Tooling or WebLogic Image Tool. For this project, choose the Java Home directory for your Oracle JDK 11 directory.
Oracle Fusion Middleware Installation
Running the WebLogic Deploy Tooling requires an Oracle Home directory. As such, you must tell WKT UI which Oracle Home directory contains the Oracle Fusion Middleware software you plan to use. Because this project uses WebLogic Server (WLS) 14.1.x or 15.1.x, set this field to the directory containing your desired WLS installation.
Image Builder Tool
Because you will be building an image as part of this project, you need to tell WKT UI whether you will use Docker or Podman to build your image. You also need to provide the path to the executable that matches your selection.
For example, if you are running Rancher Desktop on macOS, select Docker and supply the Docker executable (for example,
/Users/fred.jones/.rd/bin/docker). Provide the answers that best fit your environment.
Target Kubernetes Cluster Architecture
This section allows you to select the chip architecture used in your Kubernetes cluster. Since the default value is
Intel/AMD (linux/amd64), there is nothing you need to change here.
Container Image Registry Credentials
This sections allows you to enter information about container image registries that you will use in the project. For now, leave this empty and we will fill it in as we go through the guide.
Now that your project settings are mostly complete, use the File menu, Save All option to save the project before
you move on to creating the model for your domain. WKT UI will prompt you for the encryption passphrase you want to
use with this project. Choose whatever value you like; just try not to forget it!