Configure Kubernetes Cluster Connectivity
First, you need to configure your Kubernetes client (kubectl) to connect and authenticate to your Kubernetes cluster.
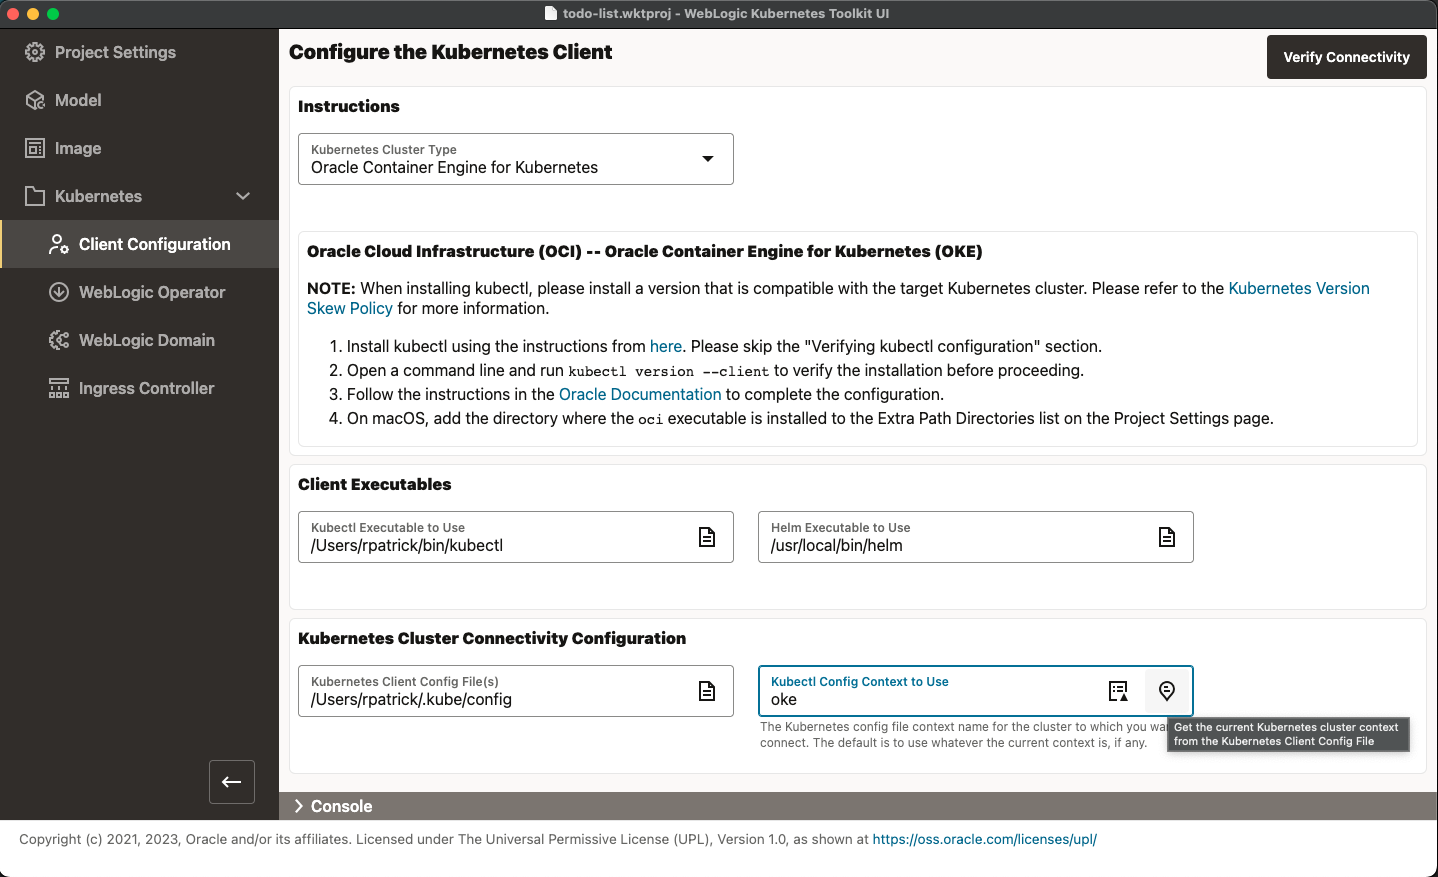
Go to the Kubernetes > Client Configuration page, shown in the following image.
By selecting the appropriate Kubernetes Cluster Type, the instructions panel will display the steps needed to properly
configure kubectl. Select your Kubernetes Cluster Type and follow the instructions in the WKT UI application (including the linked
instructions) until you can successfully connect using kubectl from the command line. (Because these steps are
generally well-documented and well-tested, we will not repeat them here.)
For those running on macOS, please remember to do any macOS-specific step, which is only visible when the WKT UI
application is running on macOS. For example, you will need to add the directory where your Docker/Podman executable
is installed to the Project Settings Extra Path Directories list. If you happen to use Homebrew to install
kubectl or helm, you will need to put the bin directory in this list as well, as shown in the following image.

After invoking kubectl from the command line, connect to the target Kubernetes cluster and fill out the rest of the form.
It is always best to select the appropriate Kubectl Config Context to Use for your project. Because you may have
multiple Kubernetes Client Config Files, select the appropriate one to use first. Then, you can use either the Chooser
icon or the Get Current Context icon to get the appropriate context value from the specified file. In the preceding
image, the context is named oke only because you edited the configuration file to change the OKE-generated context name
to one you could recognize. Prior to proceeding, run Verify Connectivity.