Create images with the WebLogic Image Tool
WKT UI uses the WebLogic Image Tool (WIT) to build container images. Each Oracle Fusion Middleware (FMW) Domain Target Location option has its own image requirements.
Model-in-Image(MII) – This approach puts Java and WebLogic Server into one image, which WKT UI calls the primary image, and WDT and the WDT model files into a separate image, known as the auxiliary image. In this document, we refer to this as MII with Auxiliary Image. Since WKT UI 2.0.0 removed support for MII without the use of an Auxiliary Image, all references to Model-in-Image or MII are meant to reference Model-in-Image with Auxiliary Image.Domain-on-PV(DoPV) – This approach uses a single image with Java and FMW in it. The domain is created on the persistent volume by external means or by using a Domain Creation Image, which is conceptually similar to an auxiliary image. A domain creation image, like an auxiliary image, has a WDT installer and WDT model files to define the domain. WebLogic Kubernetes Operator uses the domain creation image to create the initial domain on the persistent volume only if the domain directory does not already exist. Once the domain is created, all configuration changes are managed by the domain administrator, similar to how on premises domains are managed. The only difference is that server lifecycle is managed by WebLogic Kubernetes Operator and Kubernetes.
Both MII with Auxiliary Image and Domain-on-PV have an image containing only software (Java and WebLogic Server/FMW) with no configuration. This provides several important, operational advantages:
- Multiple domains can share the same software-only image since no domain-specific configuration is included. Updating hundreds of domains that all share the same image is as simple as updating the WebLogic Kubernetes Operator Domain custom resource specification to change the image. WKO will detect this change and perform a rolling update of the domain, starting with the Administration Server.
- The Oracle Container Registry (OCR) distributes prebuilt images that you can use directly, after you log in and accept the terms and conditions. Oracle customers with an active support contract can access prebuilt images with the latest set of recommended patches. See https://container-registry.oracle.com for more information about the prebuilt images and to accept the terms and conditions for the repositories of interest.
Because the ToDo List domain has no requirements that would lead us to use Domain-on-PV, you will use MII with Auxiliary Image for the ToDo List domain.
Go to the Image page, shown in the following image.
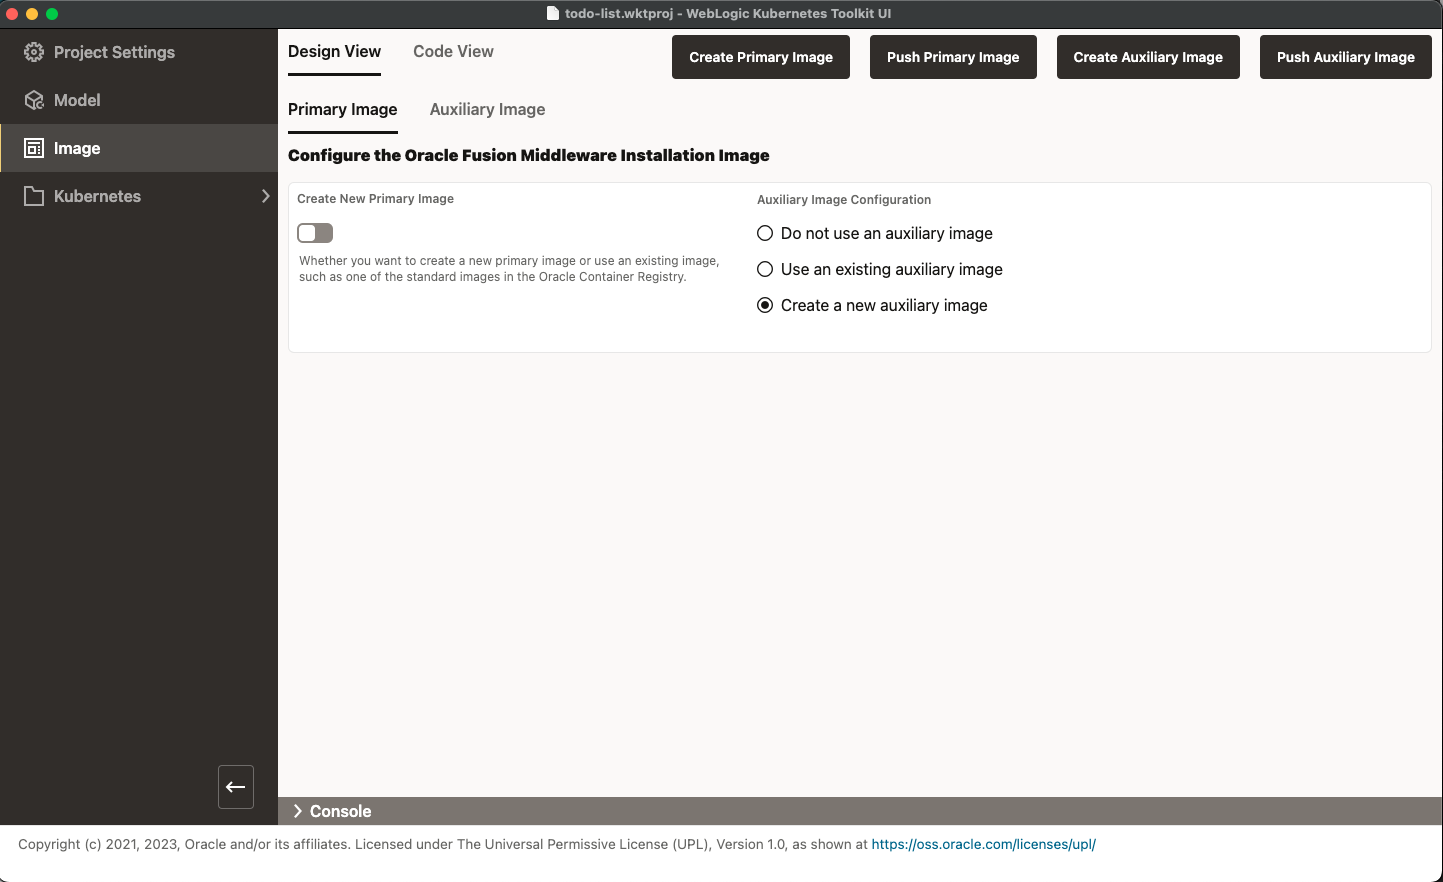
You could build your own primary image by enabling Create New Primary Image, which is off by default. To do this,
you would need to download the Linux JDK and WebLogic Server installer versions you plan to use, fill out the form, and
run Create Primary Image. Then, you would need to create an image repository in an image registry somewhere and push
the newly created image there. When Oracle releases the next set of patches, you would have to do it again.
Fortunately, you can simply use the prebuilt images in OCR. Log into
OCR
and select the Middleware category.
For those without Oracle Support credentials, make sure that you have accepted the terms and conditions for the
weblogic repository. In the following image, note the green checkmark at the end of the weblogic repository row.
For those with Oracle Support credentials, it is highly recommended to use the weblogic_cpu repository at the bottom
of the page instead.

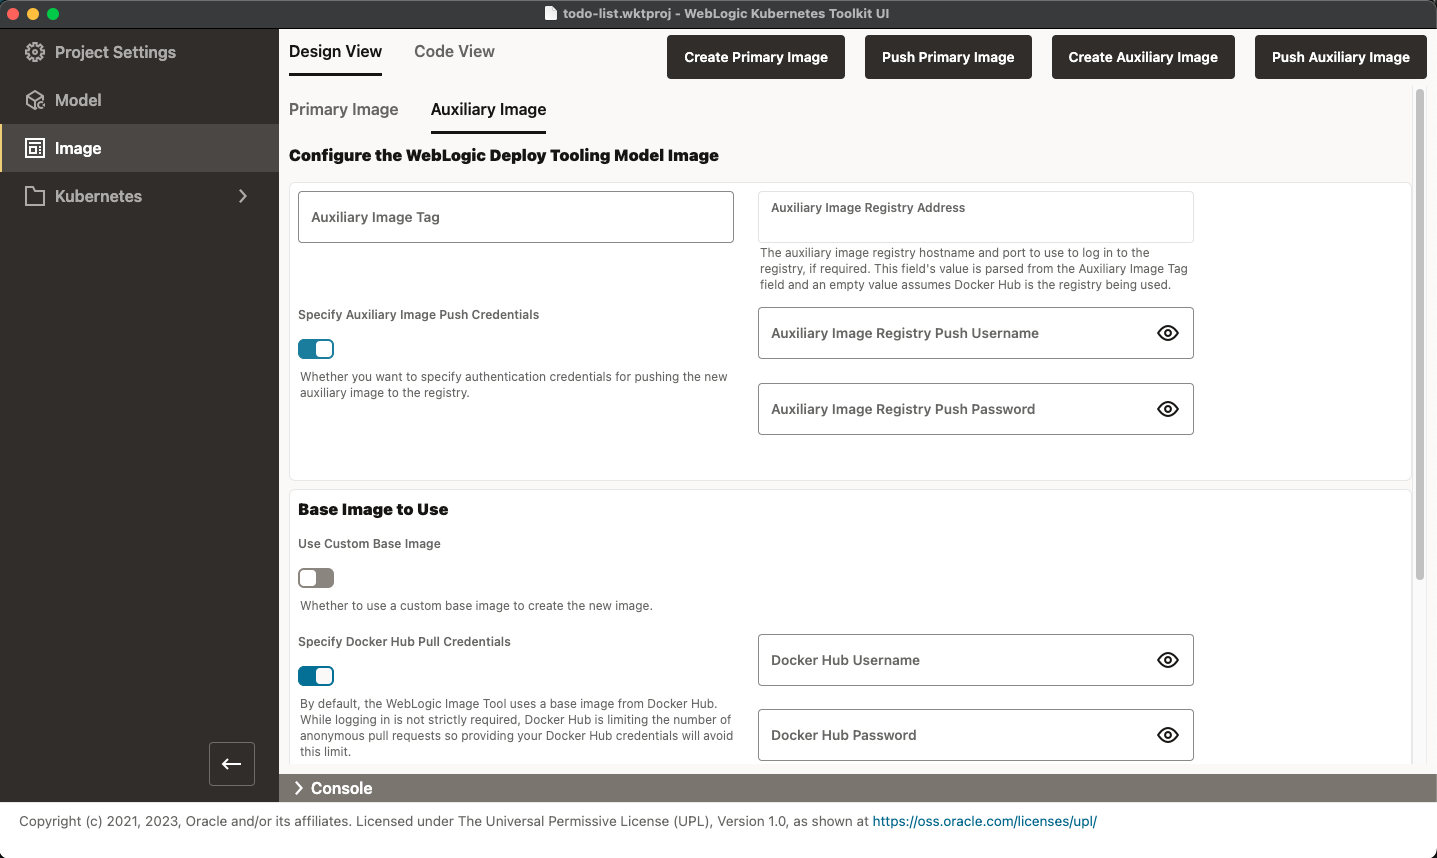
For this exercise, you will create a new auxiliary image. This is the default setting and the Auxiliary Image tab is
active. Select the Auxiliary Image tab, as shown in the following image.
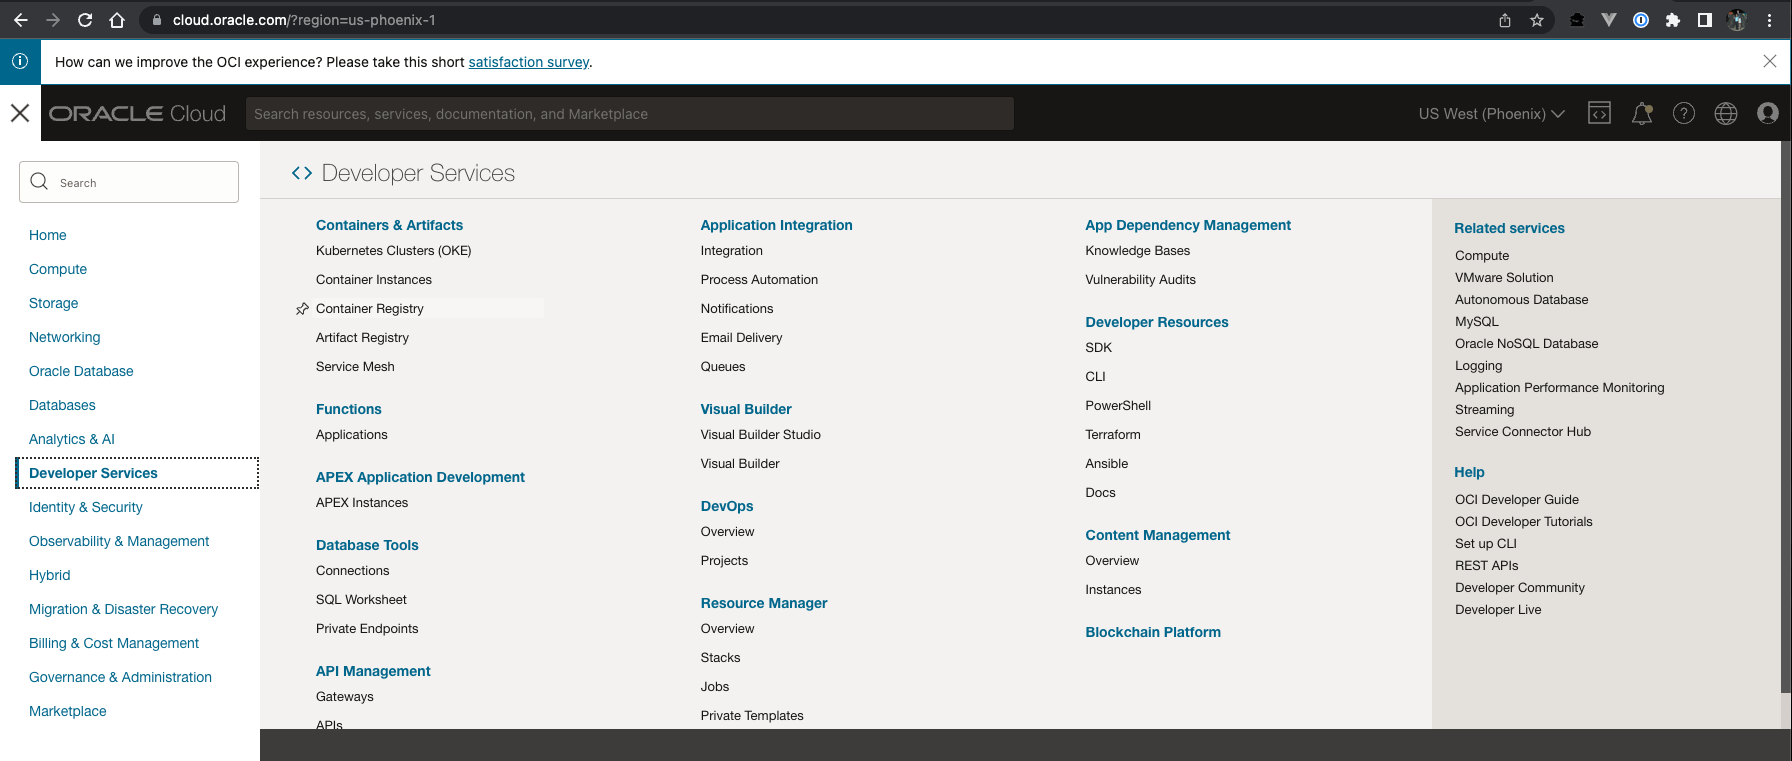
The first thing you need to decide is what image registry to use for the auxiliary image. For this exercise, you will use the Container Registry from the Oracle Cloud (OCIR) but feel free to substitute another image registry. We will try to point out where your image registry selection impacts the rest of the example.
After logging in to your Oracle Cloud account, select to the Container Registry option under the Developer Services category, as shown in the following image.
In the registry of your choosing, create a new private repository called wktui-qs/todolist-aux. Note the URL needed
to access the new repository. For the OCIR repository, the URL is of the form
<region-abbreviation>.ocir.io/<tenancy-name>/wktui-qs/todolist-aux, where region-abbreviation is something like phx
(for the Phoenix region) and tenancy name is the name of the tenancy used to log in to https://cloud.oracle.com. For
a listing of every available region, refer to the
Availability by Region table
in the OCI documentation.
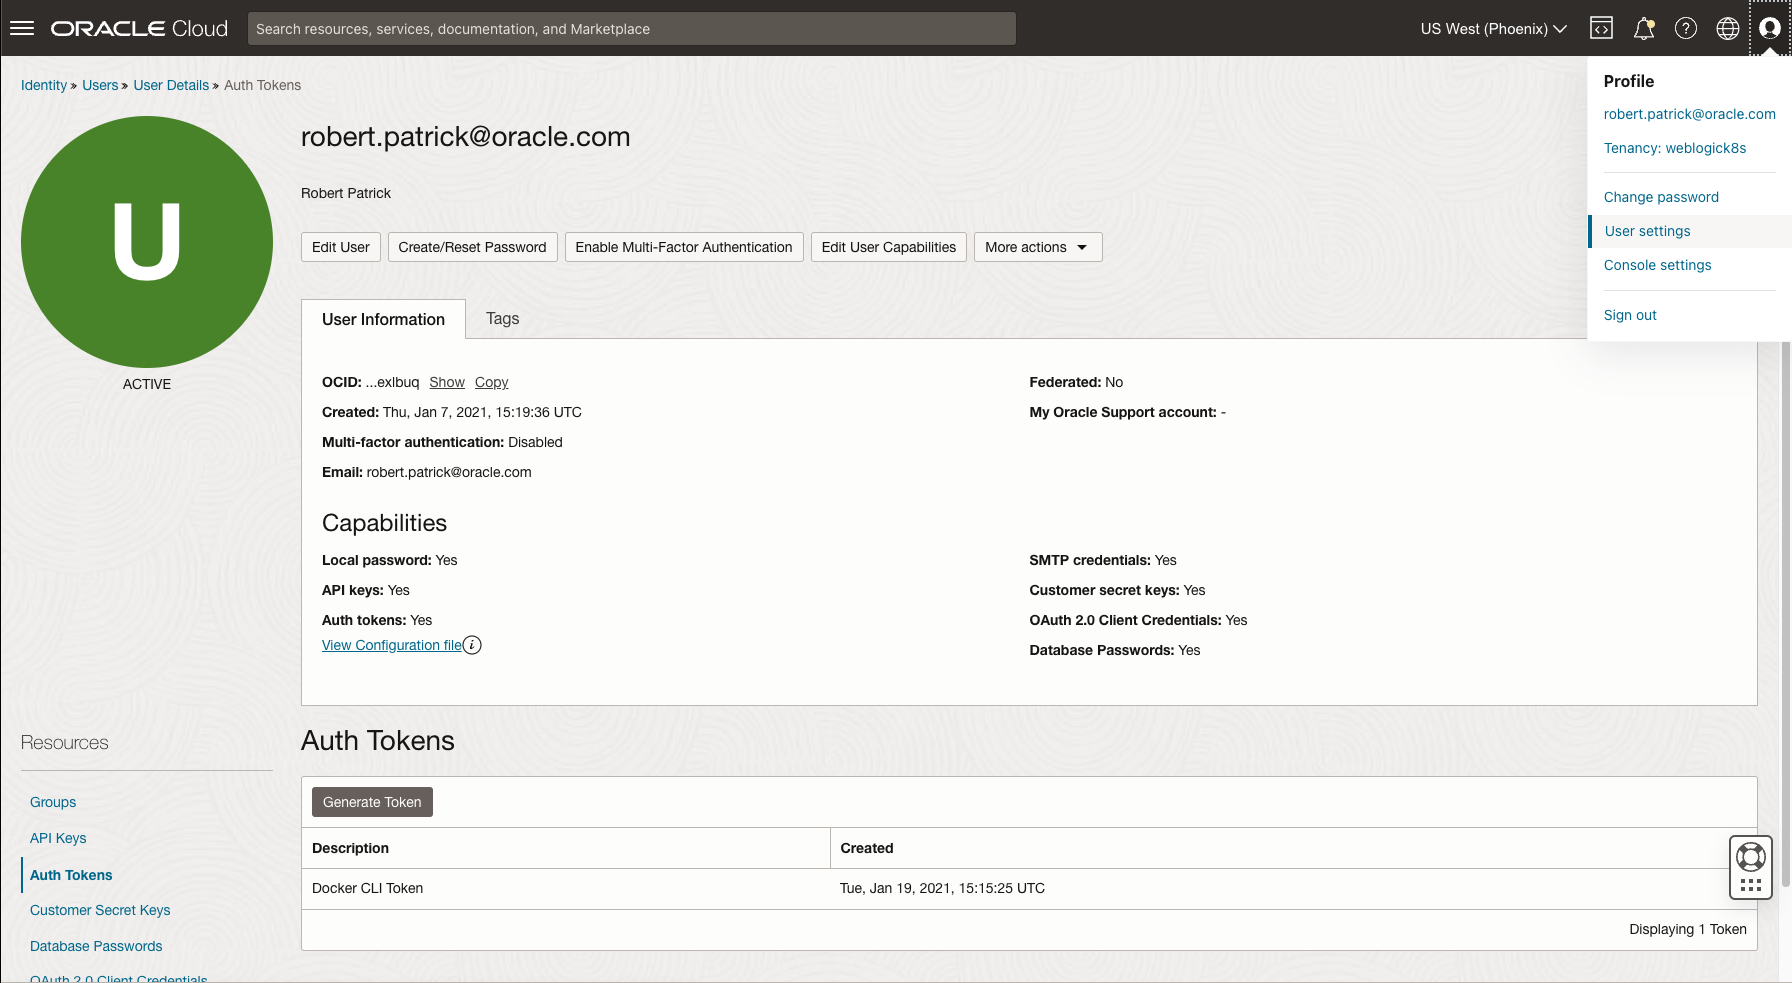
To access this OCIR repository from Docker and Kubernetes, you need to use an Auth Token associated with your OCI account in place of your password. To create an Auth Token, go to your Profile page, select the Auth Tokens option under Resources, and click Generate Token, as shown in the following image. Make sure to retain a copy of the generated token, because this is the only opportunity you will have to see it in clear text!
Note: The exact location of the Auth Tokens link may vary depending on your account type and the authentication provider being selected.
Now that your Image Registry is ready, you simply fill out the Auxiliary Image tab in WKT UI. There are a couple of
things to note before you fill out the form.
- Most image registries require authentication to push an image. If you are using OCIR, the container image registry
User NameandPasswordfields must do the following:- Username: Must be of the form
<tenancy-name>/[auth-provider-name/]<username>. Theauth-provider-name/portion is only required when not using the default provider to authenticate tocloud.oracle.com. - Password: Must be the value an Auth Token associated with the user’s account.
- Username: Must be of the form
- By default, WIT (and therefore WKT UI) use BusyBox as the base image for an auxiliary image. Because BusyBox typically comes from Docker Hub and Docker Hub has implemented anonymous pull request throttling, it is a good idea to enter a valid Docker Hub Username and Docker Hub Password to minimize the change of throttling-related errors while building the image.
- You can change the base image simply by enabling
Use Custom Base Imageand filling out the form. - If your target platform is OpenShift, enable
Make Image Compatible with OpenShiftin the Advanced section of the page.
The first thing you will want to do is to press the Add Image Registry Credentials button directly below the
Auxiliary Image Registry Push Credentials field. Give the new entry a name that will help you remember what the entry
is, since this name will show up in the dropdown list once it is created. Although the Email Address is not used for
pushing images, it is used when creating a Kubernetes pull secret so to save time, make sure you enter it now. See
an example of adding an image registry credential in the following image.
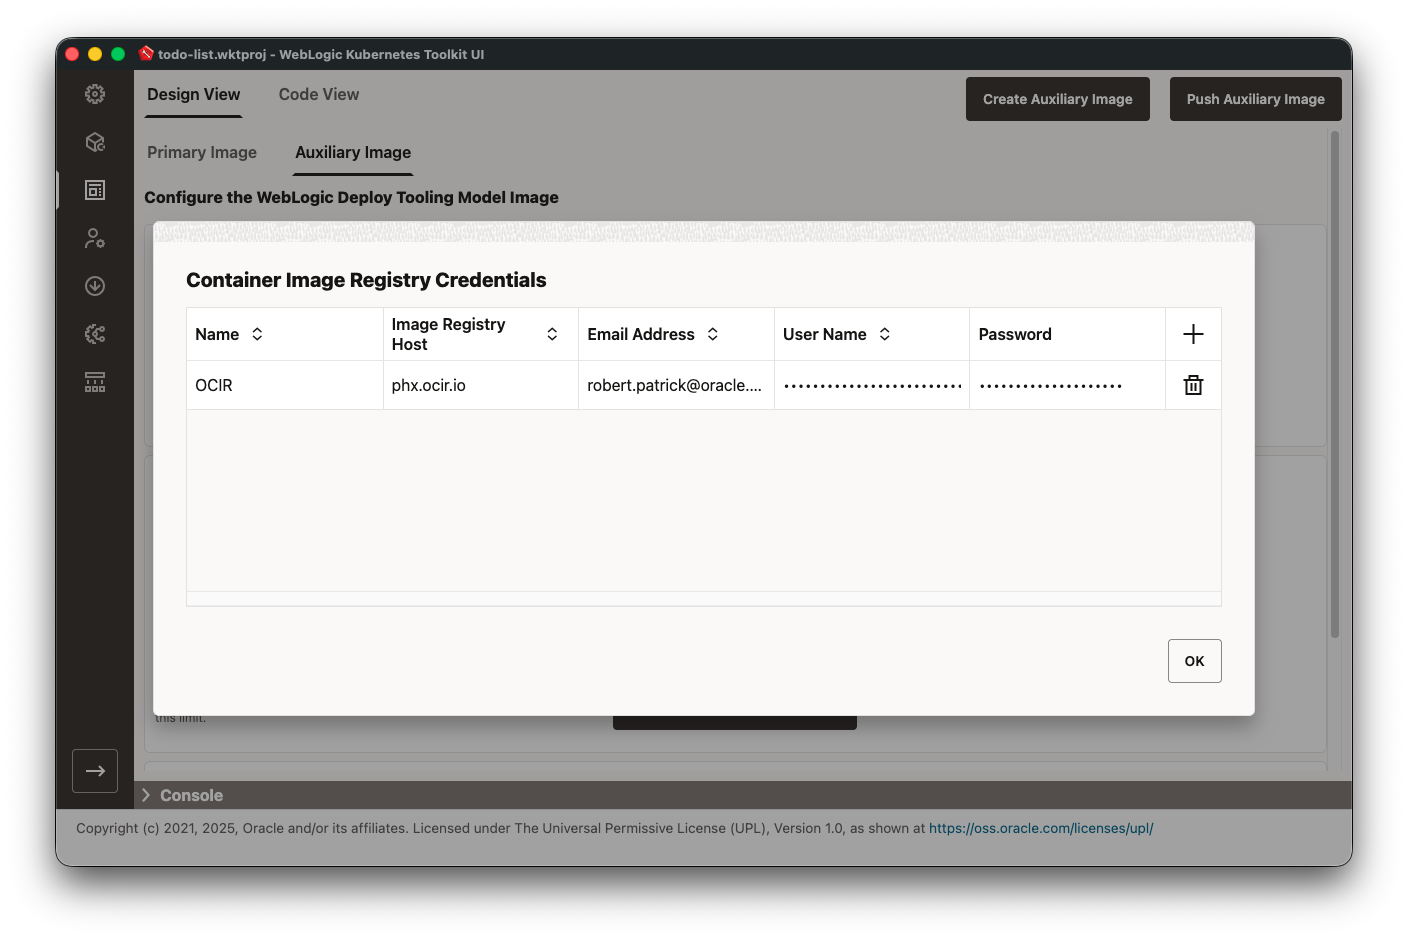
Note that this table is also available at the bottom of the Project Settings page so feel free to add it in either location.
With these things in mind, fill out the form using the data in the following table. If a field’s value is not provided, then leave it set to the default unless otherwise required for your environment.
| Field Name | Value |
|---|---|
Auxiliary Image Tag |
<image-repository-url>:1.0; for example, phx.ocir.io/mytenancy/wktui-qs/todolist-aux:1.0 |
Specify Auxiliary Image Push Credentials |
ON |
Auxiliary Image Registry Push Credentials |
Select the name of the entry created previously; for example, OCIR |
Use Custom Base Image |
OFF |
Specify Docker Hub Pull Credentials |
Add and select an Image Registry Credential for Docker Hub (Host and Email Address can be blank) |
Download and Use Latest WebLogic Deploy Tooling Installer |
ON |
Make Image Compatible with Open Shift |
OFF (unless required for your environment) |
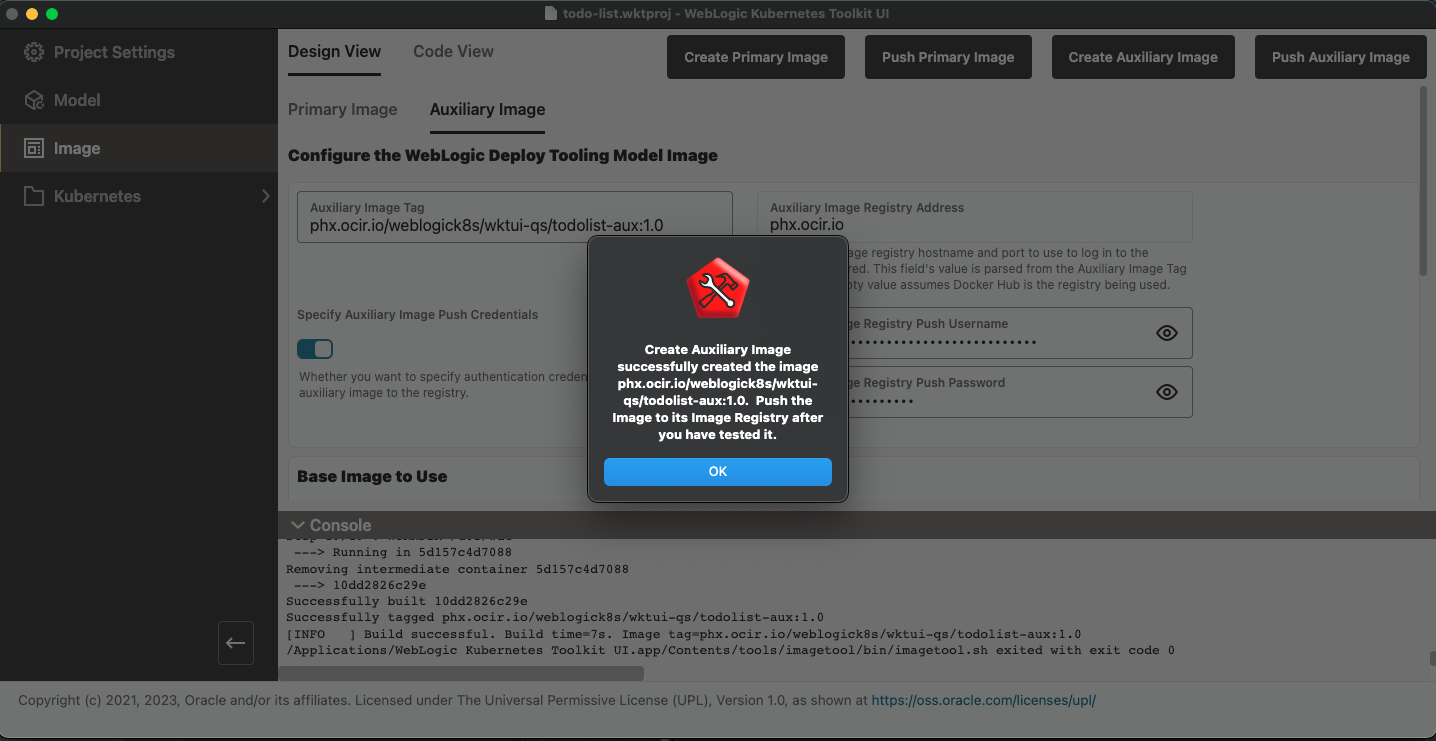
After you complete the form, you are ready to create the auxiliary image. Click Create Auxiliary Image to have the
application invoke WIT with the specified set of arguments to build the auxiliary image. The application prompts you
twice prior to running WIT’s createAuxImage command:
- You always should run Prepare Model prior to creating the auxiliary image. Because you have already done that,
select
Noto continue without running Prepare Model. - You need to choose the location to store the downloaded WDT installer. Choose the location and Click Select.
The following image shows the application after successfully creating the auxiliary image.
Now, you are ready to push the auxiliary image to the image registry. If running on macOS, you need to make sure that
your Docker (or Podman) executable directory (for example, $HOME/.rd/bin, if using Rancher Desktop) is added to the
Extra Path Directories table on the Project Settings page. Doing this allows Docker to find the executable it uses
to interact with the macOS Keychain for storing credentials.
Click Push Auxiliary Image. At this point, you are ready to shift your focus to the Kubernetes cluster.
NOTE: Any changes to the model files requires creating a new auxiliary image, which may require rerunning Prepare Model if
fields were added to the model’s YAML file. We strongly recommend that you always increment the version number of the
Auxiliary Image Tag field prior to creating and pushing a new image. This will make it very clear which image is in
use.