Expose using APISIX
Now that the account service is deployed, you need to expose it through the API Gateway so that clients will be able to access it. This is done by creating a “route” in APISIX Dashboard.
-
Retrieve the admin password for the APISIX API Gateway.
Execute the following command to get the password for the
adminuser for the APISIX API Gateway:$ kubectl get secret -n apisix apisix-dashboard -o jsonpath='{.data.conf\.yaml}' | base64 -d | grep 'password:' -
Access the APISIX Dashboard
The APISIX Dashboard isn’t exposed outside the cluster. You need to start a tunnel to be able to access APISIX Dashboard. Start the tunnel using this command in a new terminal window:
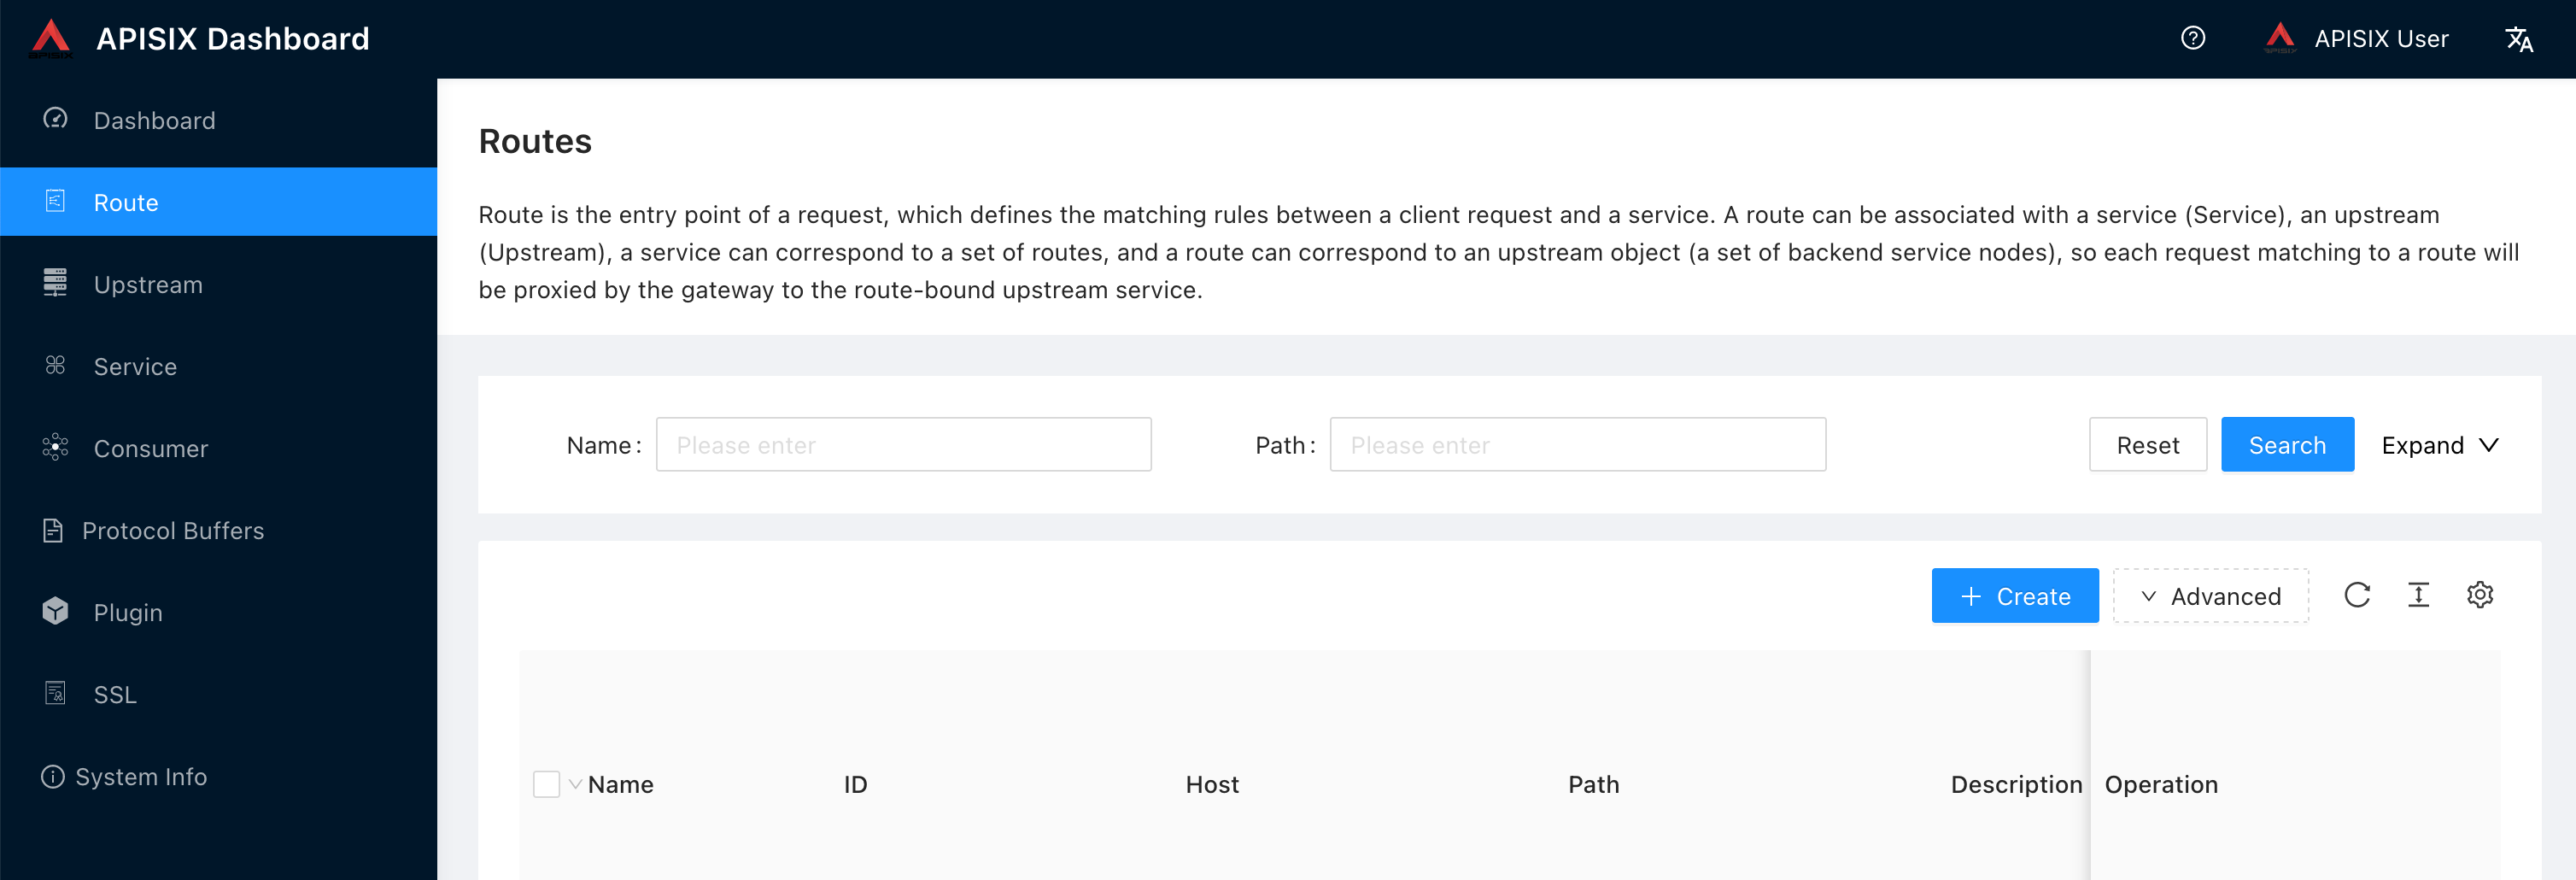
$ kubectl -n apisix port-forward svc/apisix-dashboard 8090:80Open a web browser to APISIX Dashboard to view the APISIX Dashboard web user interface. It will appear similar to the image below.
If prompted to login, login with username
adminand the password you retrieved earlier. Note that Oracle strongly recommends that you change the password, even though this interface is not accessible outside the cluster without a tunnel.Open the routes page from the left hand side menu. You will not have any routes yet.
-
Create the route
Click on the Create button to start creating a route. The Create route page will appear. Enter
accountin the Name field: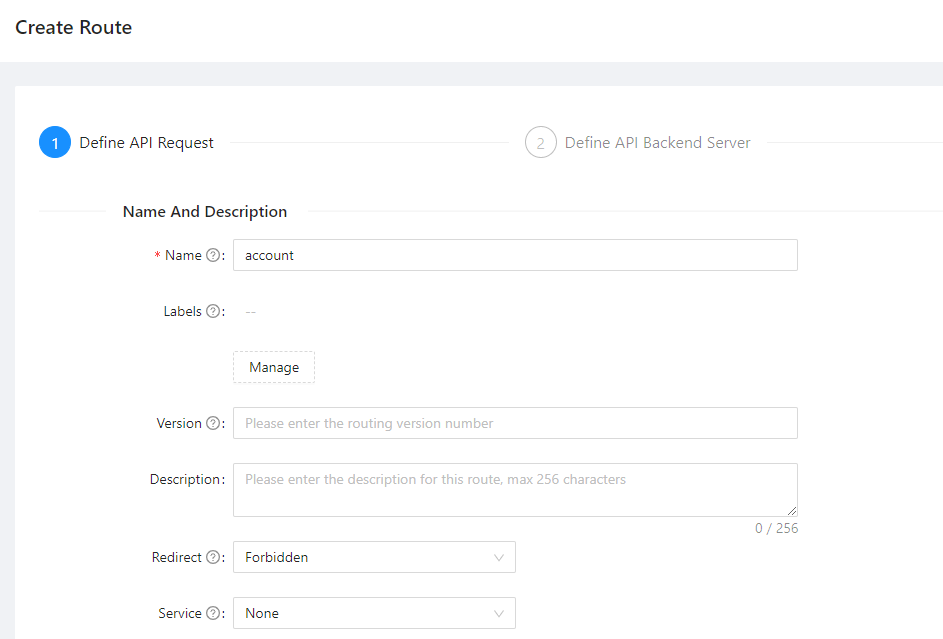
Scroll down to the Request Basic Define section. Set the Path to
/api/v1/account*. This tells APISIX API Gateway that any incoming request for that URL path (on any host or just IP address) should use this route. In the HTTP Method selectGET,POST,DELETE, andOPTIONS. The first three you will recall using directly in the implementation of the account service during this lab. User interfaces and other clients will often send anOPTIONSrequest before a “real” request to see if the service exists and check headers and so on, so it is a good practice to allowOPTIONSas well.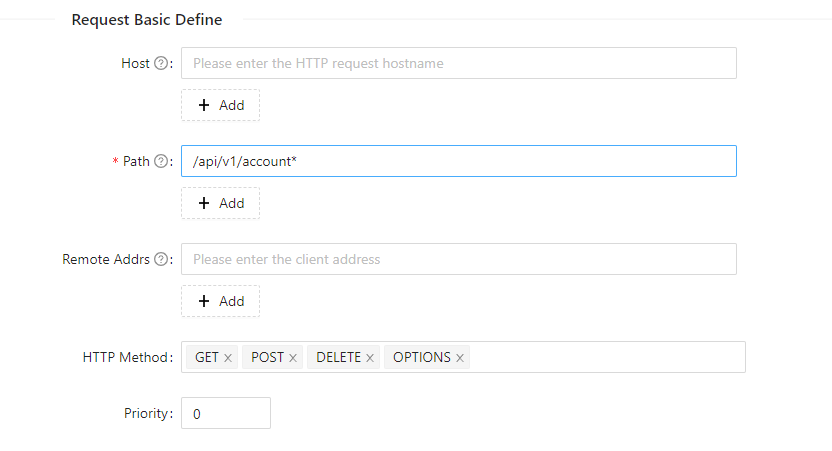
Click on the Next button to move to the Define API Backend Server page. On this page you configure where to route requests to. In the Upstream Type field, select Service Discovery. Then in the Discovery Type field, select Eureka. In the Service Name field enter
ACCOUNT. This tells APISIX to lookup the service in Spring Eureka Service Registry with the keyACCOUNTand route requests to that service using a Round Robin algorithm to distribute requests.
Click on Next to go to the Plugin Config page. You will not add any plugins right now. You may wish to browse through the list of available plugins on this page. When you are ready, click on Next to go to the Preview page. Check the details and then click on Submit to create the route.
When you return to the route list page, you will see your new
accountroute in the list now.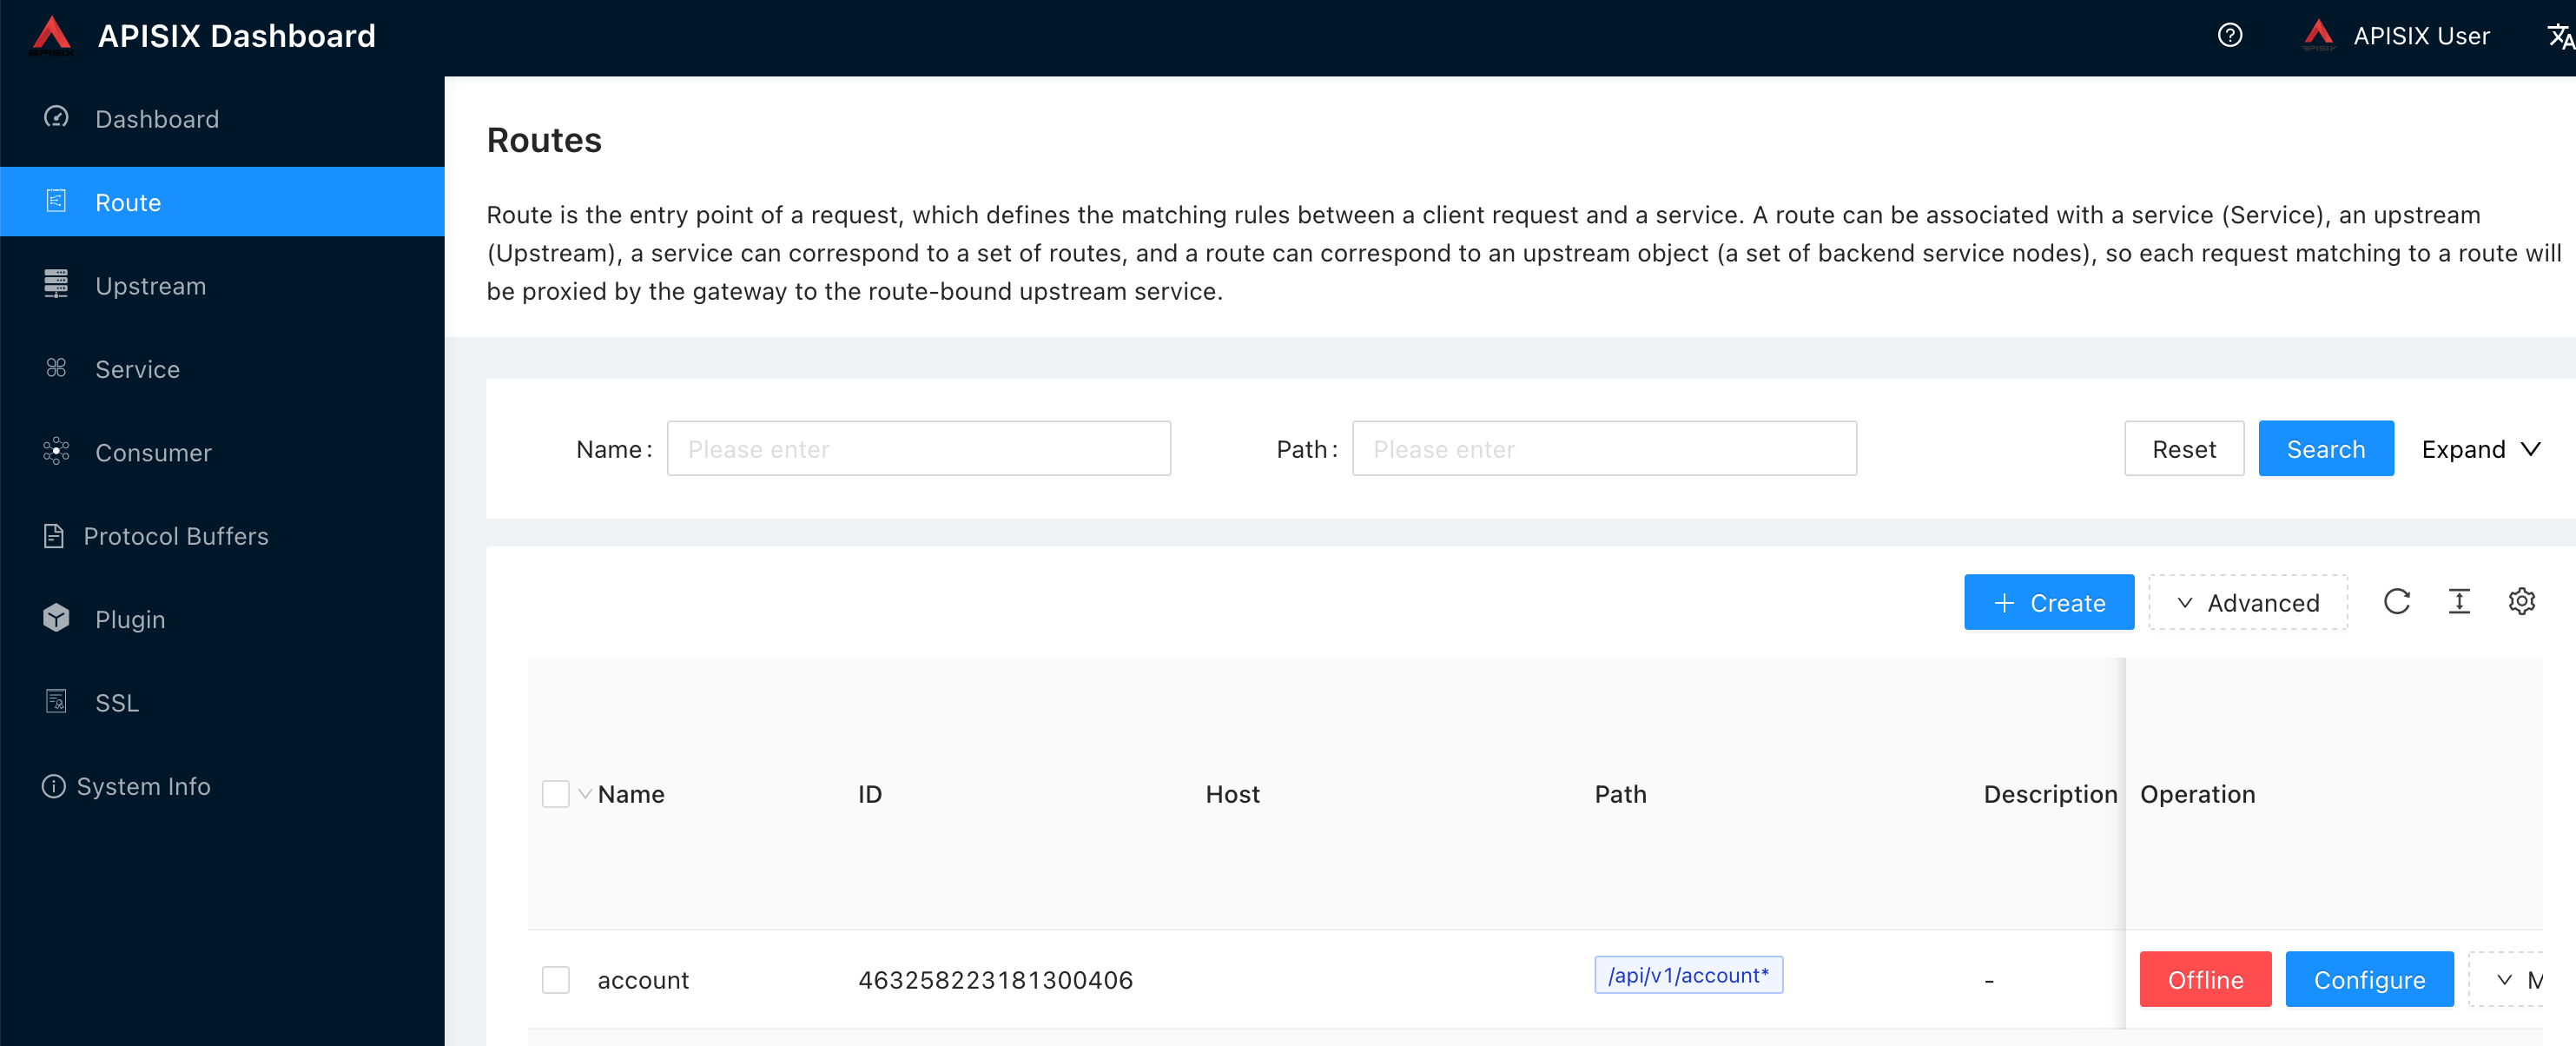
-
Verify the account service
If you are using the OCI Free Tier single container version, the steps are a different to get the EXTERNAL-IP. In this version Traefik is used. To get the EXTERNAL-IP execute the following command to get the EXTERNAL-IP.
$ kubectl get svc -n kube-system
NAME             TYPE           CLUSTER-IP     EXTERNAL-IP   PORT(S)                        AGE
kube-dns         ClusterIP      10.43.0.10     <none>        53/UDP,53/TCP,9153/TCP         120d
kubelet          ClusterIP      None           <none>        10250/TCP,10255/TCP,4194/TCP   120d
metrics-server   ClusterIP      10.43.216.45   <none>        443/TCP                        120d
traefik          LoadBalancer   10.43.176.16   172.98.0.2    80:32224/TCP,443:31377/TCP     120d
The services are only accessible from the host machine (if you want to access the services you can create a SSH tunnel).
If you are using the OCI Free Tier single container version you kan skip this step. In the next two commands, you need to provide the correct IP address for the API Gateway in your backend environment. You can find the IP address using this command, you need the one listed in the
EXTERNAL-IPcolumn:$ kubectl -n ingress-nginx get service ingress-nginx-controller NAME TYPE CLUSTER-IP EXTERNAL-IP PORT(S) AGE ingress-nginx-controller LoadBalancer 10.123.10.127 100.20.30.40 80:30389/TCP,443:30458/TCP 13dTest the create account endpoint with this command, use the IP address (EXTERNAL-IP in the table above) for your API Gateway:
$ curl -i -X POST \
  -H 'Content-Type: application/json' \
  -d '{"accountName": "Sanjay''s Savings", "accountType": "SA", "accountCustomerId": "bkzLp8cozi", "accountOtherDetails": "Savings Account"}' \
  http://<EXTERNAL-IP>/api/v1/account
HTTP/1.1 201
Date: Wed, 01 Mar 2023 18:35:31 GMT
Content-Type: application/json
Transfer-Encoding: chunked
Connection: keep-alive

{"accountId":24,"accountName":"Sanjays Savings","accountType":"SA","accountCustomerId":"bkzLp8cozi","accountOpenedDate":null,"accountOtherDetails":"Savings Account","accountBalance":0}
Test the get account endpoint with this command, use the IP address for your API Gateway and the
accountIdthat was returned in the previous command:$ curl -s http://<EXTERNAL-IP>/api/v1/account/24 | jq . { "accountId": 24, "accountName": "Sanjay's Savings", "accountType": "SA", "accountCustomerId": "bkzLp8cozi", "accountOpenedDate": null, "accountOtherDetails": "Savings Account", "accountBalance": 1040 }Your service is deployed in the Oracle Backend for Microservices and AI environment and using the Oracle Autonomous Database instance associated with the backend.