Use Spring Data JPA
-
Add Spring Data JPA to the Account service and configure it to access the database
Spring Data JPA allows our Spring Boot application to easily use the database. It uses simple Java POJOs to represent the data model and provides a lot of out-of-the-box features which means there is a lot less boilerplate code to be written.
To add Spring Data JPA and the Oracle Database drivers to your project, open the Maven POM (
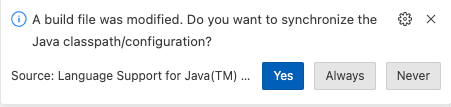
pom.xml) and add these extra dependencies for Spring Data JPA, Oracle Spring Boot Starters for Oracle Database UCP (Universal Connection Pool) and Wallet:<dependency> <groupId>org.springframework.boot</groupId> <artifactId>spring-boot-starter-data-jpa</artifactId> </dependency> <dependency> <groupId>com.oracle.database.spring</groupId> <artifactId>oracle-spring-boot-starter-ucp</artifactId> <version>23.4.0</version> </dependency> <dependency> <groupId>com.oracle.database.spring</groupId> <artifactId>oracle-spring-boot-starter-wallet</artifactId> <version>23.4.0</version> </dependency>Visual Studio code will display a notification in the bottom right corner and ask if it should update the project based on the change you just made. You should select Yes or Always to this notification. Doing so will ensure that the auto-completion will have access to the classes in the new dependency that you just added.
-
Configure JPA Datasource
To configure Spring Data JPA access to the database, you will add some configuration information to the Spring Boot application properties (or YAML) file. Access to the database you need to unzip the Wallet and get information from those files.
-
Unzip the Wallet you downloaded in the Setup module (Lab 2)
$ unzip /path/to/wallet/wallet_name.zip -
Edit the
sqlnet.orafile so that the section(DIRECTORY="?/network/admin")matches the full path to the directory where you unzipped the Wallet, for example:WALLET_LOCATION = (SOURCE = (METHOD = file) (METHOD_DATA = (DIRECTORY="/path/to/unzipped/wallet"))) -
Get the TNS Entry connection string using this command. Remember the name of the entry as you’ll need it in the next steps. In the sample below it is
cbankdb_tp.$ grep "_tp =" /path/to/unzipped/wallet/tnsnames.ora | cut -d"=" -f 1 cbankdb_tp
You will find a file called
application.propertiesin thesrc/main/resourcesdirectory in your project. You can use either properties format or YAML format for this file. In this lab, you will use YAML. Rename the file toapplication.yamland then add this content to the file. Make sure that you modify the url to contain the path to the wallet and the name of the TNS entry you collected earlier.spring: application: name: account jpa: hibernate: ddl-auto: validate properties: hibernate: dialect: org.hibernate.dialect.OracleDialect format_sql: true show-sql: true datasource: url: jdbc:oracle:thin:@tns_entry_from_above?TNS_ADMIN=/path/to/Wallet username: account password: Welcome1234## driver-class-name: oracle.jdbc.OracleDriver type: oracle.ucp.jdbc.PoolDataSource oracleucp: connection-factory-class-name: oracle.jdbc.pool.OracleDataSource connection-pool-name: AccountConnectionPool initial-pool-size: 15 min-pool-size: 10 max-pool-size: 30 ``` These parameters will be used by Spring Data JPA to automatically configure the data source and inject it into your application. This configuration uses [Oracle Universal Connection Pool](https://docs.oracle.com/en/database/oracle/oracle-database/21/jjucp/index.html) to improve performance and better utilize system resources. The settings in the `spring.jpa` section tell Spring Data JPA to use Oracle SQL syntax, and to show the SQL statements in the log, which is useful during development when you may wish to see what statements are being executed as your endpoints are called. -
-
Create the data model in the Spring Boot application
Create a new directory inside
src/main/java/com/example/accountscalledmodeland inside that new directory, create a new Java file calledAccount.java, when prompted for a type, choose class.In this class you can define the fields that will make up the “account” object, as shown below. Also add a constructor for the non-generated fields.
package com.example.accounts.model;

import java.util.Date;

public class Account {

    private long accountId;
    private String accountName;
    private String accountType;
    private String accountCustomerId;
    private Date accountOpenedDate;
    private String accountOtherDetails;
    private long accountBalance;

    public Account(String accountName, String accountType, String accountOtherDetails, String accountCustomerId) {
        this.accountName = accountName;
        this.accountType = accountType;
        this.accountOtherDetails = accountOtherDetails;
        this.accountCustomerId = accountCustomerId;
    }
}
Now, you need to give Spring Data JPA some hints about how to map these fields to the underlying database objects. Spring Data JPA can actually automate creation of database objects for you, and that can be very helpful during development and testing. But in many real-world cases, the database objects will already exist, so in this module you will work with pre-existing database objects.
Before continuing, open the Maven POM (
pom.xml) for the project and add this new dependency to the list. Lombok offers various annotations aimed at replacing Java code that is well known for being boilerplate, repetitive, or tedious to write. You’ll use it to avoid writing getters, setters, constructors and builders.<dependency> <groupId>org.projectlombok</groupId> <artifactId>lombok</artifactId> </dependency>Visual Studio code will display a notification in the bottom right corner and ask if it should update the project based on the change you just made. You should select Yes or Always to this notification. Doing so will ensure that the auto-completion will have access to the classes in the new dependency that you just added.
Add the
DataandNoArgsConstructorLombok annotations to yourAccountclass.@Datagenerates all the boilerplate that is normally associated with simple POJOs and beans: getters for all fields, setters for all non-final fields, and appropriatetoString,equalsandhashCodeimplementations that involve the fields of the class, and a constructor that initializes all final fields, as well as all non-final fields with no initializer that have been marked with@NonNull, in order to ensure the field is never null. TheNoArgsConstructorcreates a constructor with no arguments.Also add the JPA
EntityandTableannotations to the class and set theTable’snameproperty toaccounts. These tell JPA that this object will be mapped to a table in the database calledaccounts. Your class should now look like this:package com.example.accounts.model; import java.util.Date; import jakarta.persistence.Entity; import jakarta.persistence.Table; import lombok.Data; import lombok.NoArgsConstructor; @Data @NoArgsConstructor @Entity @Table(name = "ACCOUNTS") public class Account { // ... }You also need to give some hints about the columns in the existing tables. You should add a
Columnannotation to each field and set itsnameproperty to the name of the database column. Some of the columns will need additional information.First, the
accountIdfield is the primary key, so add theIdannotation to it, and its value is generated, so add theGeneratedValueannotation and set itsstrategyproperty toGenerationType.IDENTITY.Next, the
accountOpenedDatefield is special - it should not be able to be inserted or updated. So you will add theupdatableandinsertableproperties to itsColumnannotation and set them both tofalse. Also add theGeneratedannotation and set it toGenerationTime.INSERTto tell Spring Data JPA that the value for this field should be generated at the time of the database insert operation.With these additions, the fields in your class should now look like this, the extra imports are also shown:
import org.hibernate.annotations.Generated; import org.hibernate.annotations.GenerationTime; import jakarta.persistence.Column; import jakarta.persistence.GeneratedValue; import jakarta.persistence.GenerationType; import jakarta.persistence.Id; // ... @Id @GeneratedValue(strategy = GenerationType.IDENTITY) @Column(name = "ACCOUNT_ID") private long accountId; @Column(name = "ACCOUNT_NAME") private String accountName; @Column(name = "ACCOUNT_TYPE") private String accountType; @Column(name = "CUSTOMER_ID") private String accountCustomerId; @SuppressWarnings("deprecation") @Generated(GenerationTime.INSERT) @Column(name = "ACCOUNT_OPENED_DATE", updatable = false, insertable = false) private Date accountOpenedDate; @Column(name = "ACCOUNT_OTHER_DETAILS") private String accountOtherDetails; @Column(name = "ACCOUNT_BALANCE") private long accountBalance; -
Create the JPA Repository definition
Create a new directory in
src/main/java/com/example/accountscalledrepositoryand in the new directory, create a new Java file calledAccountRepository.java. When prompted for the type, choose interface. Update the interface definition to extendJpaRepositorywith type parameters<Account, Long>.Accountis the model class you just created, andLongis the type of the primary key. Your interface should look like this:package com.example.accounts.repository; import org.springframework.data.jpa.repository.JpaRepository; import com.example.account.model.Account; public interface AccountRepository extends JpaRepository<Account, Long> { }
By extending JpaRepository you will get a lot of convenient methods “for free”. You will use one of them now to create an endpoint to list all accounts.