Install locally
This option allows you to run Oracle Backend for Microservices and AI in a containerized environment on your local machine. This option is recommended if you do have enough free capacity on your local machine to run the environment, a minimum of 64GB RAM and 80GB free disk are recommended. This option provides an environment with adequate resources for development and testing, but is not suitable for a production-sized deployment or performance testing.
Note: You only need to choose one of the three deployment options - local, OCI Free Tier or OCI Marketplace.
-
Prerequisites
The following prerequisites are required to run the local environment:
- A container runtime environment such as Docker Desktop, Rancher Desktop or Podman Desktop.
- The ability to run a BASH script, or to read one and run equivalent commands in your environment.
- 64GB RAM and 80GB free disk space.
-
Download the required files
-
If you have not already done so, clone the Microservices Data-Driven GitHub repository:
git clone --depth 1 https://github.com/oracle/microservices-datadriven.git --tags cbv4-1.3.1 --single-branch -
Change into the directory with the local environment files:
cd microservices-datadriven/cloudbank-v4/local-environment
-
-
Start the environment
-
Run the provided script to start the environment, including a Kubernetes cluster in a container (using k3s), Oracle Backend for Spring Boot and Microservices and an Oracle Database instance inside that cluster.
./obaas.sh -
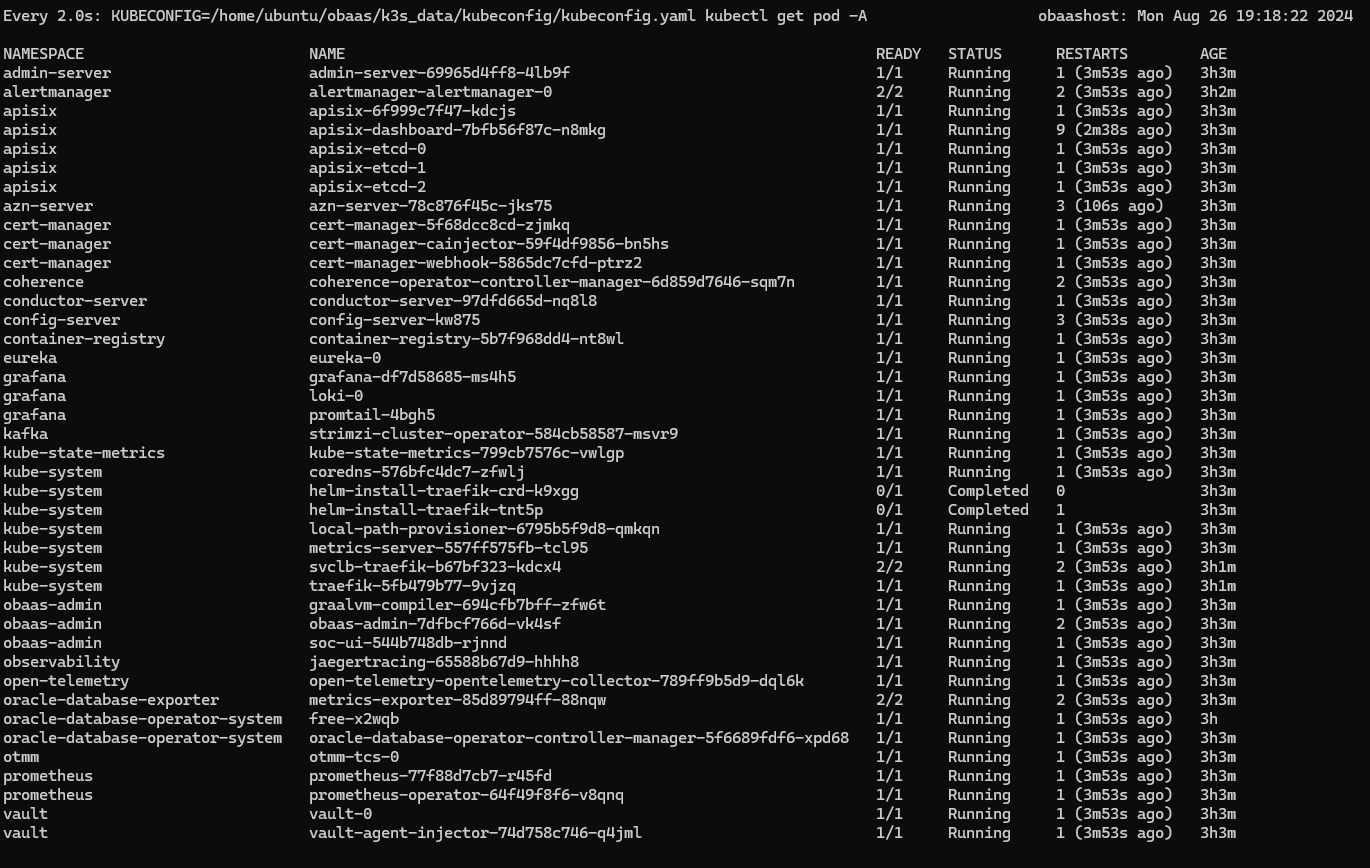
It will take approximately six to ten minutes (depending on the size of your machine) for all of the containers to reach ready/running state. You can watch the progress using this command:
watch KUBECONFIG=$(pwd)/k3s_data/kubeconfig/kubeconfig.yaml kubectl get pod -ANote: You will need to provide the
KUBECONFIGvariable as shown, or export it in your shell, each time you wish to run akubectlcommand to access the cluster.When the environment is fully started, the output will appear similar to this:
-
-
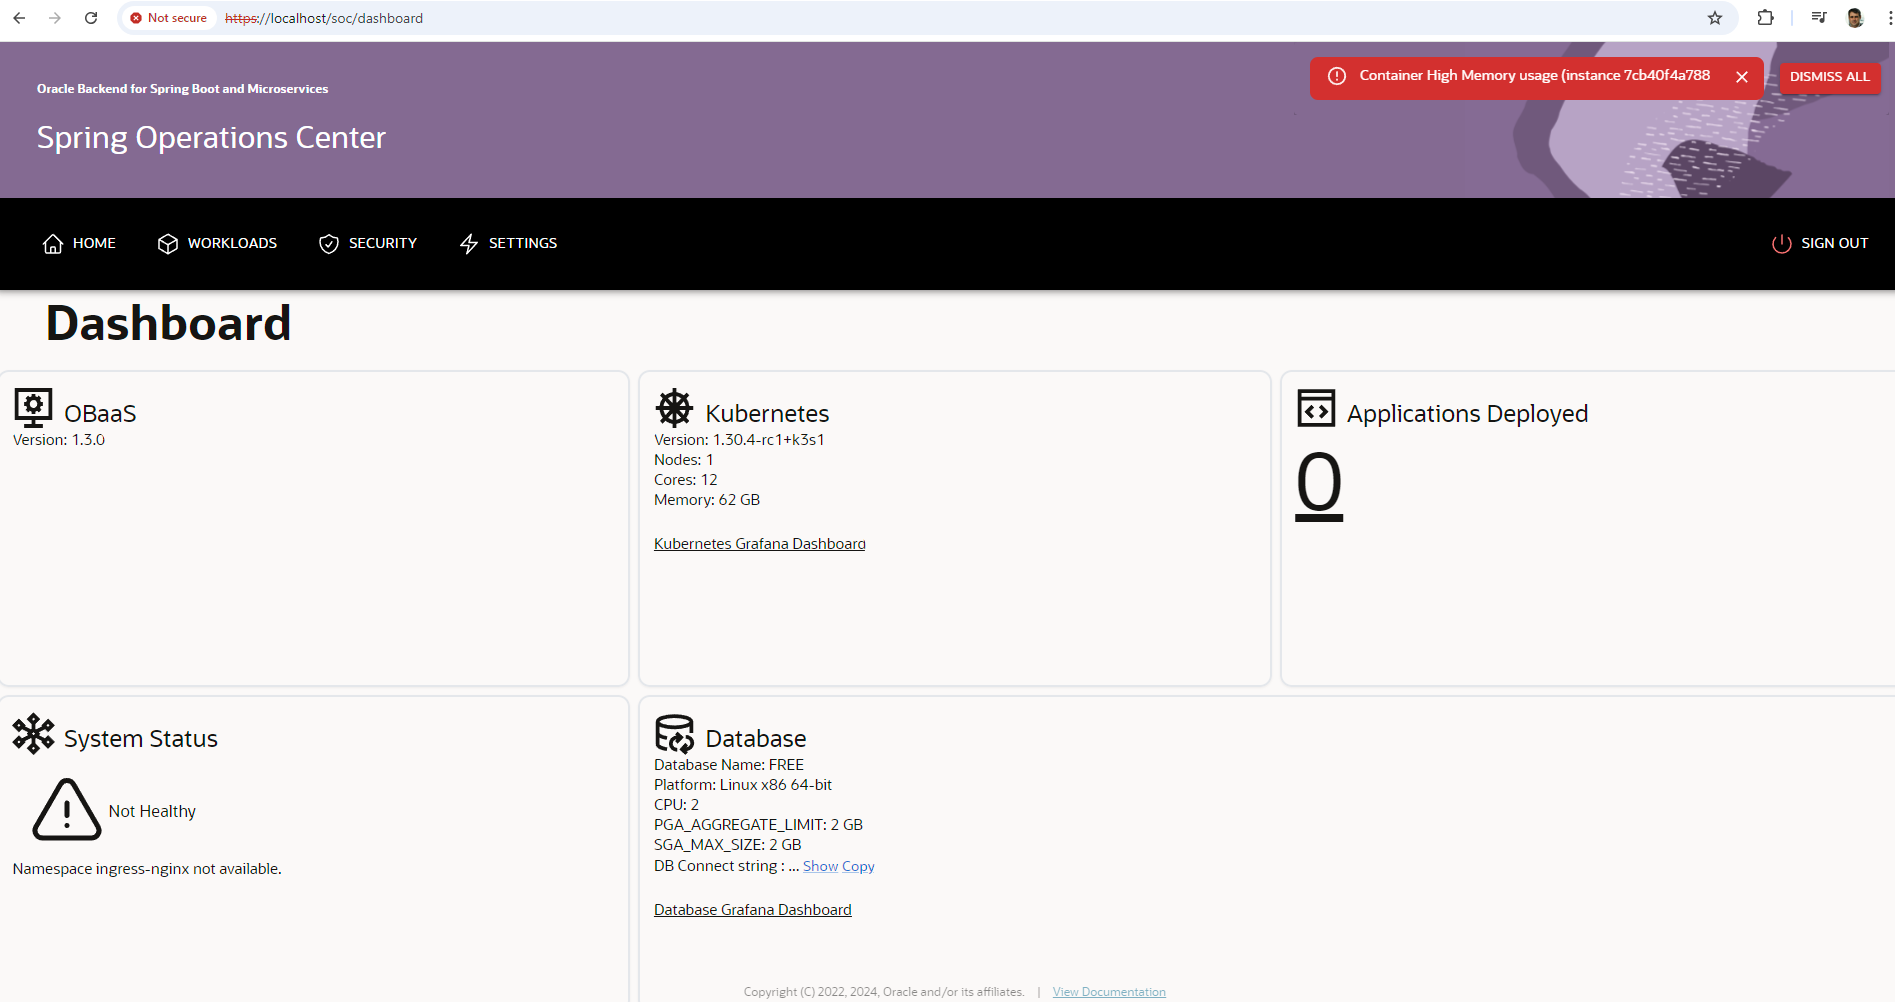
Verify access to web user interfaces
-
On your local machine, open a browser and navigate to the Spring Operations Center.
-
Log in using the pre-defined user
obaas-adminand passwordWelcome-12345.
Note: Since this is a development environment with no DNS name, it is configured with self-signed certificates. Your browser will warn you about the connection security.
-
If you are using Chrome, click on the Advanced link and then the Proceed to localhost (unsafe) link. If you are using a different browser, perform the equivalent actions.
-
The Spring Operations Center main dashboard will appear similar to this:
-