Explore APISIX API Gateway
Oracle Backend for Microservices and AI includes APISIX API Gateway to manage which services are made available outside the Kubernetes cluster. APISIX allows you to manage many aspects of the services’ APIs including authentication, logging, which HTTP methods are accepted, what URL paths are exposed, and also includes capabilities like rewriting, filtering, traffic management and has a rich plugin ecosystem to enhance it with additional capabilities. You can manage the APISIX API Gateway using the APISIX Dashboard.
-
Access the APISIX Dashboard
Start the tunnel using this command. You can run this in the background if you prefer.
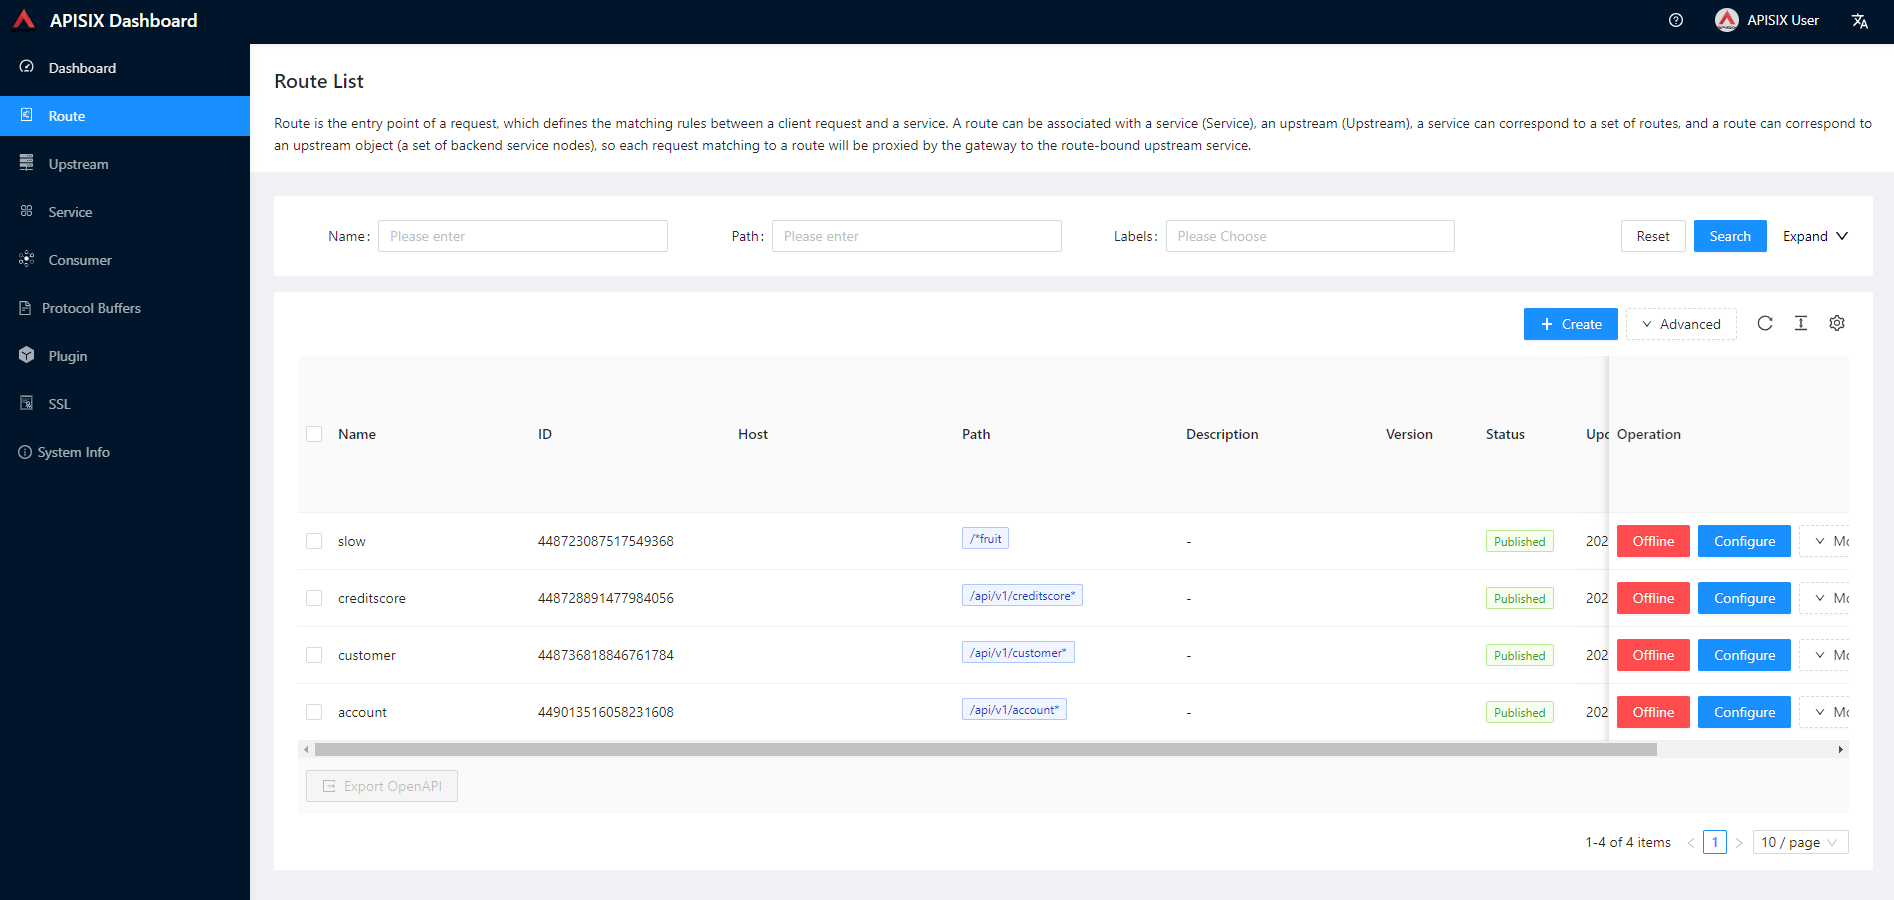
$ kubectl -n apisix port-forward svc/apisix-dashboard 8081:80Open a web browser to http://localhost:8081 to view the APISIX Dashboard web user interface. It will appear similar to the image below.
If prompted to login, login with username
adminand passwordadmin. Note that Oracle strongly recommends that you change the password, even though this interface is not accessible outside the cluster without a tunnel.Open the routes page from the left hand side menu. You will see the routes that you defined in earlier modules:
-
View details of a route
Click on the Configure button next to the account route. The first page shows information about the route definition. Scroll down to the Request Basic Define section. Notice how you can set the host, port, paths, HTTP Methods and other information for the API.

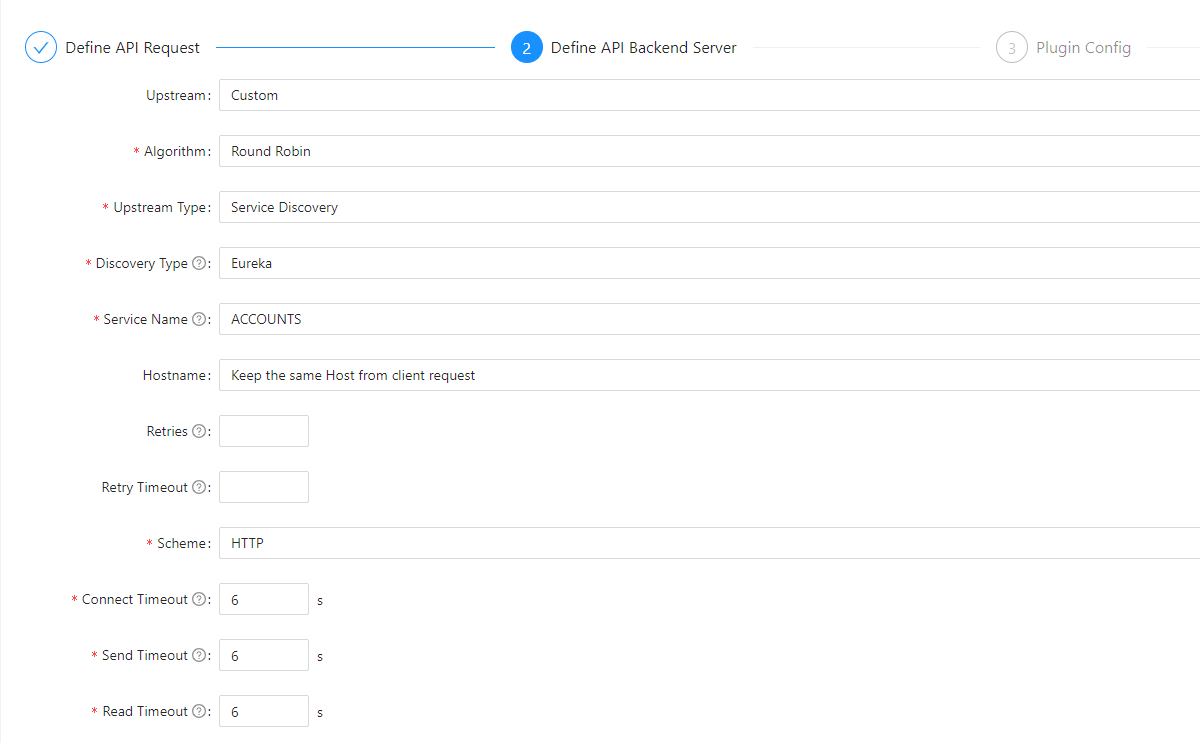
Click on the Next button to move to the Define API Backend Server page where you can set the routing/load balancing algorithm, retries, timeout and so on. On this page you will notice that the upstream service is defined using Service Discovery and the discovery type is Eureka. The Service Name specified here is the key used to look up the service in the Spring Eureka Service Registry. APISIX will route to any available instance of the service registered in Eureka.
Click on the Next button to move to the Plugin Config page. The routes in the CloudBank sample do not use any of the plugins, however you can scroll through this page to get an idea of what plugins are available for your services.
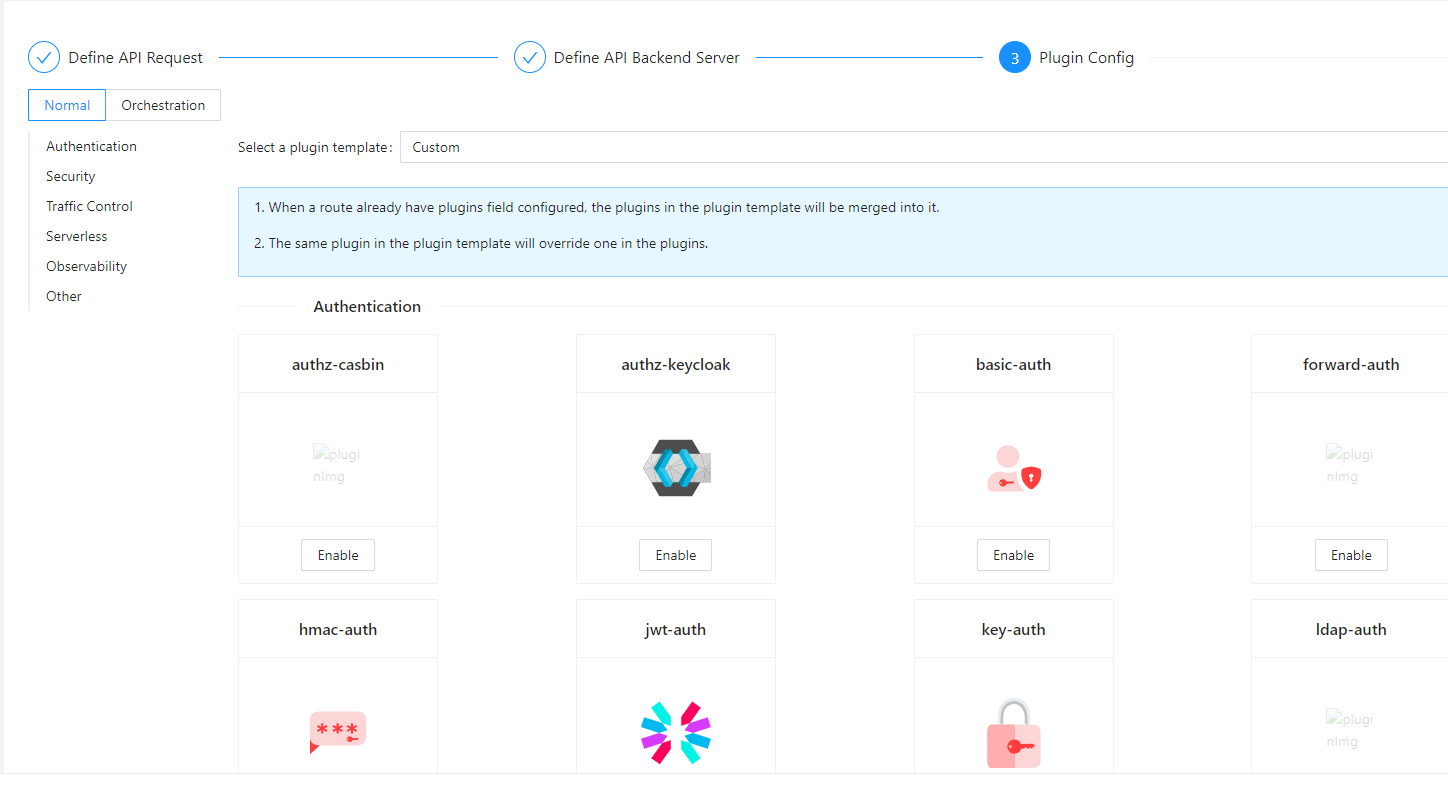
Note: You can find detailed information about the available plugins and how to configure them in the APISIX documentation in the Plugins section.