Preparing a file system
Create Filesystem and security list for FSS
Note: Make sure you create the filesystem and security list in the OKE created VCN
-
Login to OCI Console and go to Storage and Click
File System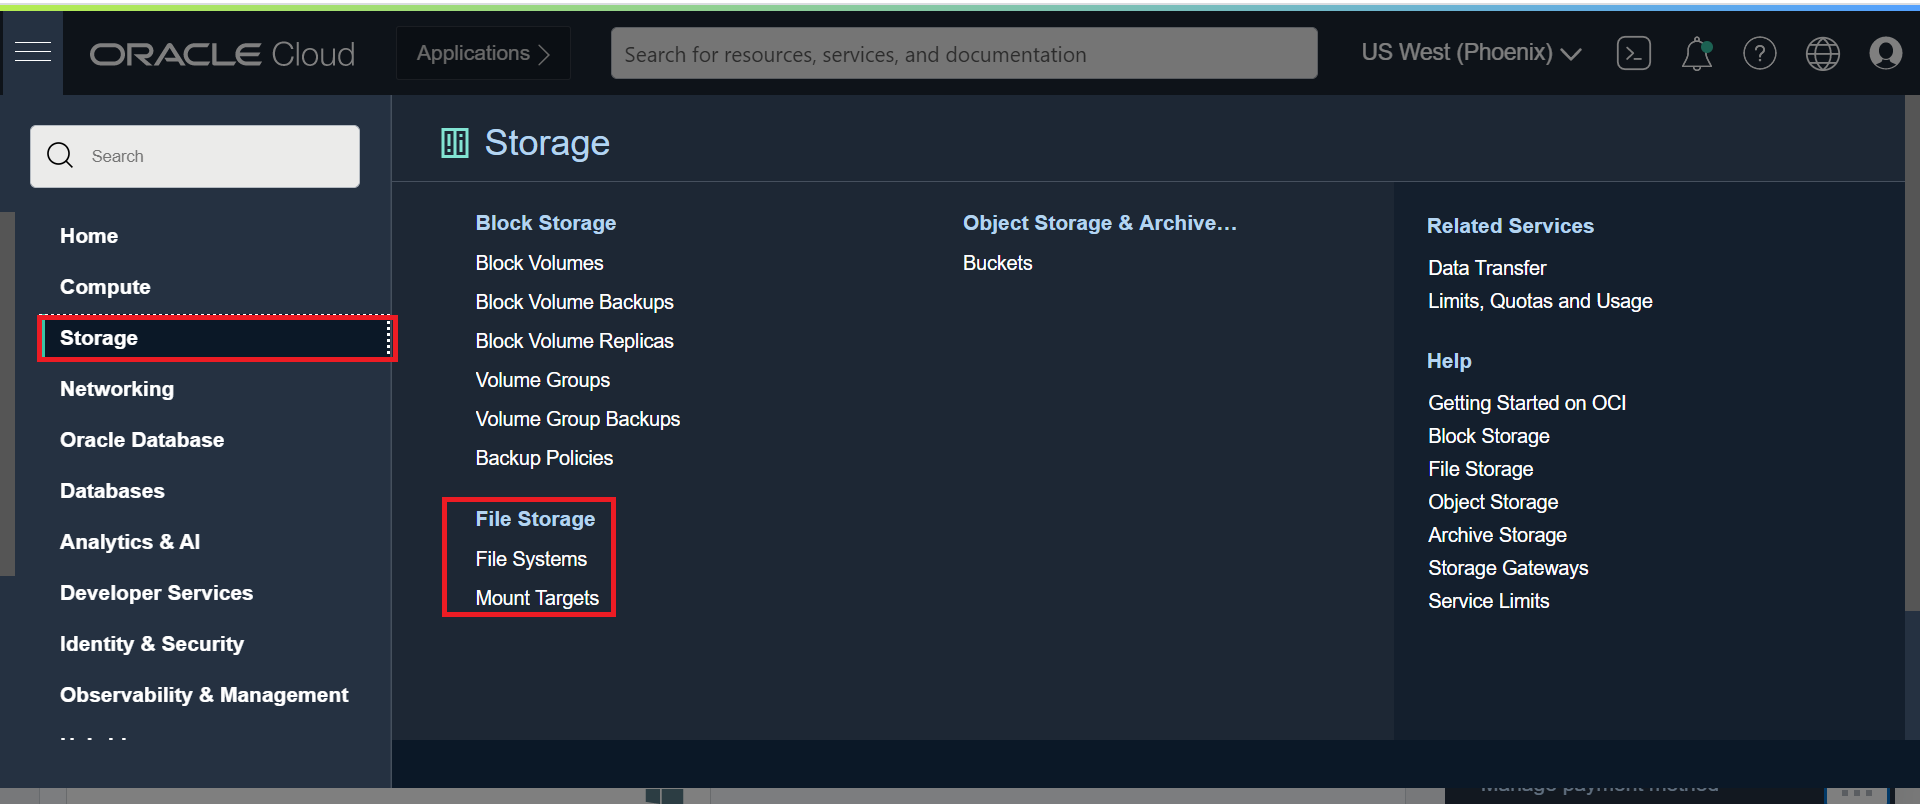
-
Click
Create File System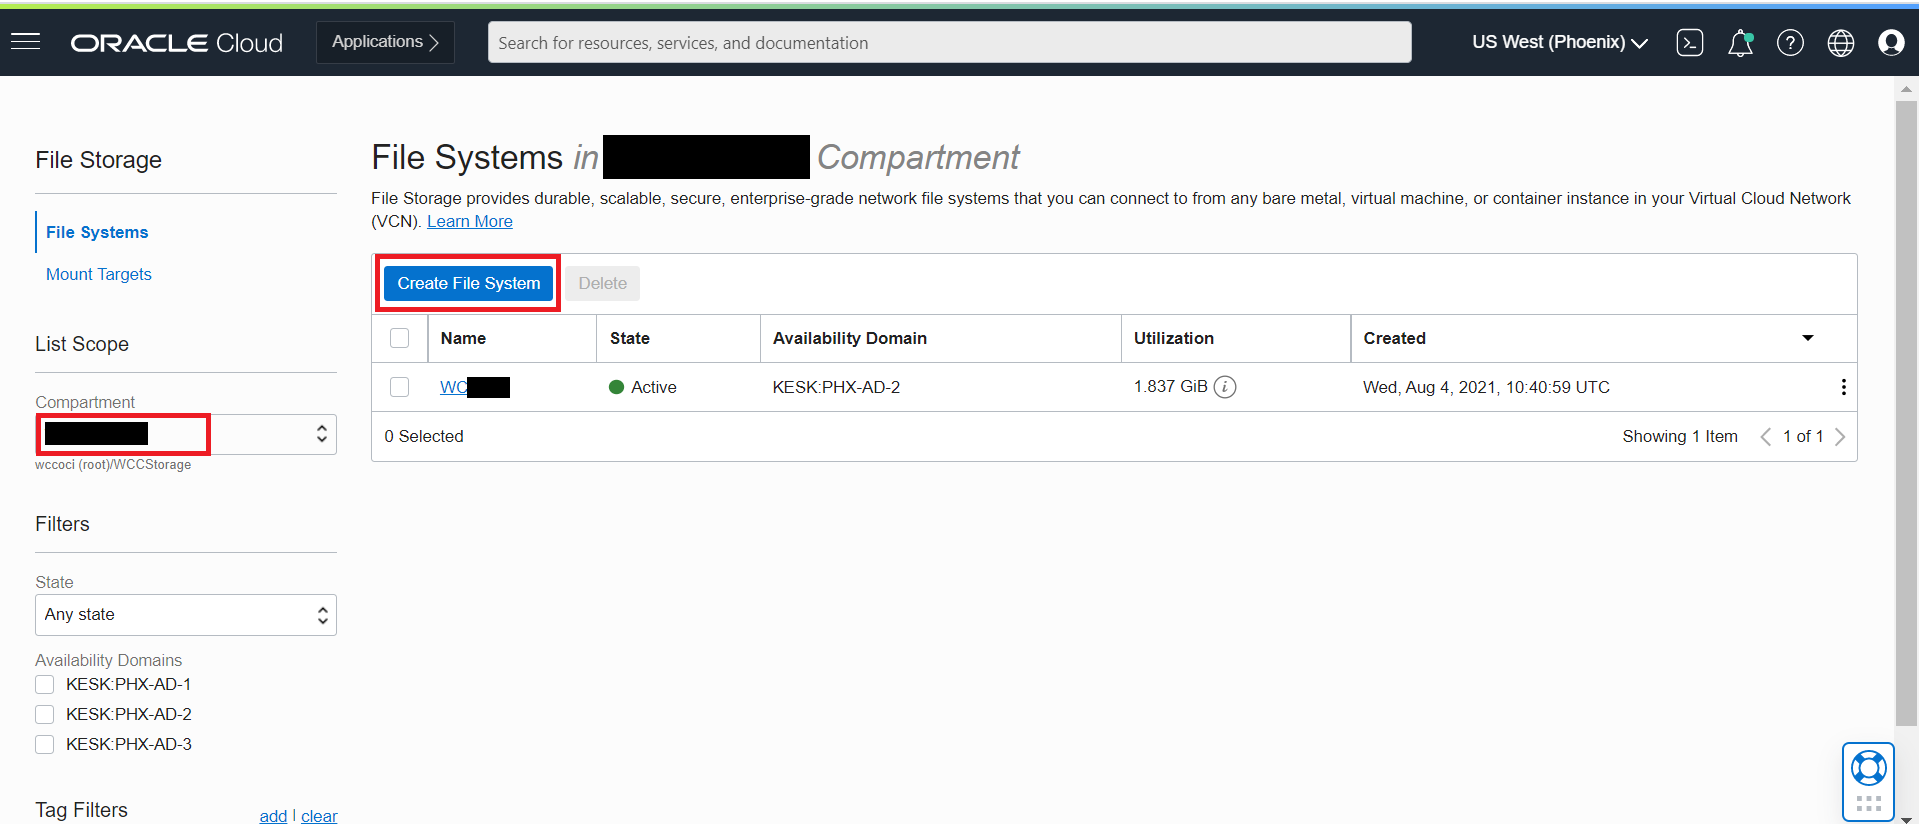
-
You can create File System and Mount Targets with the default values. But in case you want to rename the file System and mount targets, follow below steps.
Note: Make sure the Virtual Cloud Network in Mount Target refers to the one where your OKE Cluster is created and you will be accessing this file system.
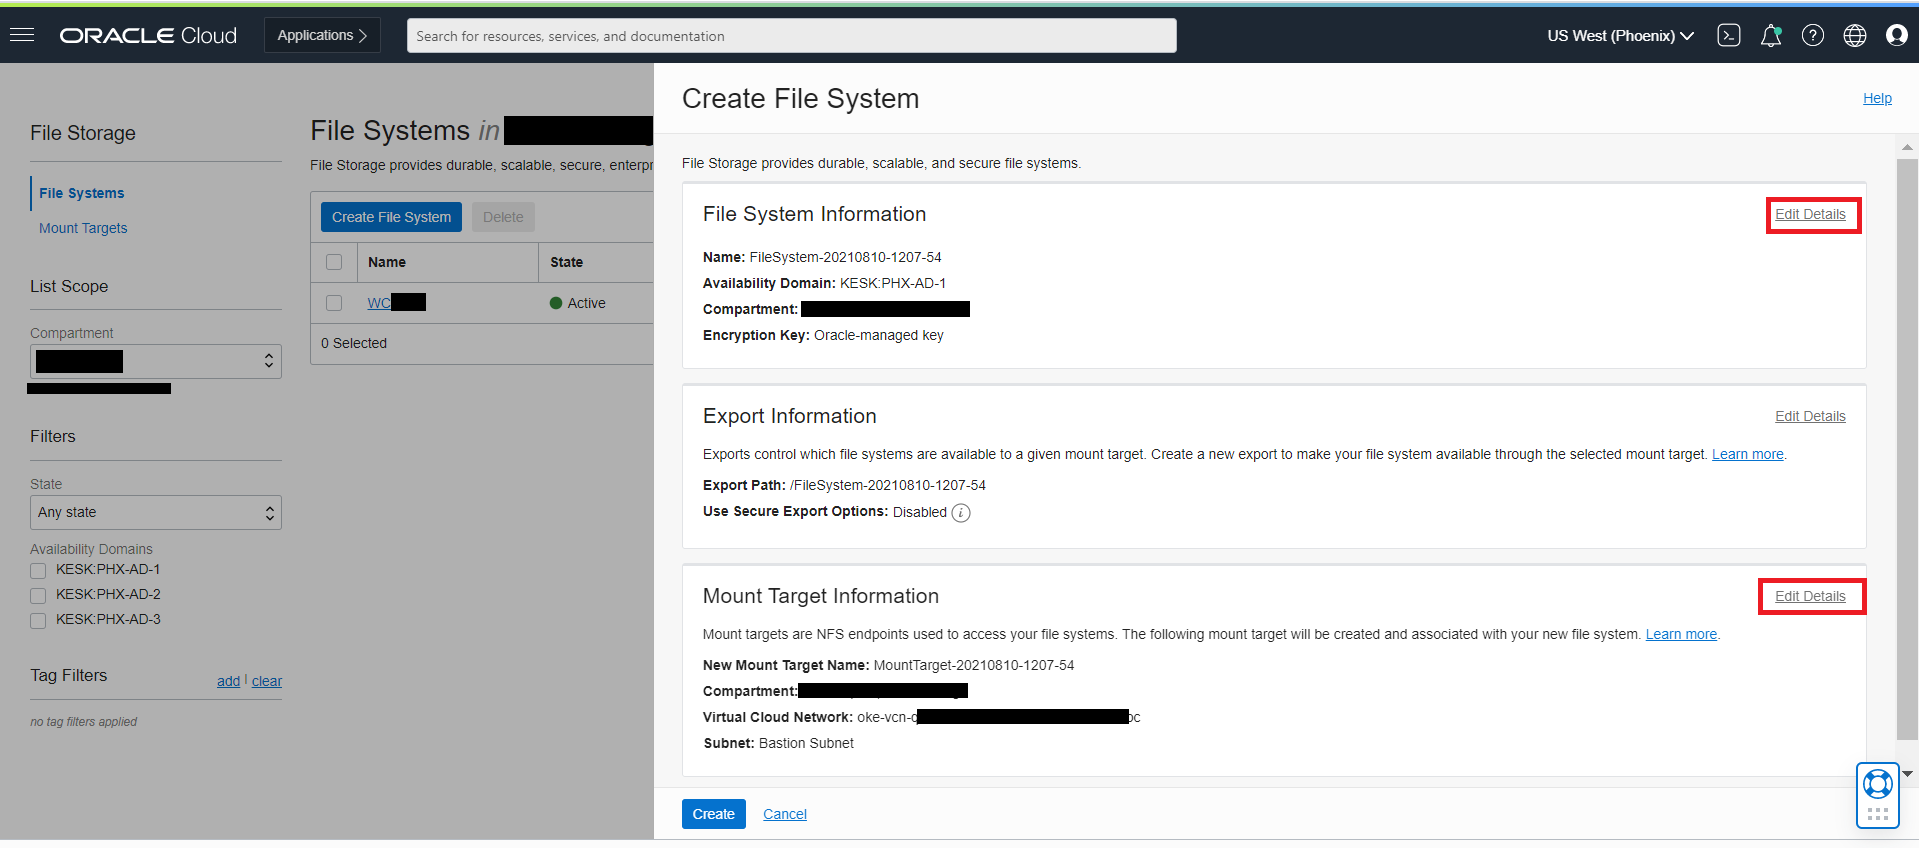
-
Edit and change the File System name. You can choose any name of your choice. Following instructions will assume that the File System name chosen is
WCCFS.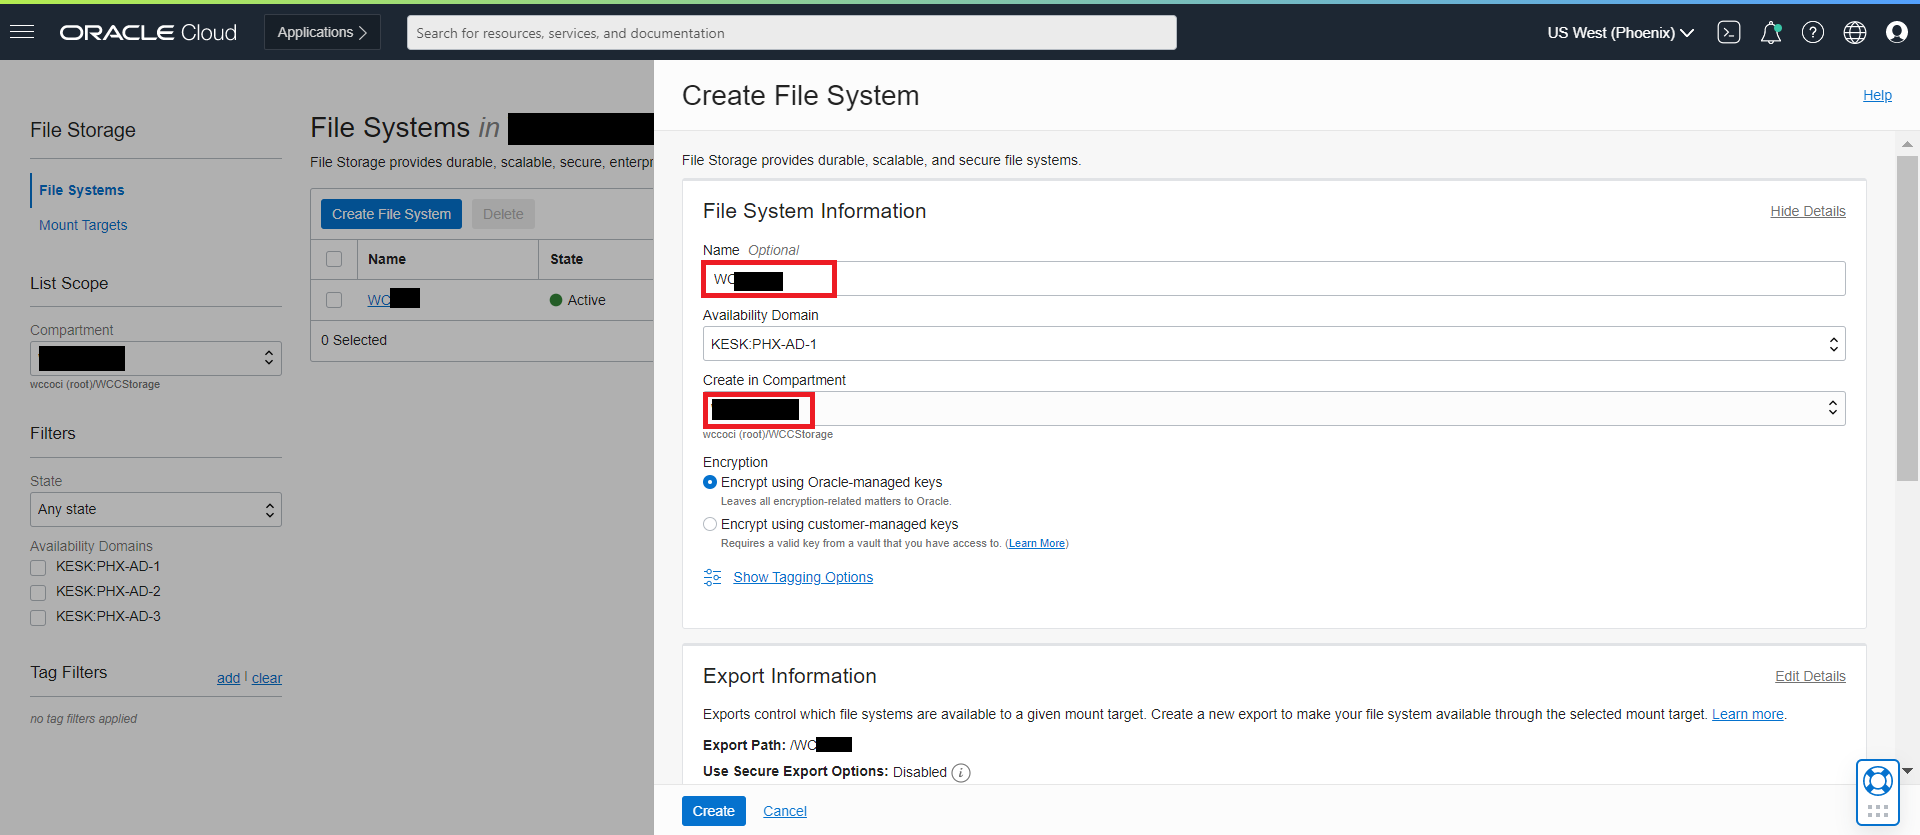
-
Edit and change the Mount Target name to
WCCFSand make sure the Virtual Cloud Network selected is the one where all the instances are created. SelectPublic Subnetand ClickCreate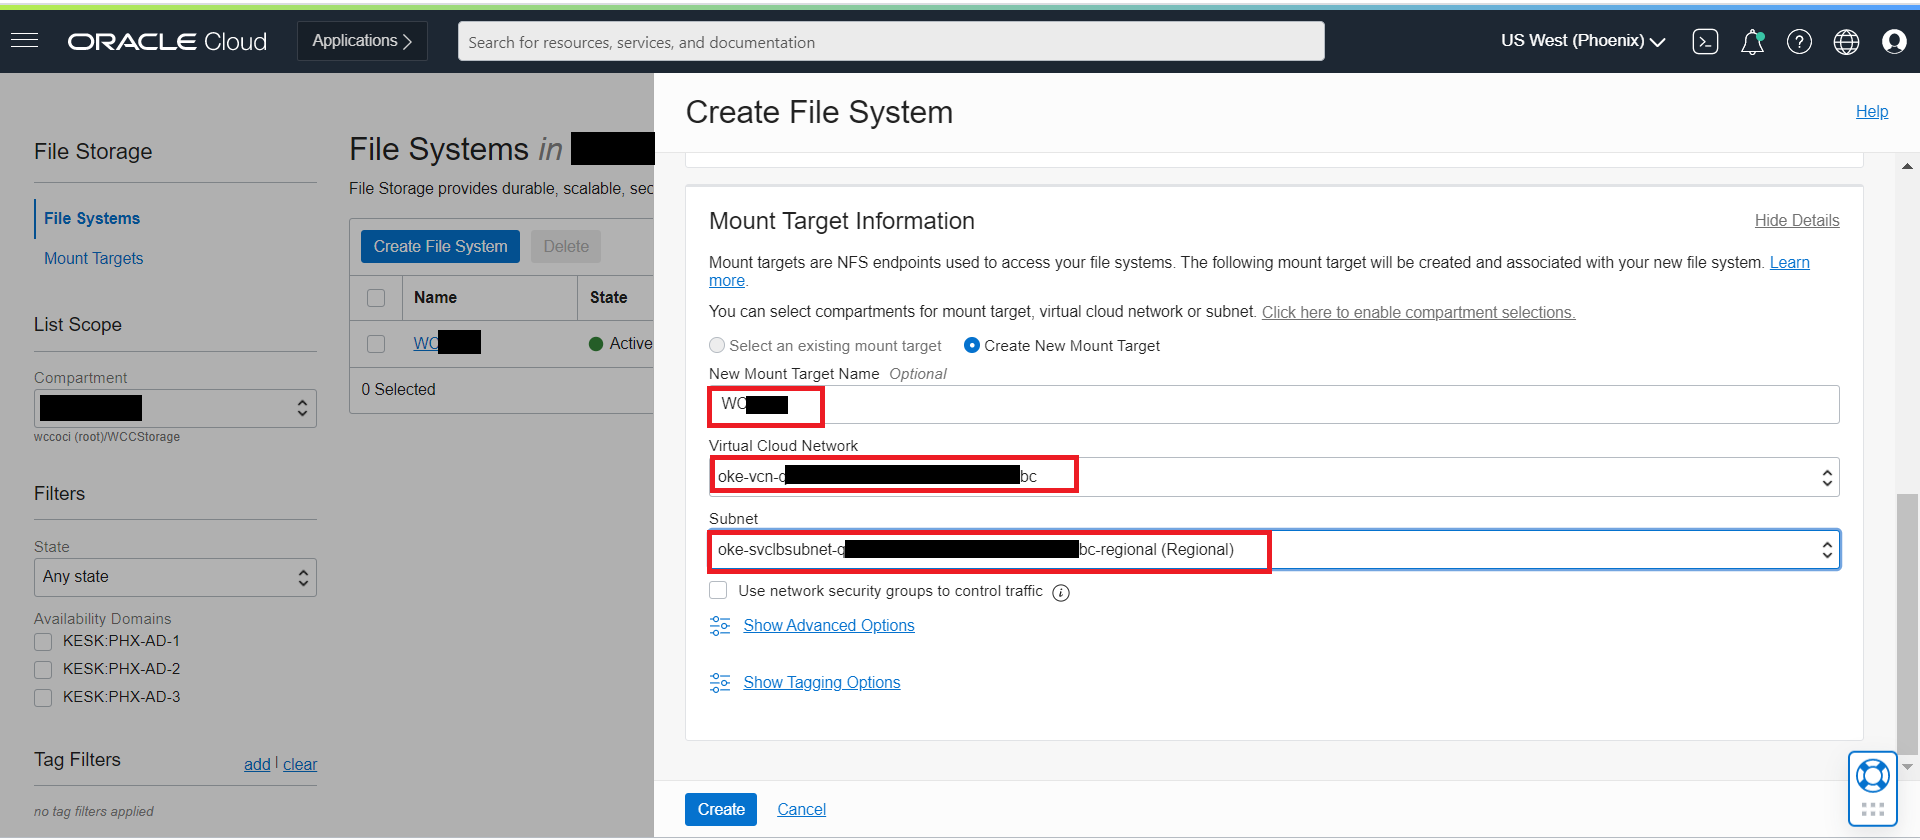
-
Once the File System is created, it lands at below page. Click on
WCCFSlink.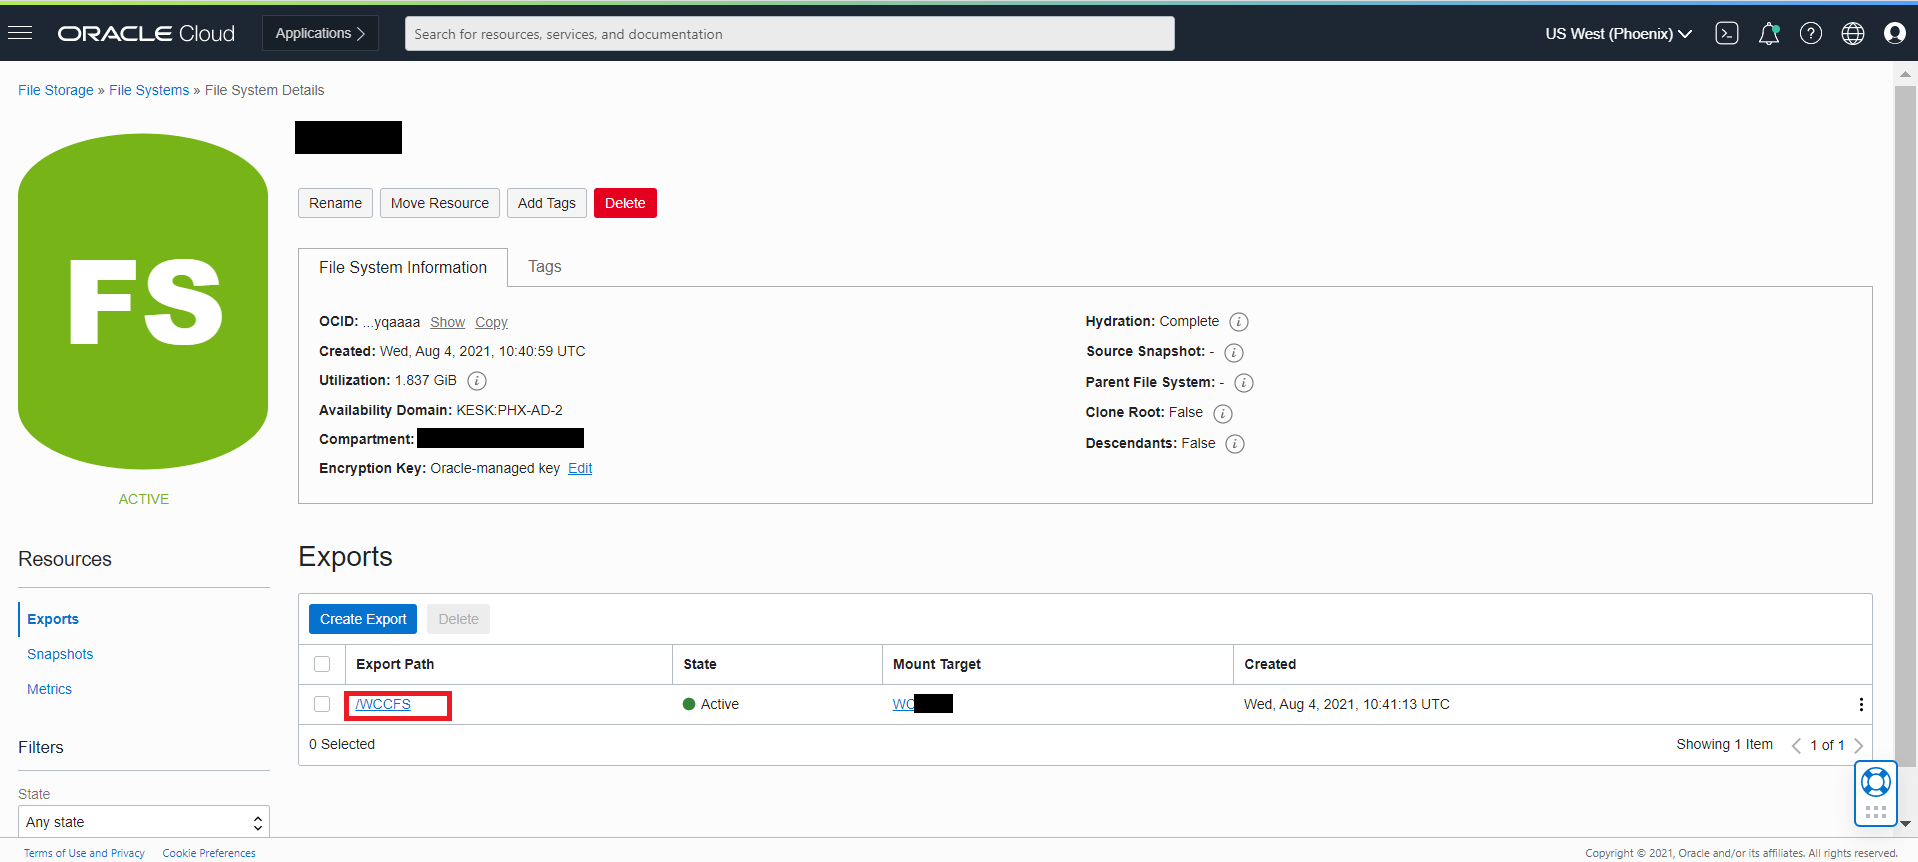
-
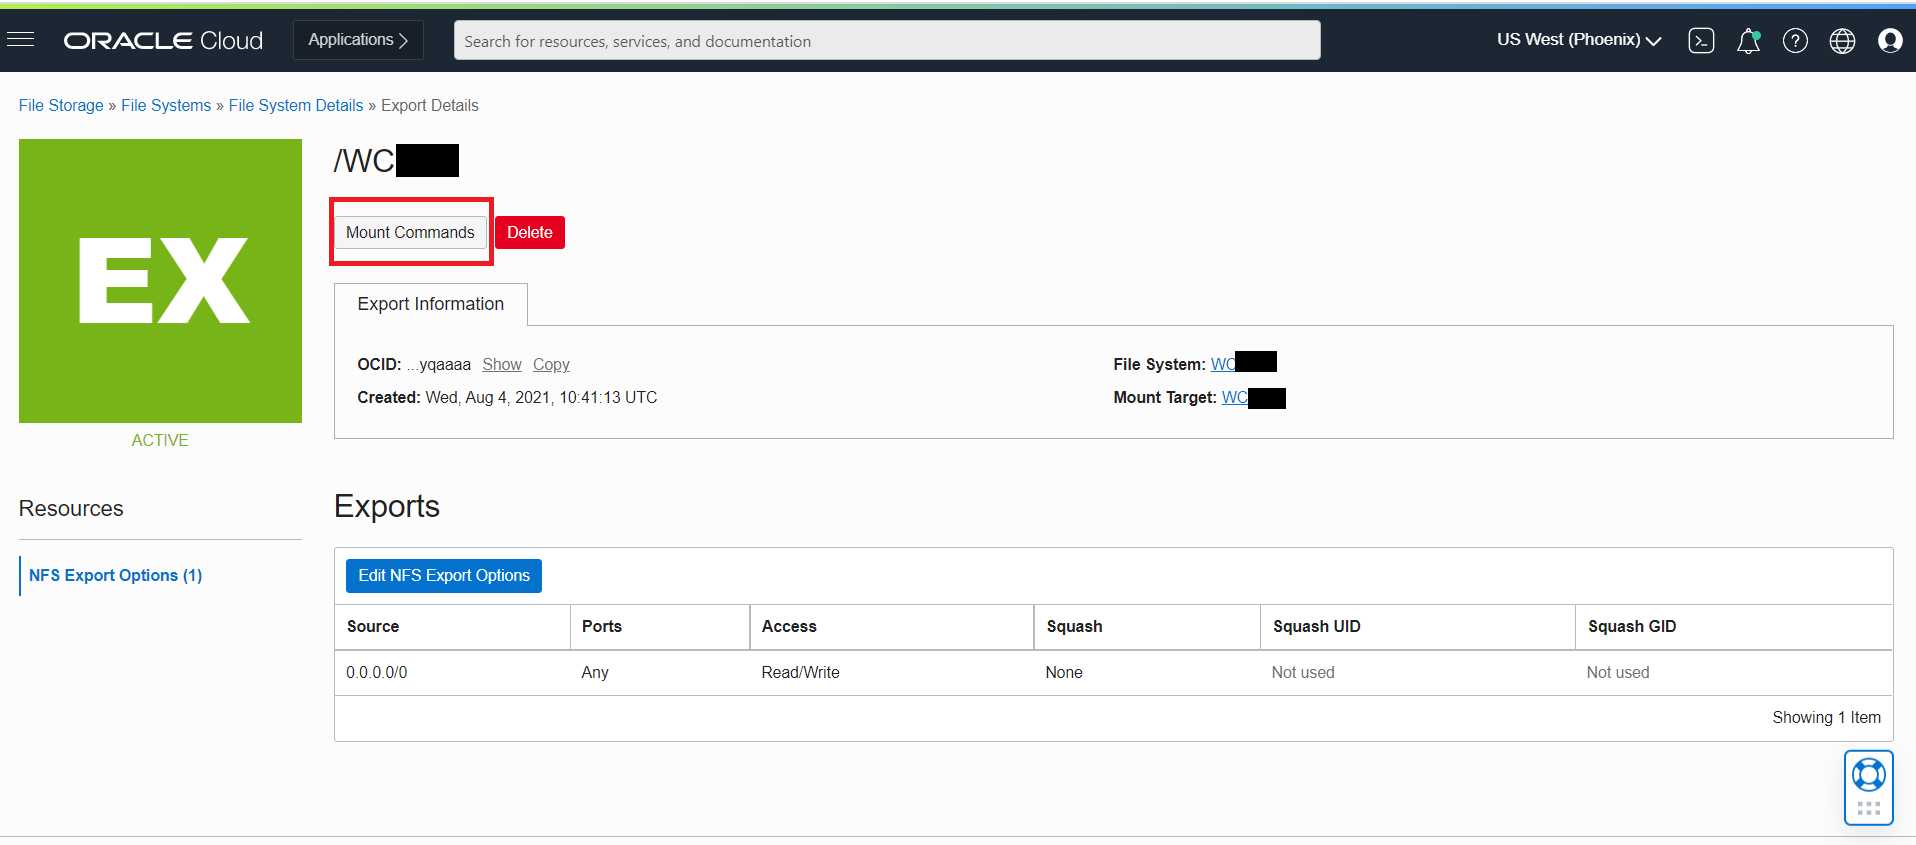
Click on Mount Commands which gives details on how to mount this file system on your instances.
-
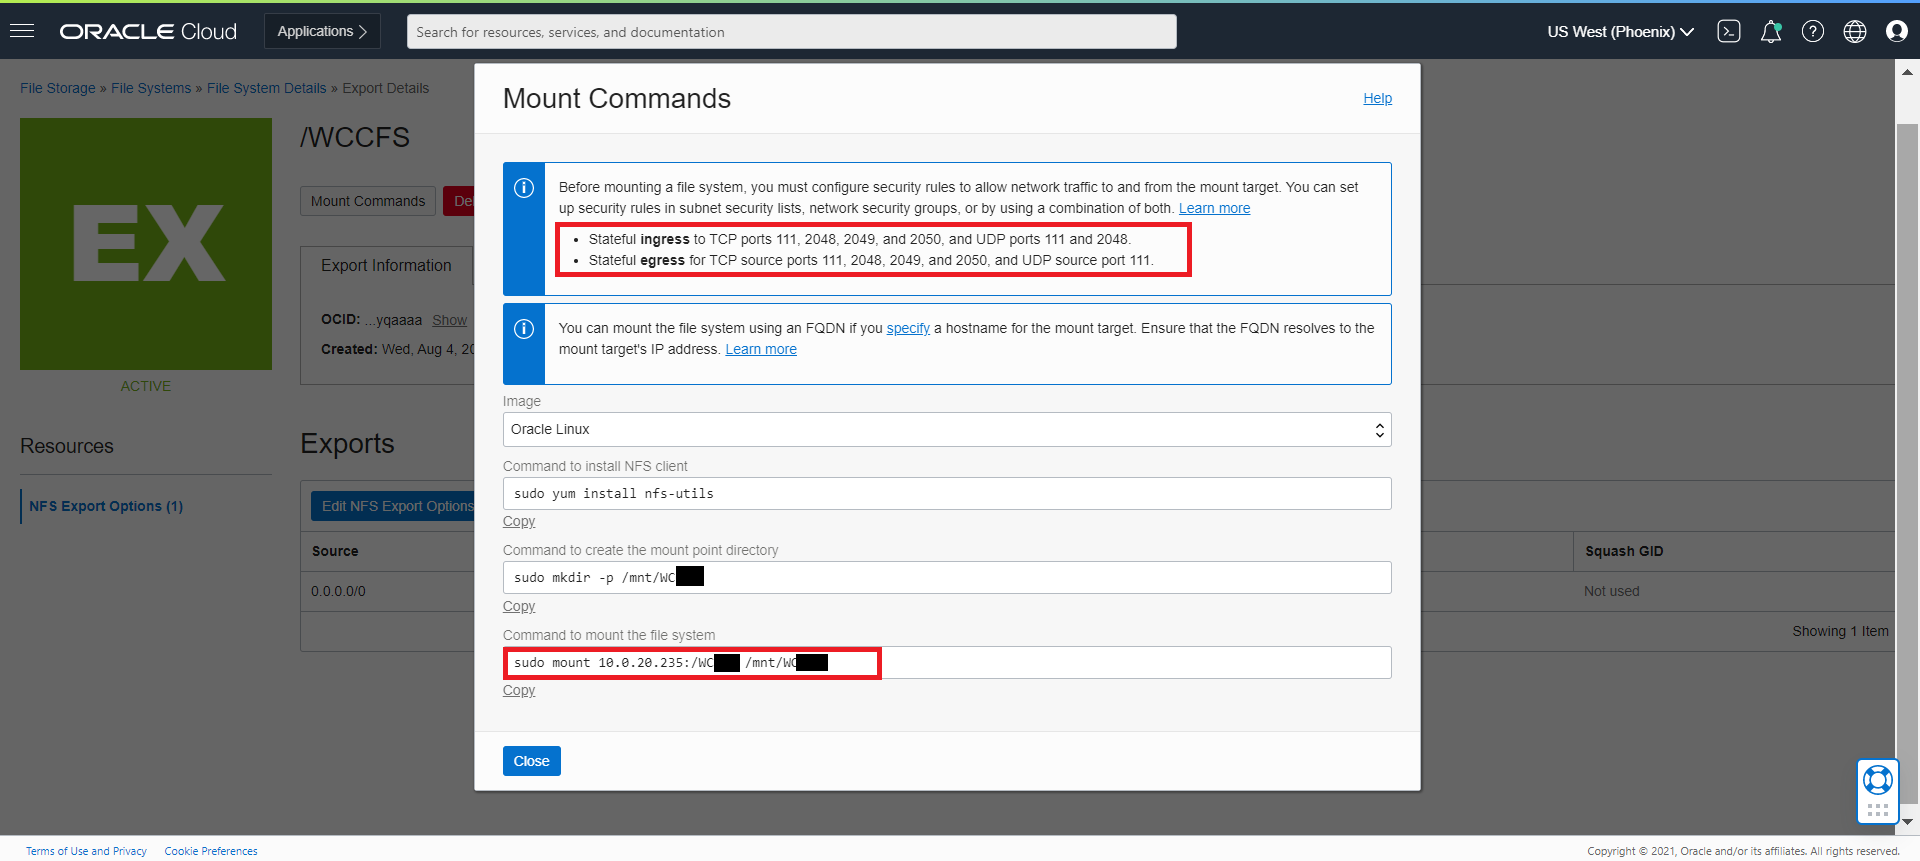
Mount Command pop up gives details on what must be configured on security list to access the mount targets from instances. Note down the mount command which need to be executed on the instance
-
Note down the mount path and NFS server from the
COMMAND TO MOUNT THE FILE SYSTEM. We will use this as NFS for Domain Home with below details. Sample from the above mount command.- NFSServer: 10.0.20.xxx
- Mount Path: /WCCFS
-
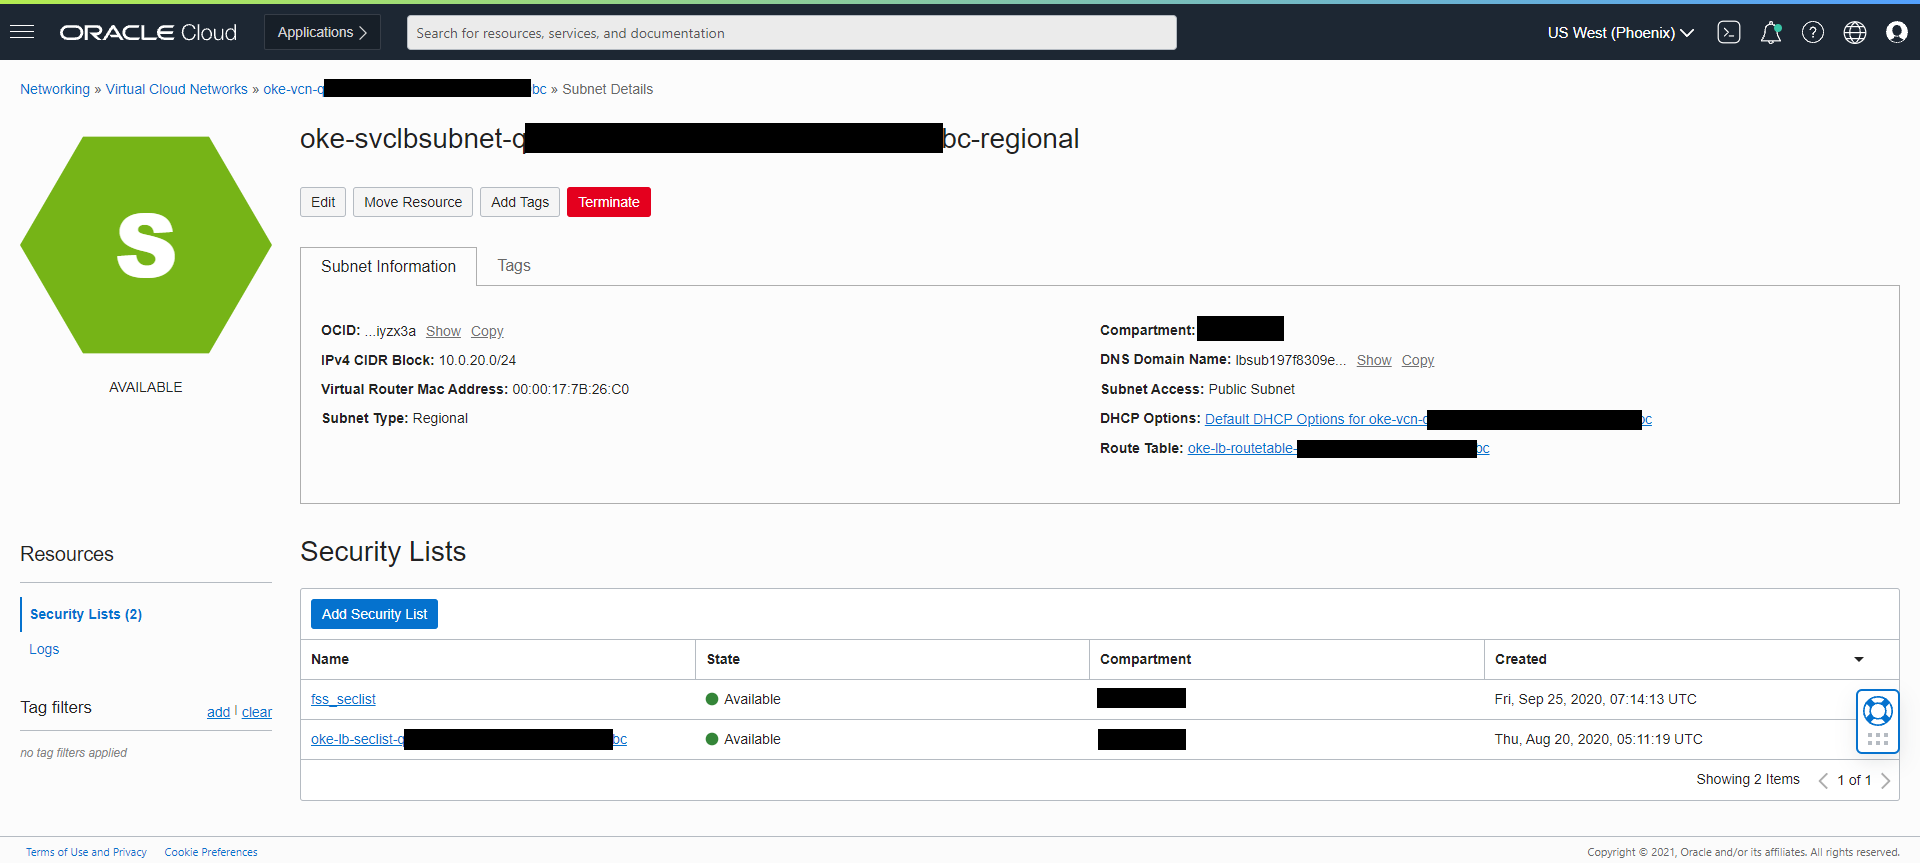
Create the security list
fss_seclistwith below Ingress Rules as given in the Mount commands pop up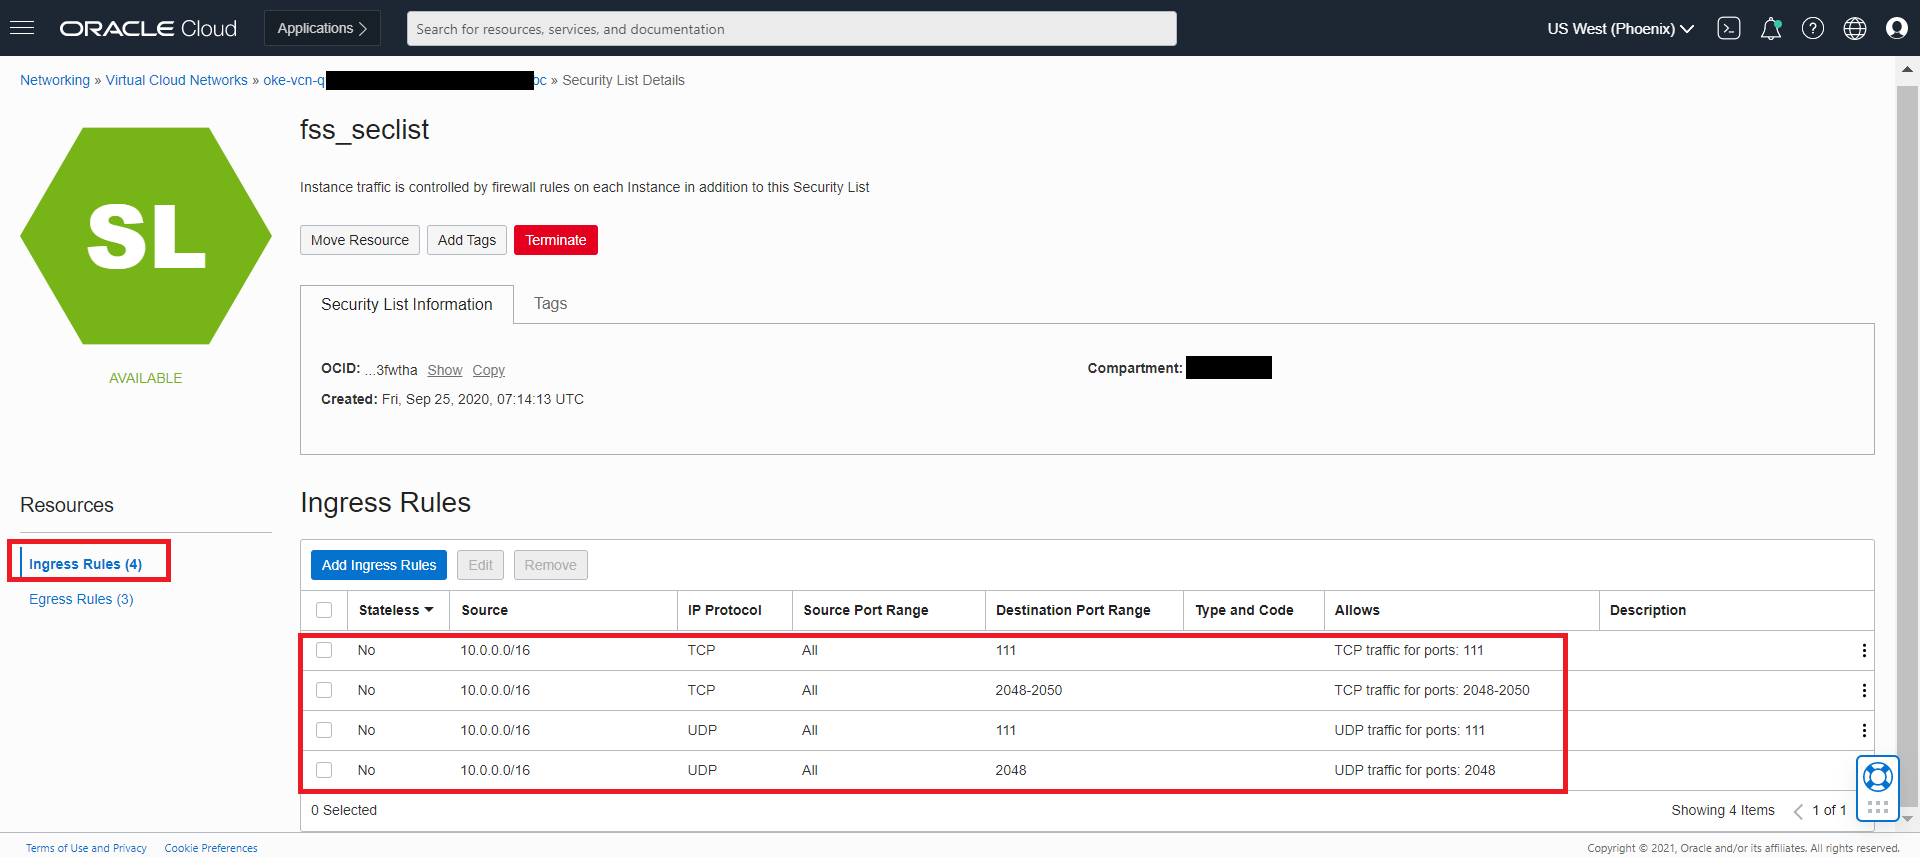
-
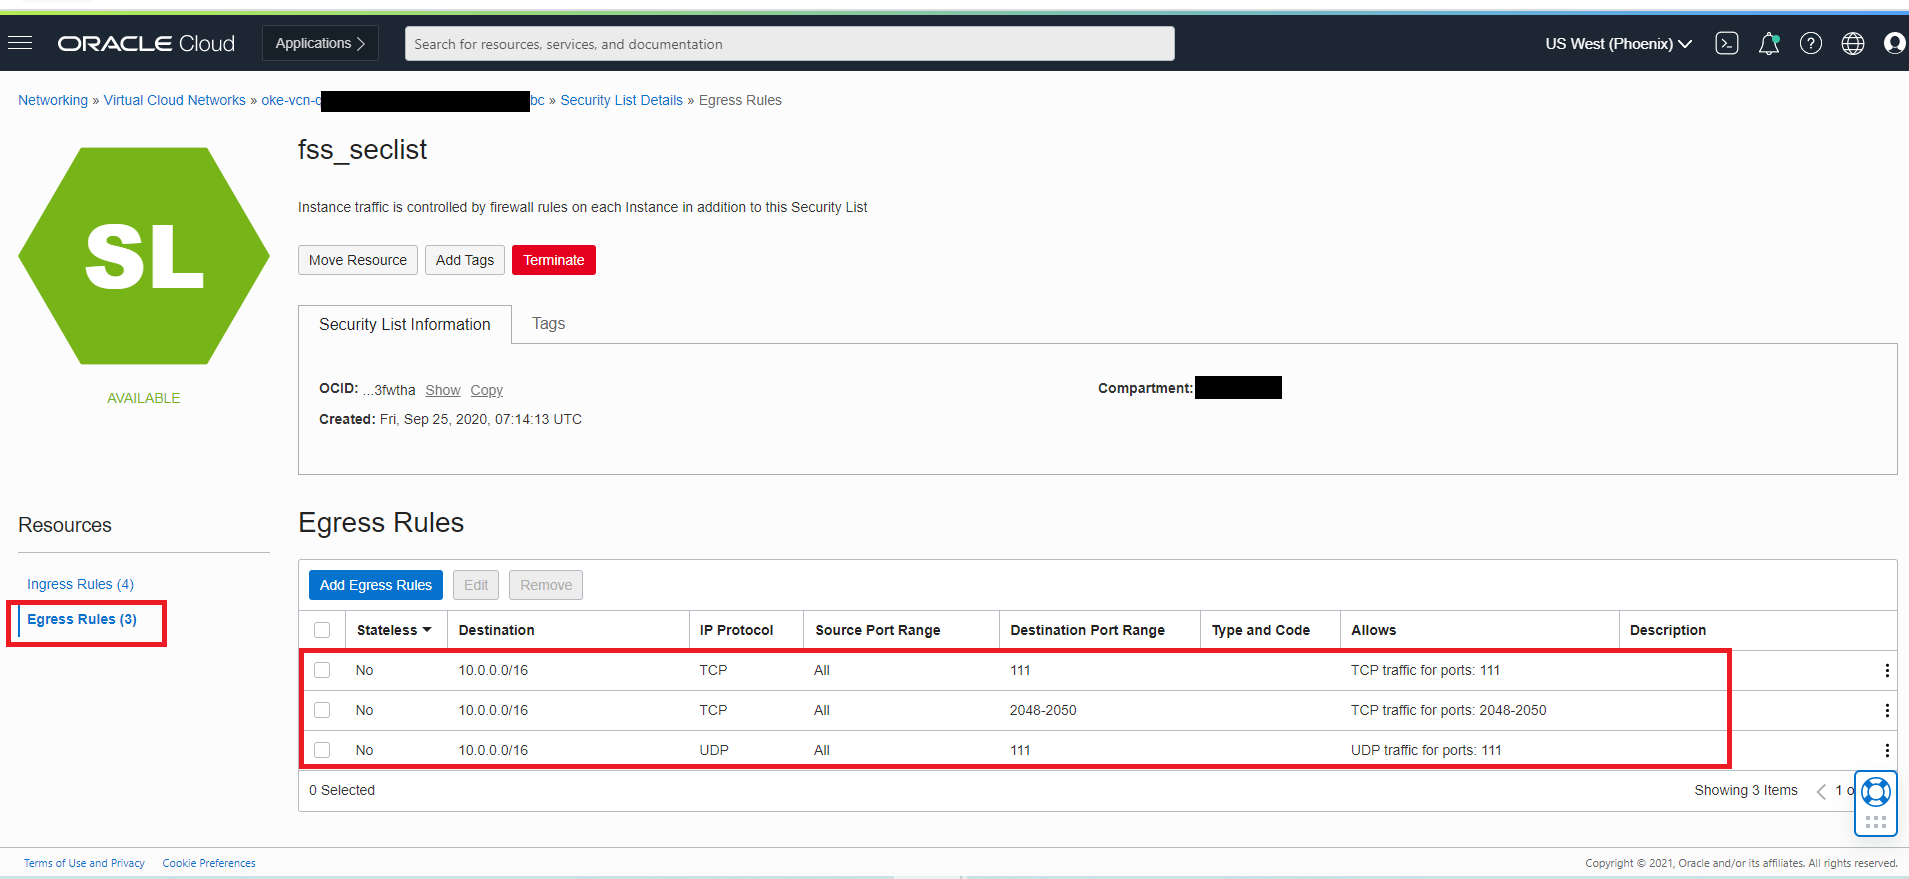
Create the Egress rules as below as given in the Mount commands pop up.
-
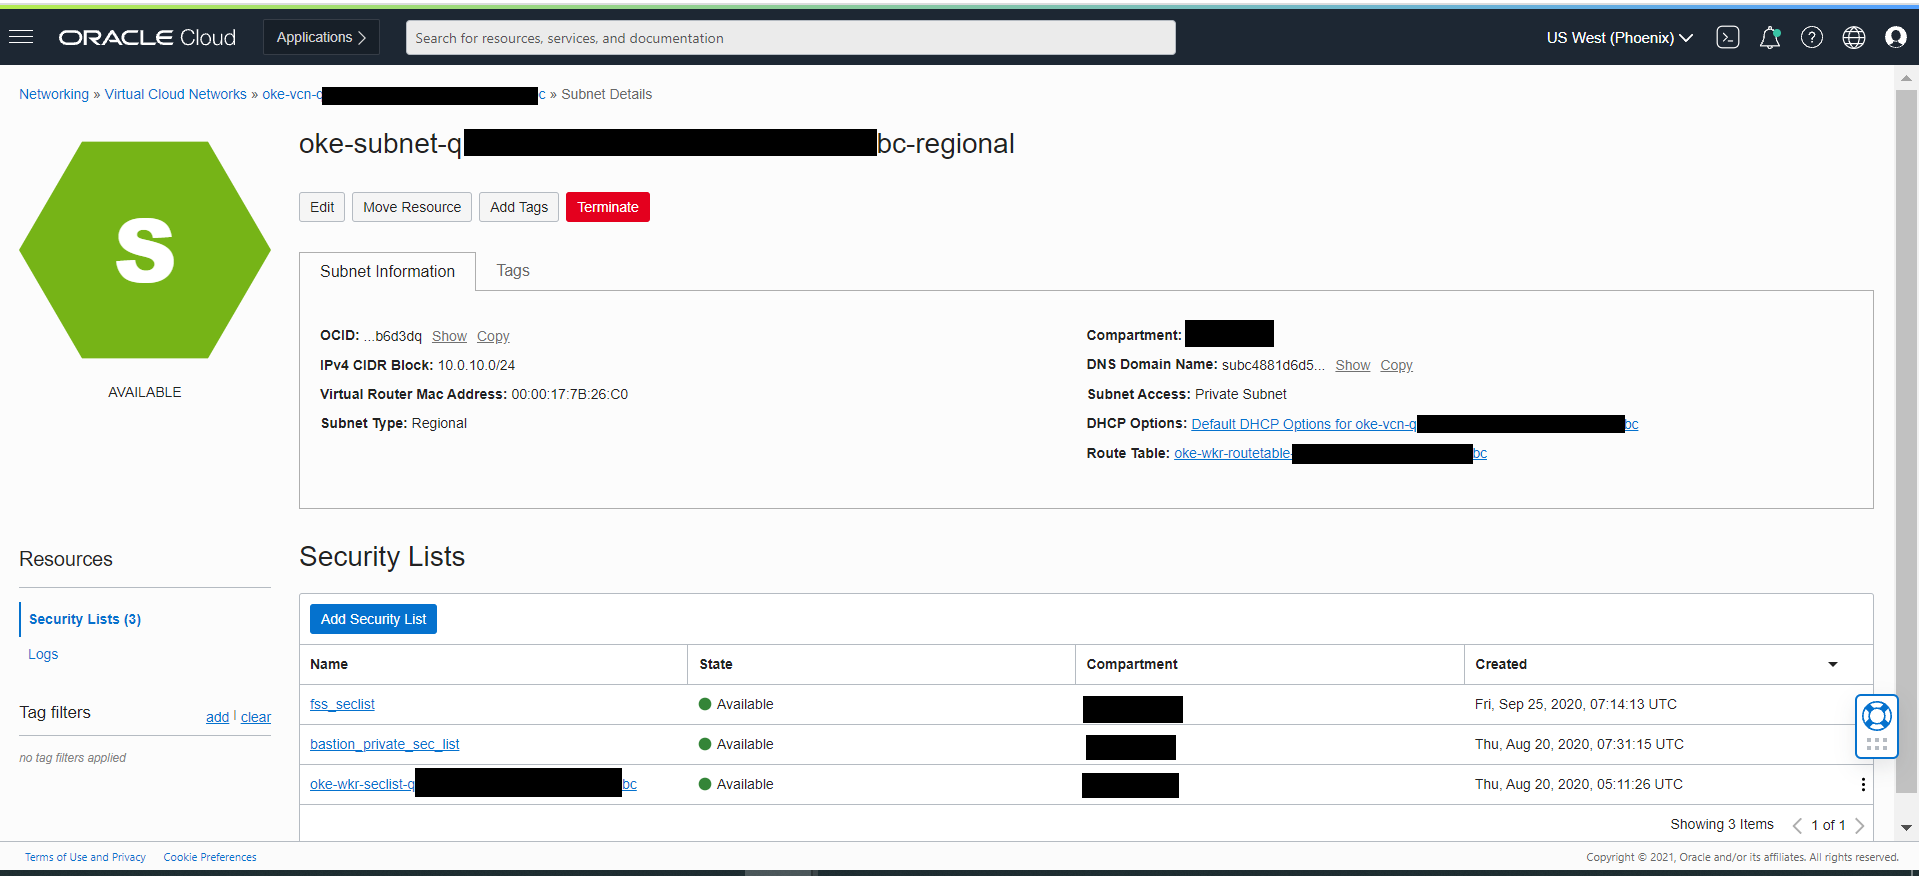
Make sure to add the created security list
fss_security listto each subnets as shown below: Otherwise the created security list rules will not apply to the instances.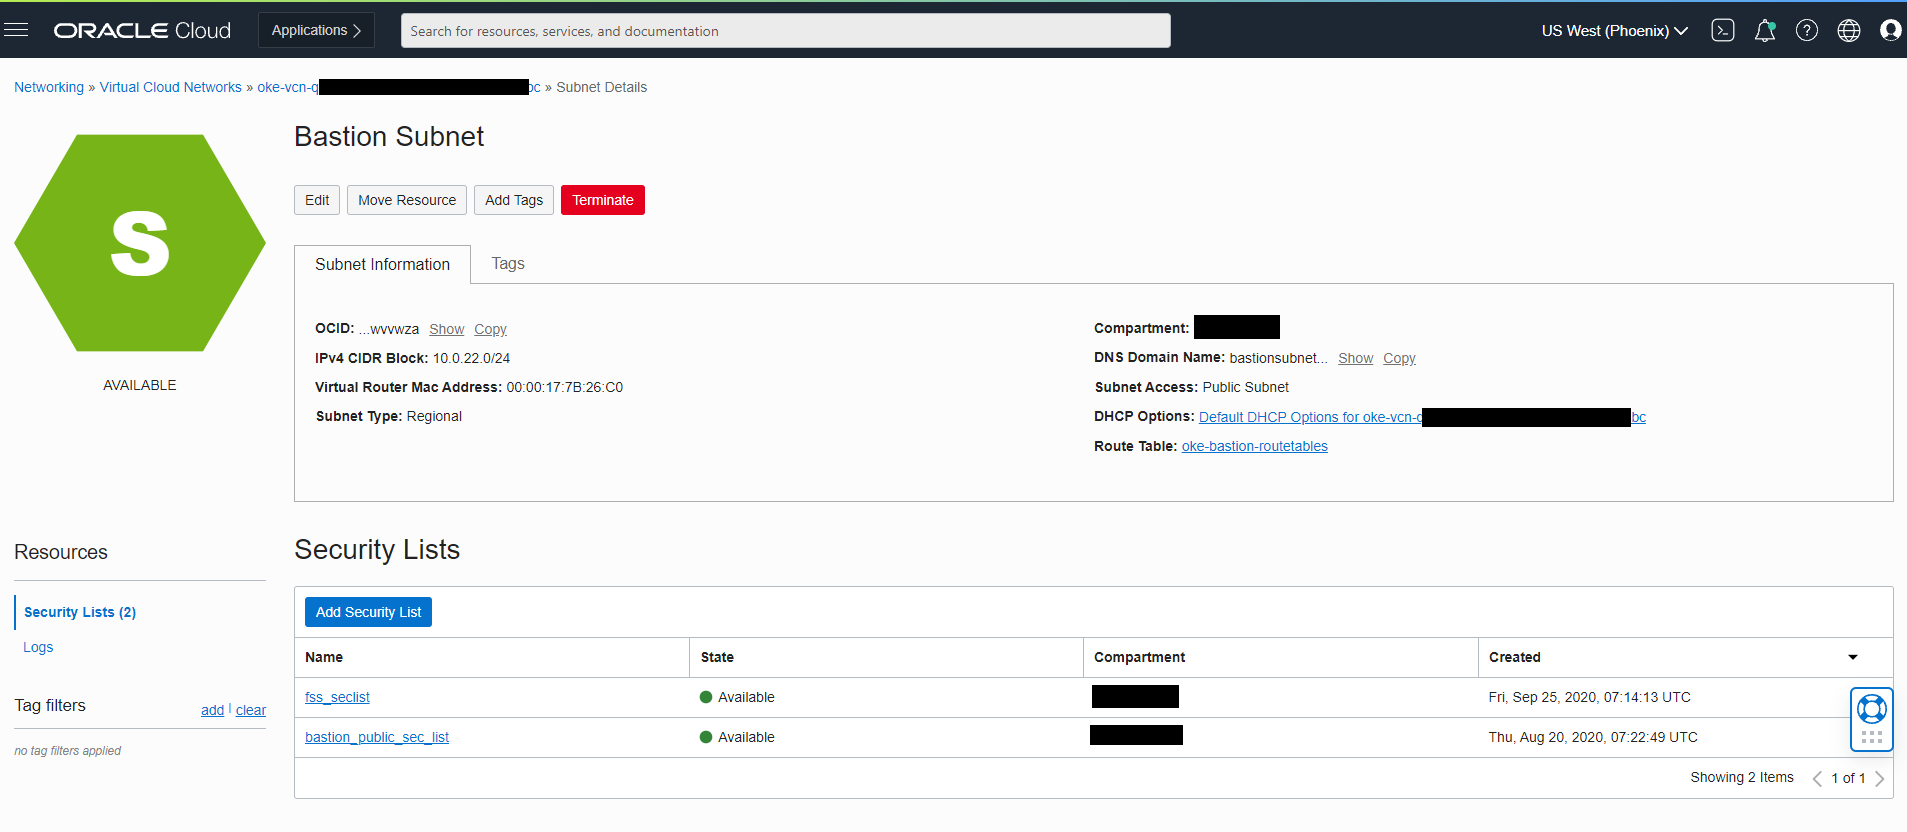
-
Once the security list
fss_security listis added into the subnet, login to the instances and mount the file systems on to Bastion Node.Note: Please make sure to replace the sample NFS server address (10.0.20.235, as shown in the example below) according to your environment.
# Run below command in same order(sequence) as a root user. # login as root sudo su # Install NFS Utils yum install nfs-utils # Create directory where you want the mount the file system sudo mkdir -p /mnt/WCCFS # Mount Command sudo mount 10.0.20.235:/WCCFS /mnt/WCCFS # Alternatively you can use: "mount 10.0.20.235:/WCCFS /mnt/WCCFS". To persist on reboot add into /etc/fstab echo "10.0.20.235:/WCCFS /mnt/WCCFS nfs nfsvers=3 0 0" >> /etc/fstab mount -a # Change proper permissions so that all users can access the share volume sudo chown -R 1000:0 /mnt/WCCFS -
Confirm that /WCCFS is now pointing to created File System
[root@bastionhost WCCFS]# cd /mnt/WCCFS/
[root@bastionhost WCCFS]# df -h .
Filesystem          Size  Used Avail Use% Mounted on
10.0.20.235:/WCCFS  8.0E     0  8.0E   0% /mnt/WCCFS