Deploy the Domain
To inform the operator of a new WebLogic or FMW domain, you must create an operator Domain resource object in Kubernetes. Starting in WKO 4.0.0, the operator also needs an operator Cluster resource object for every cluster in the domain. This separation is required to work with the Kubernetes Horizontal Pod Autoscaler (HPA) to allow it to automatically scale clusters based on load (but only up to the maximum size of the WebLogic cluster). For more information, see this WebLogic Kubernetes Operator Scaling documentation.
WKT UI generated the required operator resource objects for your domain because of the project settings. Go to the Kubernetes > WebLogic Domain page. Before continuing, there are a few things to understand:
- We are using the
Oracle Container Registry
(OCR) to pull the primary image.
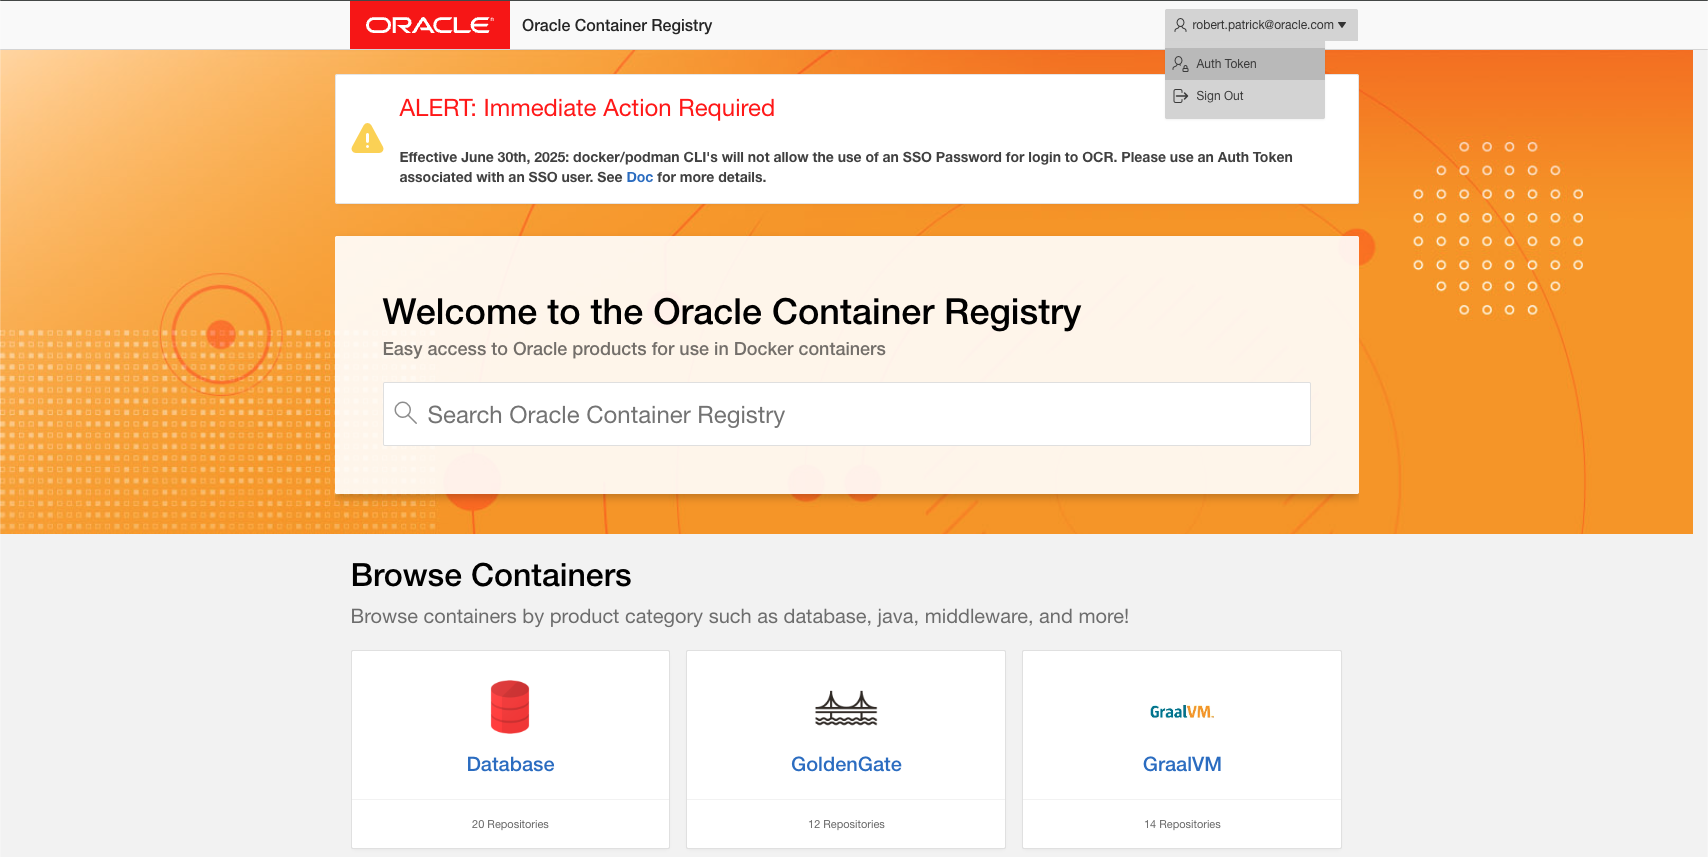
You must log in and create an
Auth Tokenthat will be used by Docker and Kubernetes instead of your password. See the following image to understand how to do that. You will need to copy this Auth Token value since it will be needed when creating the Image Registry Credentials entry that will be used to create a Kubernetes pull secret for the primary image. - For your user to be allowed to pull images, you must accept the Terms and Conditions for that repository. Note that
only authorized users on your company’s Support CSID will be allowed to pull from the
weblogic_cpurepository. - For real world usage, Oracle strongly recommended using fully patched images; for example, from the
weblogic_cpuregistry. For the purposes of this guide, it is acceptable to use the publicweblogicrepository if you do not have permission to access theweblogic_cpurepository. - Make sure to choose an image for the version of WebLogic Server that you want to use. For example, at the time of
writing, the
15.1.1.0-generic-jdk17-ol9-251002image is the newest one available in theweblogicrepository. We chose to use the “Dated Tag” so that it is obvious what image we are using. For this image, thePrimary Image Tagvalue would becontainer-registry.oracle.com/middleware/weblogic:15.1.1.0-generic-jdk17-ol9-251002.
Fill in the form fields, as described in the following table.
| Field Name | Value |
|---|---|
WebLogic Admin Username |
Enter the username that you want to use. |
WebLogic Admin Password |
Enter the password that you want to use. |
WebLogic Kubernetes Operator Installed Version |
If this field is not already populated, press the icon in the text box. |
Primary Image Tag |
See the discussion in point 4 above and enter your chosen value. |
Specify Image Pull Credentials |
ON |
Use Existing Image Pull Secret |
OFF |
Image Pull Secret Name |
ocr |
Image Registry Pull Credentials |
Create and select a new Image Registry Credential for your OCR account. |
Auxiliary Image Pull Policy |
Always (Required if you update the image without changing the version) |
Specify Auxiliary Image Pull Credentials |
ON |
Use Existing Auxiliary Image Pull Secret |
OFF |
Auxiliary Image Pull Secret Name |
ocir |
Auxiliary Image Registry Pull Credentials |
Select the Image Registry Credential entry used to push the auxiliary image. |
After you filled out the fields in the preceding table, you need to look at some additional fields contained in tables, shown in the following image.
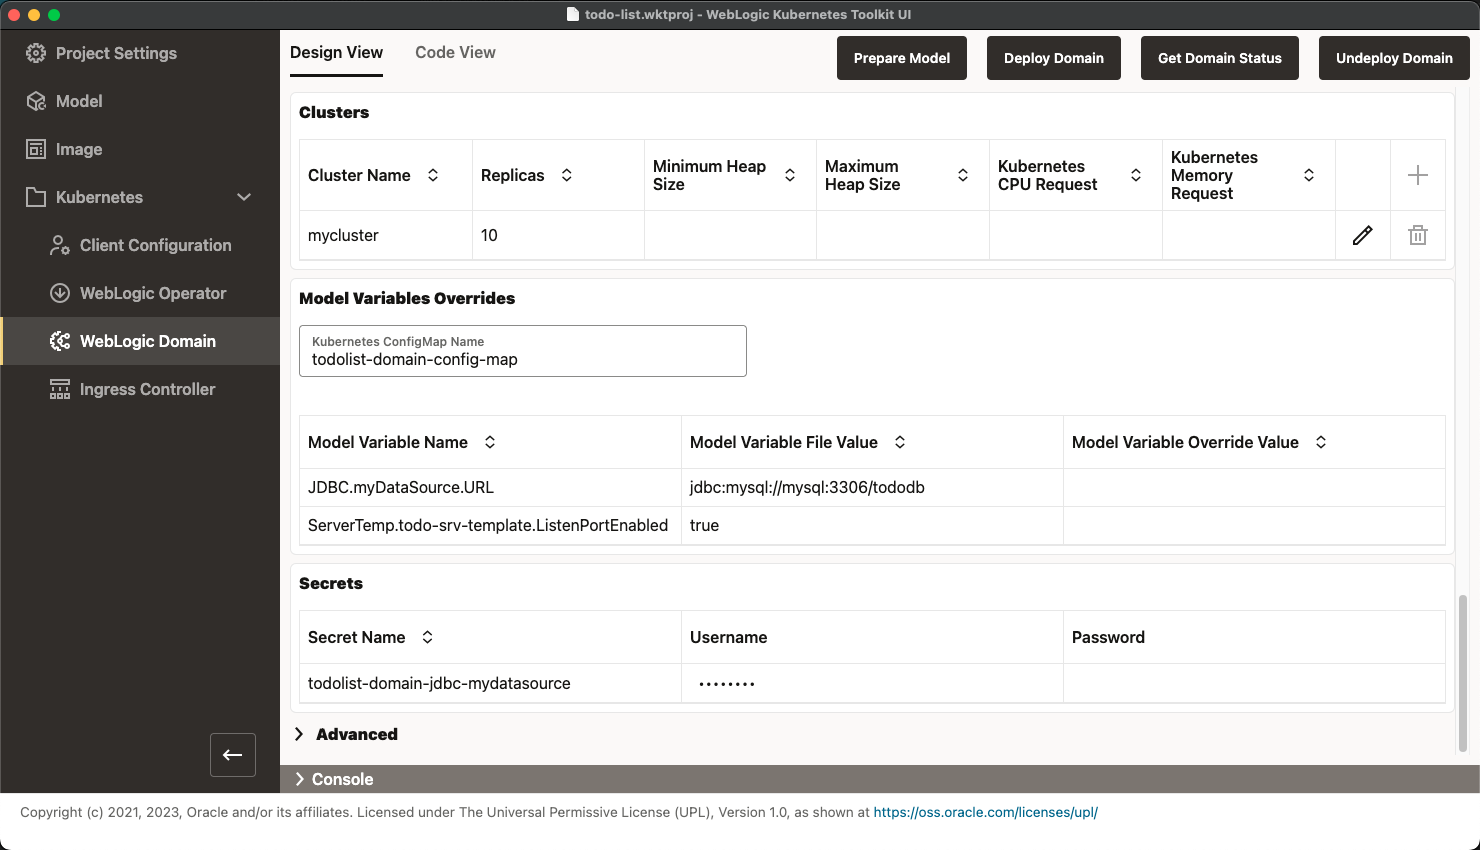
- First, look at the
Clusterstable. As you can see, the cluster from your model has been added to this table (by the earlier invocation of the Prepare Model action). If you do not see the cluster, run Prepare Model again to populate the table. - Notice that the
Replicasvalue for the cluster is set to the maximum size of the cluster, as specified in the model. Select the Pencil icon toward the right end of the row. Notice that you cannot set theReplicasvalue higher than 10. After you are done, change the value to2and clickOK. - Next, look at the
Model Variables Overridessection. This section lets you override the values specified in the variables model file in the auxiliary image using a Kubernetes ConfigMap. Because you do not need to override these values, you can move on to theSecretssection.
The Secrets section contains all model-defined secrets and lets you specify the user name and password. In the
preceding image, notice that the secret associated with your MySQL database connection is already populated with the
proper image name. This value was removed from the model (or the variable reference) by the Prepare Model action and
added here. If you run Prepare Model more than once, you will lose this value and must enter it manually. WDT
generally will not populate password values, so you need to enter your MySQL database password you provided when you ran
Quick Start scripts/wkoDeployMySQL script.
Before you deploy the domain, you must deploy the MySQL database. You will deploy the database to the same namespace as the domain, so you need to create the following Kubernetes objects to deploy the database:
todolist-domain-nsNamespace – The Kubernetes namespace where both the WebLogic or FMW domain and MySQL database will reside.ocrSecret – The Kubernetes image pull secret for pulling images from the Oracle Container Registry.mysqlSecret – The Kubernetes secret that holds the root password, user name, and password of the user the ToDo List application uses to connect to the database.todolist-mysql-cmConfigMap – The Kubernetes ConfigMap used to hold theinit-schema.sqlscript to initialize the MySQL database on startup.todolist-mysql-deploymentDeployment – The Kubernetes deployment that will start and manage the MySQL database.mysqlService – The Kubernetes service that exposes the MySQL database by themysqlDNS name to the WebLogic managed servers.
To make this easier, go to the QuickStart directory and do the following:
- Edit the demarcated section of the
setQuickstartEnvshell script to match your environment. - Source (macOS or Linux) or run the
setQuickstartEnvshell script. - Change to the
scriptssubdirectory and run thewkoDeployMySQLscript, which creates the Kubernetes objects described previously to start the MySQL database.
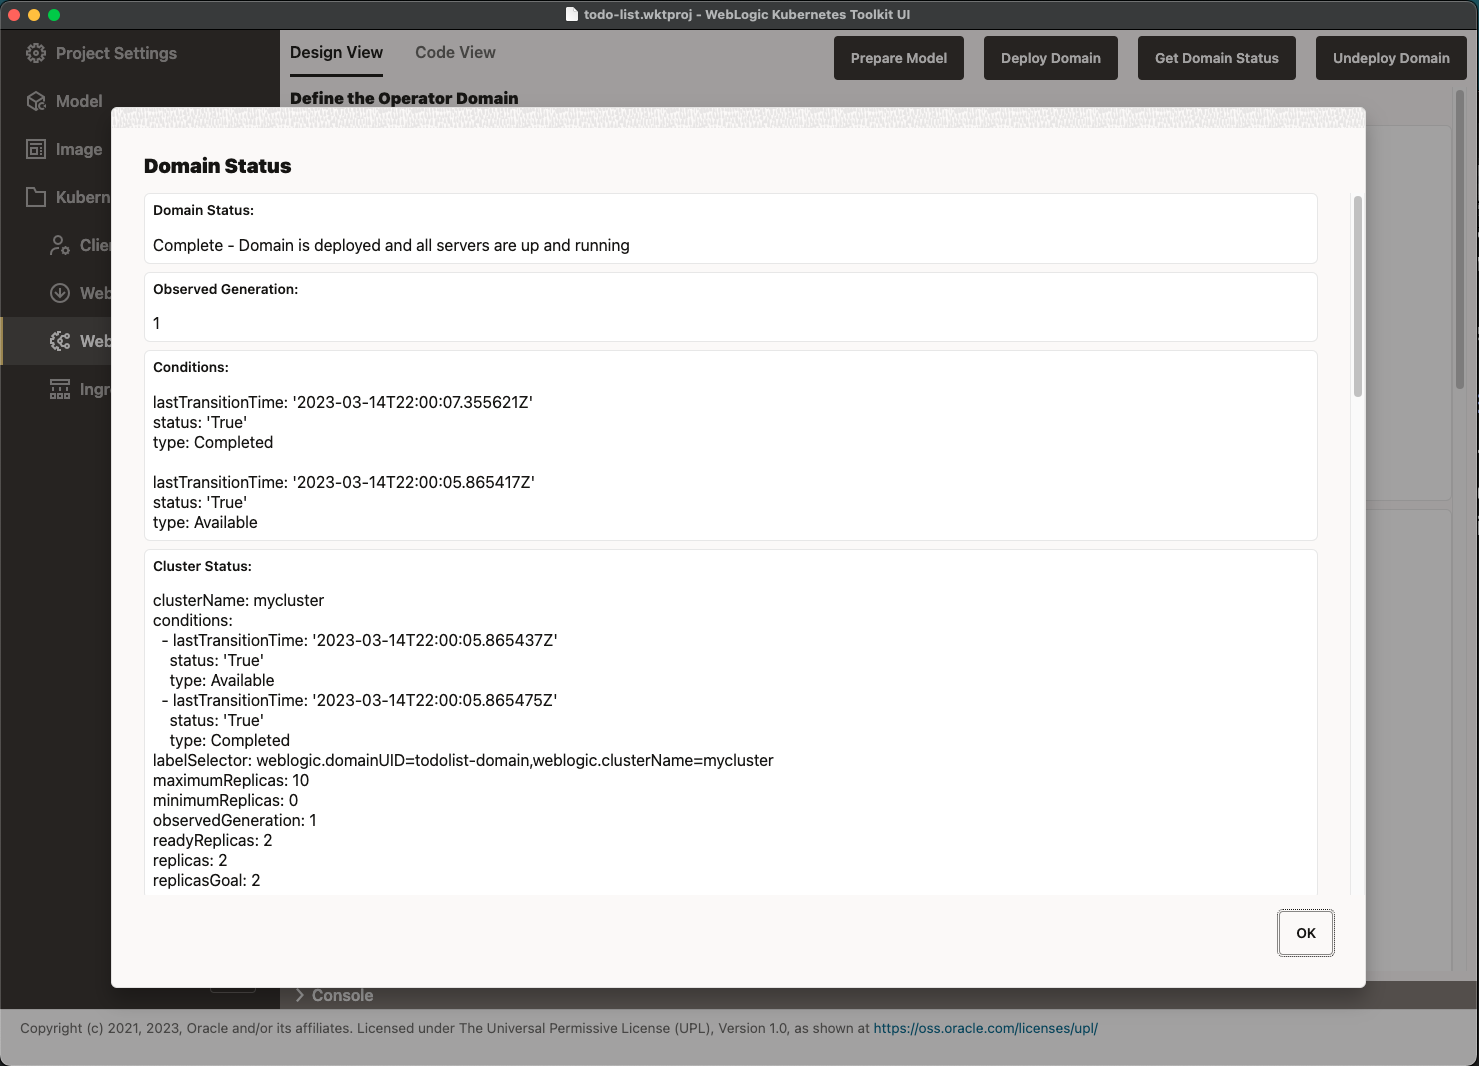
Now that the MySQL database is running at the hostname mysql (inside the namespace), click Deploy Domain. This
action takes some time to run. Even after the action finishes, you need to wait a few minutes for the operator to
introspect the domain and start the servers. Use Get Domain Status to verify that the domain is up, and all servers
are running, as shown in the following image.
After your domain is ready, move onto the next section.