OCI Free Tier Cleanup
Note: These steps apply only if you chose the option to install in OCI Free Tier.
-
Login into your OCI Free Trail account.
-
Delete the Compute Instance.
-
Select the compartment where you installed the Compute instance in the drop down box on the left hand side of the OCI Console.
-
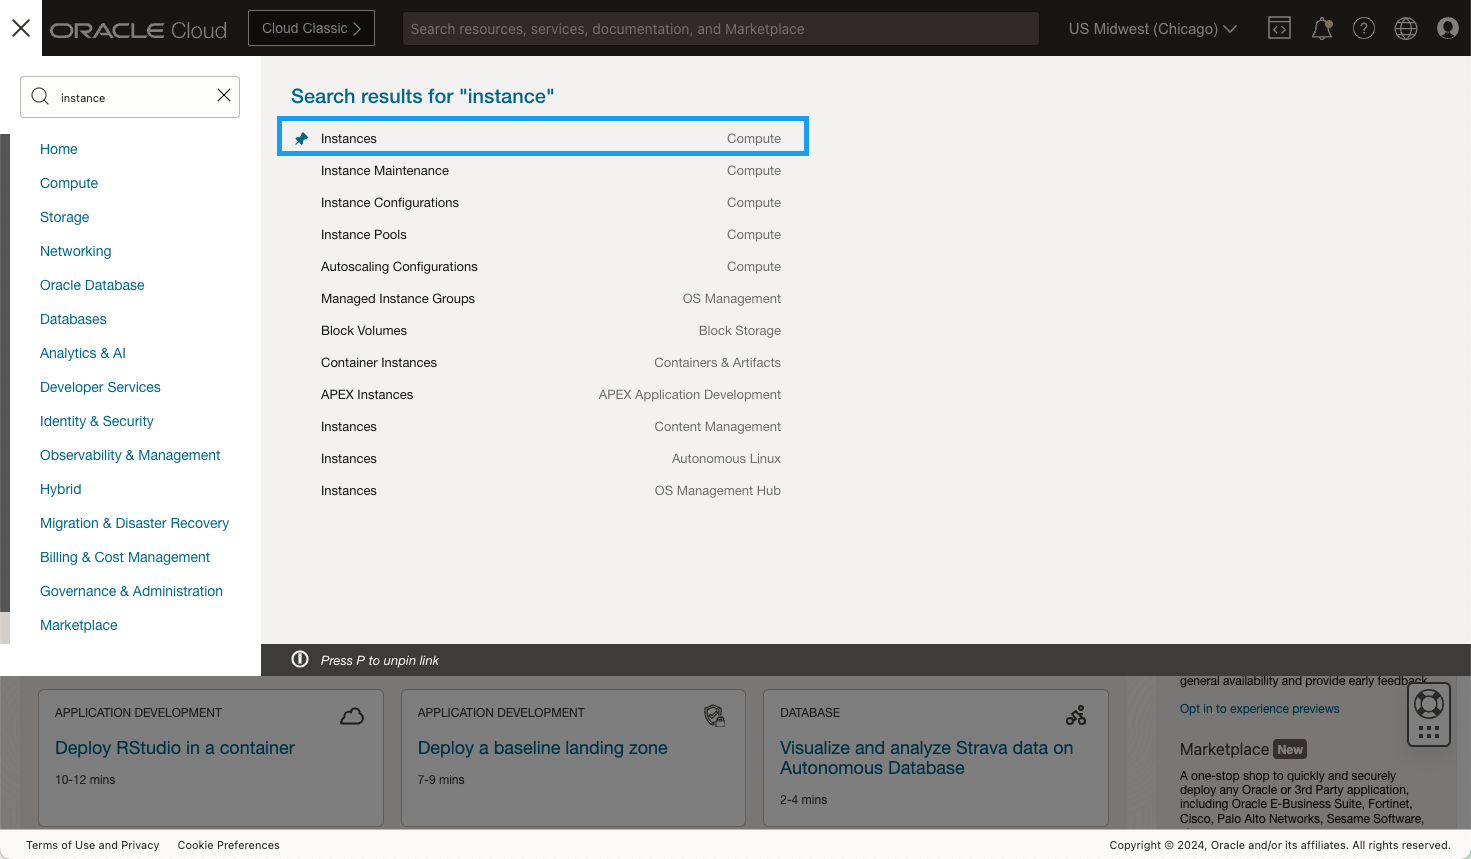
Navigate to the Compute Instances page by clicking on the link on the home page of the OCI Console or opening the main menu using the “hamburger” icon ( ) in the top left corner of the console and searching for “instance”:
-
Click on the compute instance name. The name of your instance will be different than the example below.

-
Click on the Terminate button.
-
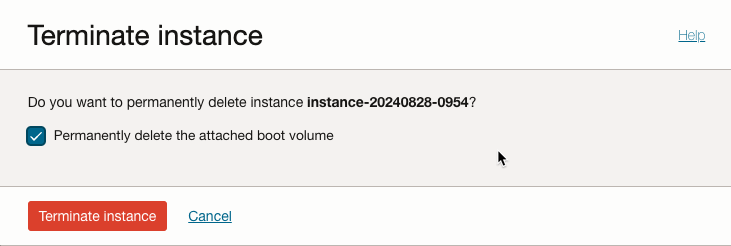
In the Terminate Instance dialog box it is VERY important that you select Permanently delete the attached boot volume.
The instance will now be terminated. This process will take a few minutes. When the status of the instance changes to terminated you can move on to the next step.
-
-
Delete the Custom Image.
-
Select the compartment where you created the Custom image in the drop down box on the left hand side of the OCI Console.
-
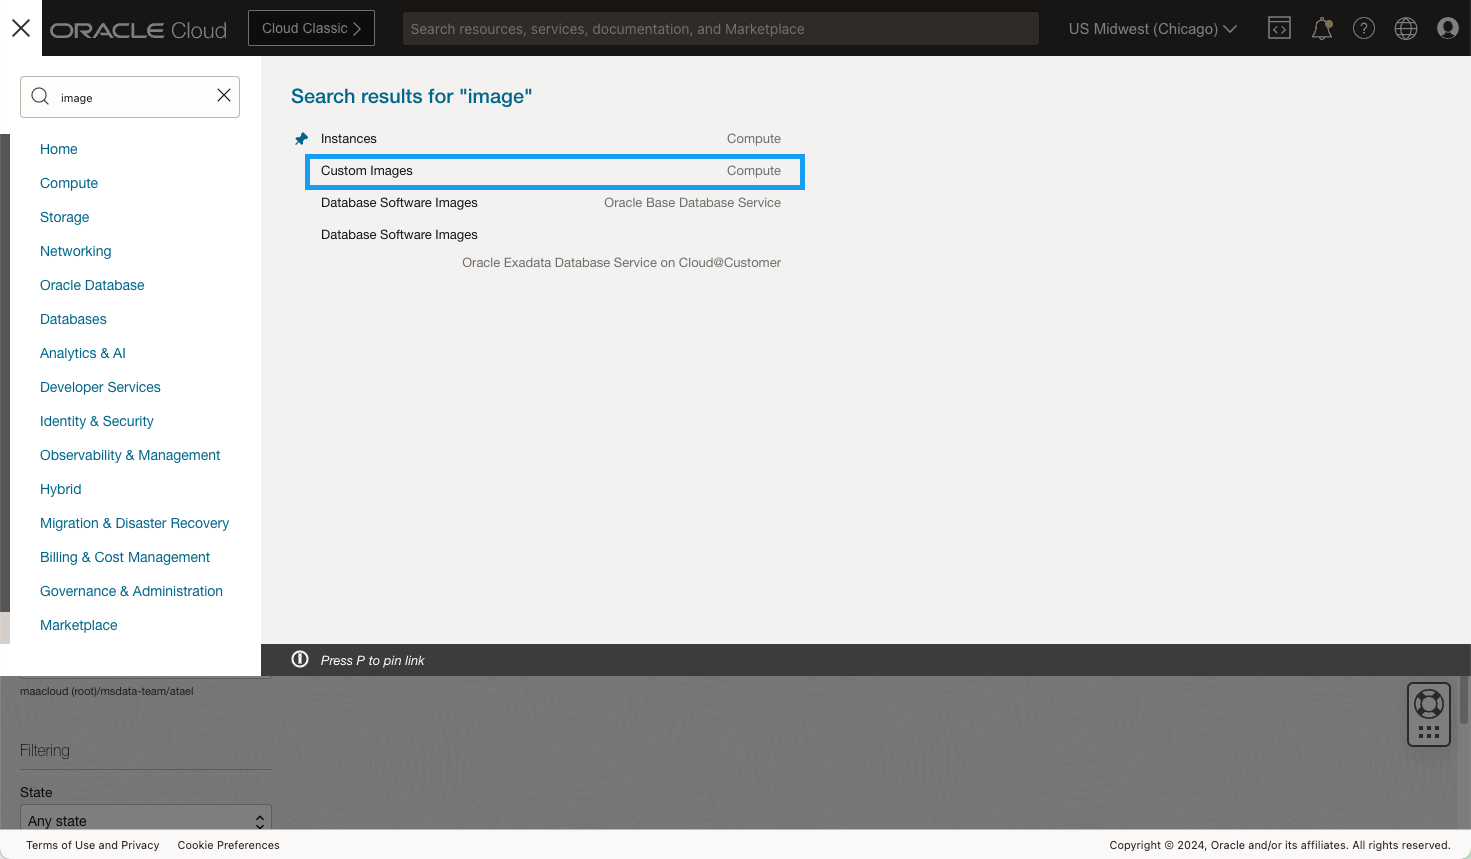
Navigate to the Custom Instances page by opening the main menu using the “hamburger” icon ( ) in the top left corner of the console and searching for “image”:
-
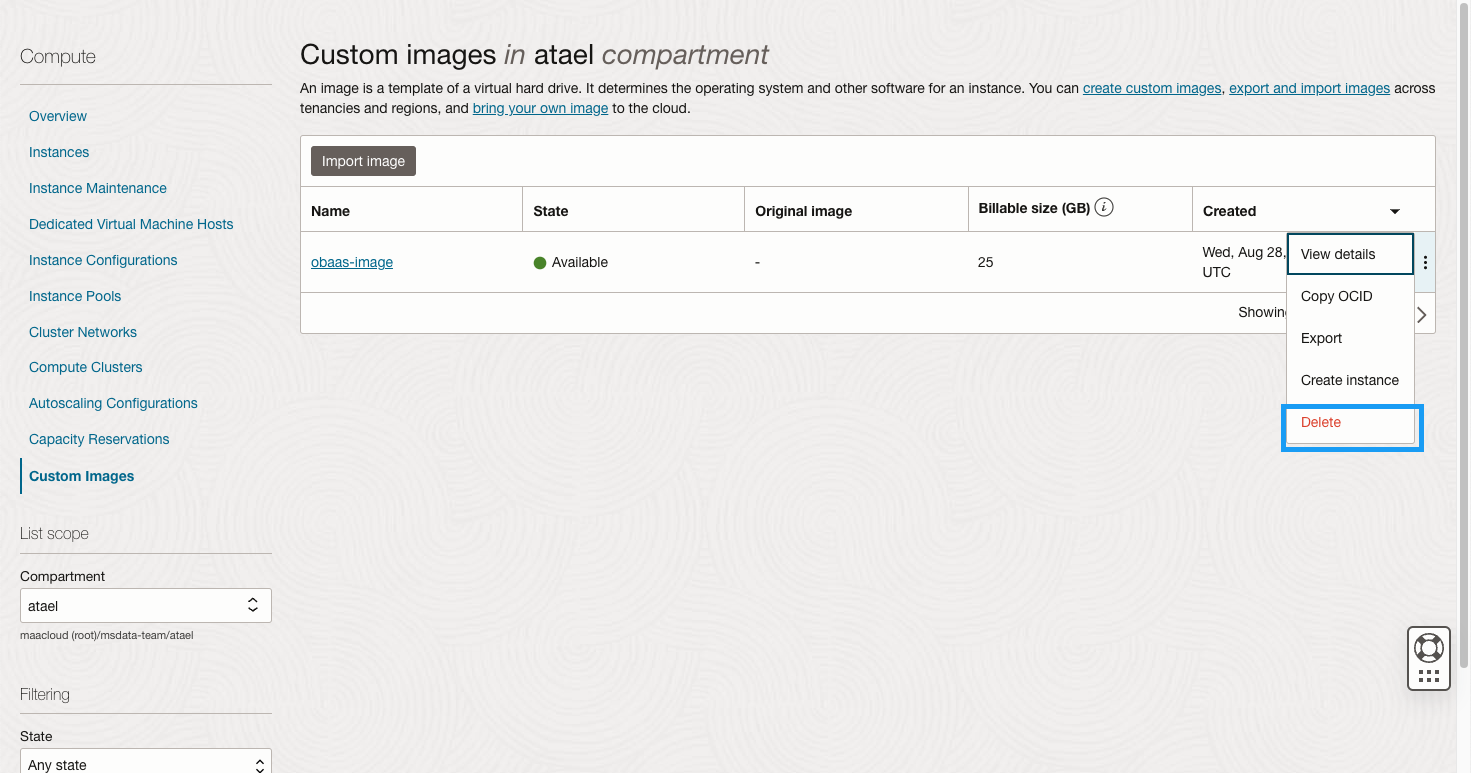
Clock in the three little dots on the right hand side of table and select Delete. And confirm by clicking the Delete button in the dialog box.
The custom image you created is now deleted.
-
-
Delete the Virtual Cloud Network.
-
Select the compartment where you installed the Compute instance in the drop down box on the left hand side of the OCI Console.
-
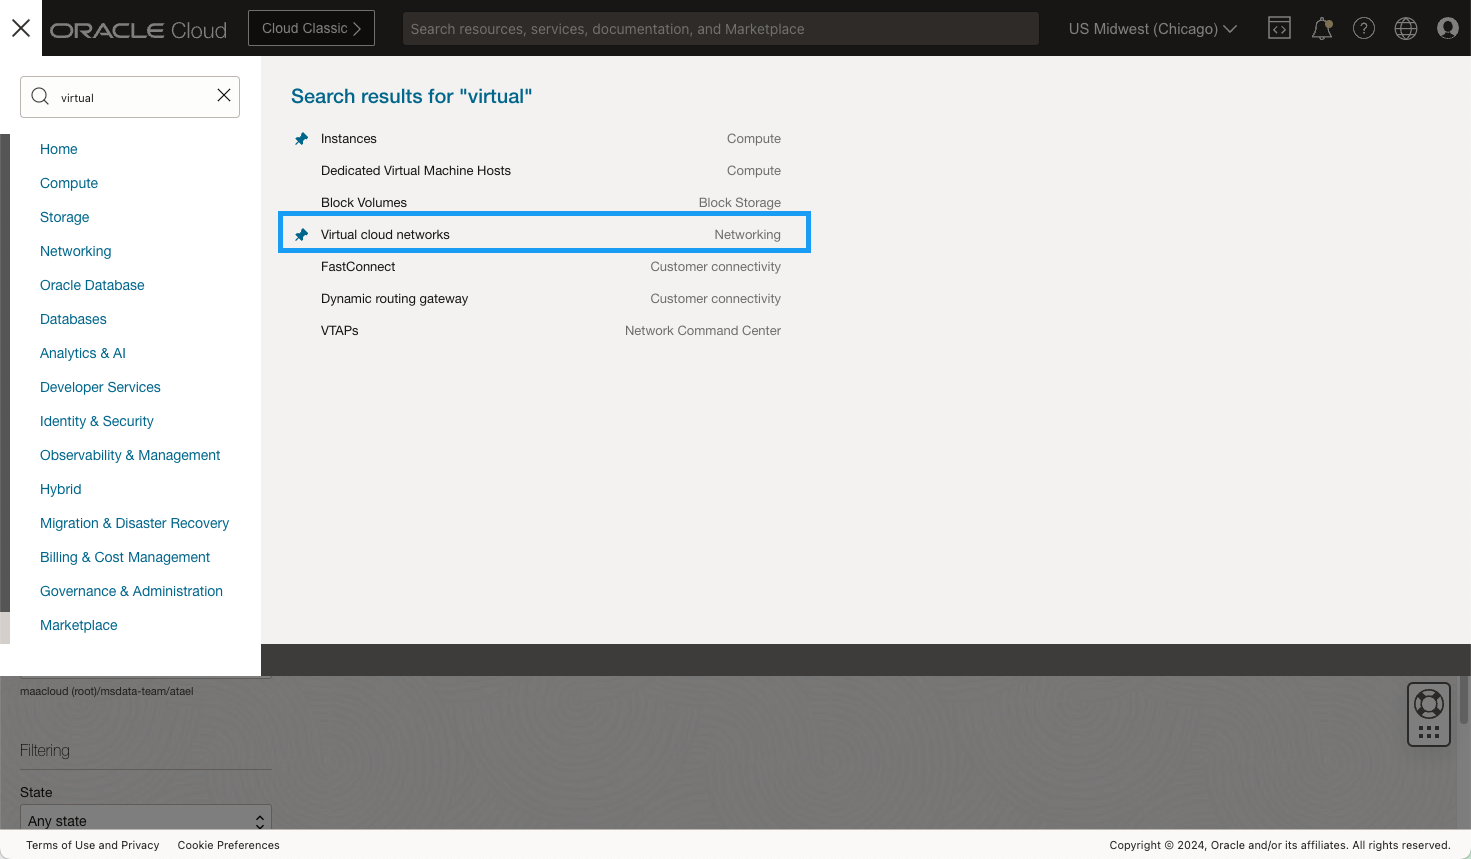
Navigate to the Virtual cloud networks page by clicking on the link on the home page of the OCI Console or opening the main menu using the “hamburger” icon ( ) in the top left corner of the console and searching for “instance”:
-
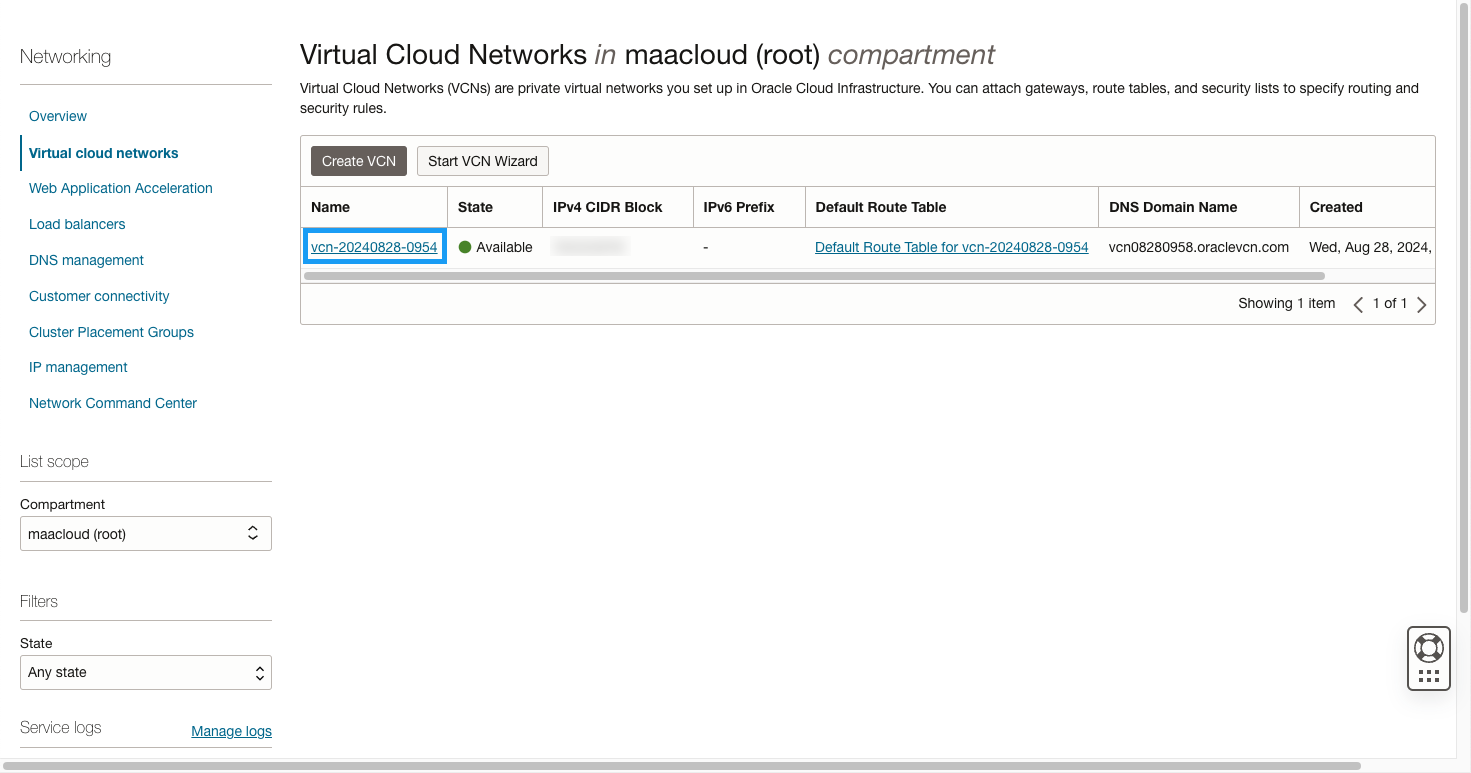
Click on the network name.
-
Click on the Delete button.
-
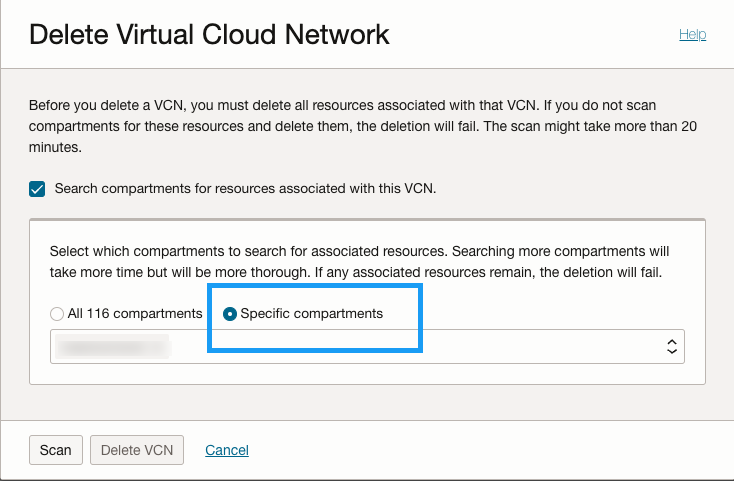
In the Delete Virtual Cloud Network dialog box, it is important that you select Specific Compartment and the compartment where you installed the VCN. Otherwise the scan will can all the compartments in the tenancy. Click on the Scan button.
-
When the scan is complete, click on the Delete All button. Click the Close button when the deletion is complete.
The VCN you created is now deleted.
-