Create the Test Runner Microservice
Next, you will create the “Test Runner” microservice which you will use to simulate the ATM and Back Office. This service will send messages to the queues that you just created.
-
Create a new Java Project for the
transferservice.In the Explorer of VS Code open
Java Projectand click the plus sign to add a Java Project to your workspace.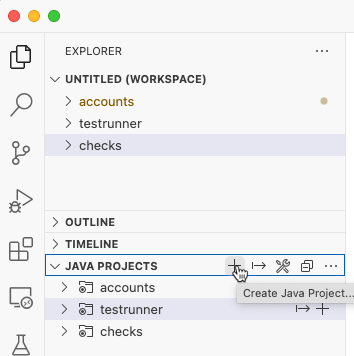
Select Spring Boot Project.
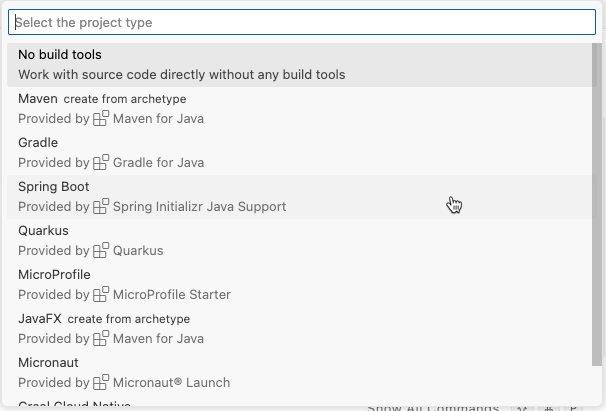
Select Maven Project.

Specify
3.3.4as the Spring Boot version.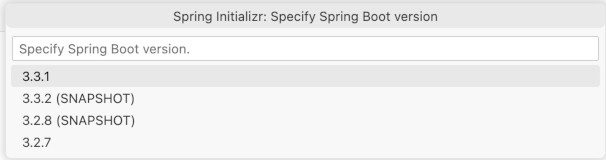
Use
com.exampleas the Group Id.
Enter
testrunneras the Artifact Id.
Use
JARas the Packaging Type.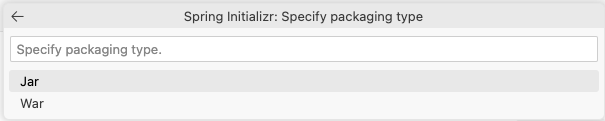
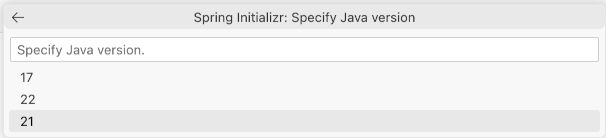
Select Java version
21.
Search for
Spring Weband press Enter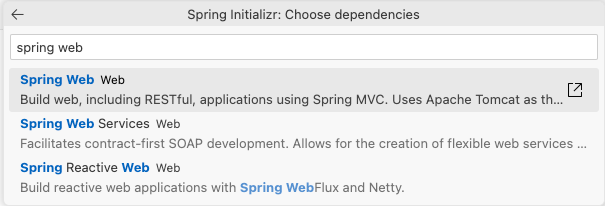
Press Enter to continue and create the Java Project

Select the
rootlocation for your project e.g. side by side with theaccountproject.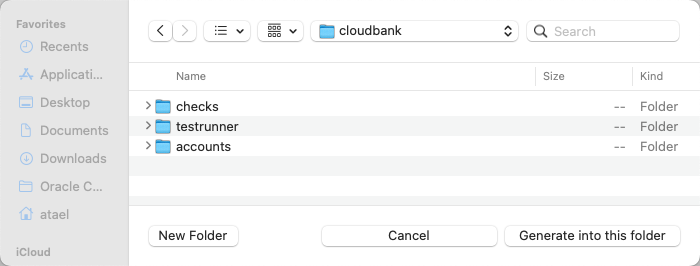
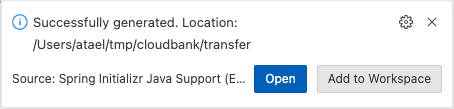
When the project opens click Add to Workspace
-
Modify the
pom.xmlfileOpen the
pom.xmlfile in thetestrunnerproject. This service will use the “Web” Spring Boot Starter which will allow it to expose REST endpoints and make REST calls to other services. It also uses the two Oracle Spring Boot Starters for UCP and Wallet to access the database: Add the following to the pom.xml:<dependency> <groupId>com.oracle.database.spring</groupId> <artifactId>oracle-spring-boot-starter-aqjms</artifactId> <version>23.4.0</version> </dependency> <dependency> <groupId>com.oracle.database.spring</groupId> <artifactId>oracle-spring-boot-starter-wallet</artifactId> <type>pom</type> <version>23.4.0</version> </dependency> <dependency> <groupId>org.projectlombok</groupId> <artifactId>lombok</artifactId> </dependency> -
Create the Spring Boot application YAML file
In the
testrunnerproject, rename the file calledapplication.propertiestoapplication.yamllocated in thesrc/main/resources. This will be the Spring Boot application configuration file:spring: application: name: testrunner datasource: url: ${spring.datasource.url} username: ${spring.datasource.username} password: ${spring.datasource.password}This is the Spring Boot application YAML file, which contains the configuration information for this service. In this case, you only need to provide the application name and the connection details for the database hosting the queues.
-
Create the main Spring Application class
In the
testrunnerdirectory, open the Java file calledTestrunnerApplication.javaand add this content. This is a standard Spring Boot main class, notice the@SpringBootApplicationannotation on the class. It also has the@EnableJmsannotation which tells Spring Boot to enable JMS functionality in this application. Themainmethod is a normal Spring Boot main method:package com.example.testrunner; import jakarta.jms.ConnectionFactory; import org.springframework.boot.SpringApplication; import org.springframework.boot.autoconfigure.SpringBootApplication; import org.springframework.context.annotation.Bean; import org.springframework.jms.annotation.EnableJms; import org.springframework.jms.core.JmsTemplate; import org.springframework.jms.support.converter.MappingJackson2MessageConverter; import org.springframework.jms.support.converter.MessageConverter; import org.springframework.jms.support.converter.MessageType; @SpringBootApplication @EnableJms public class TestrunnerApplication { public static void main(String[] args) { SpringApplication.run(TestrunnerApplication.class, args); } // Serialize message content to json using TextMessage @Bean public MessageConverter jacksonJmsMessageConverter() { MappingJackson2MessageConverter converter = new MappingJackson2MessageConverter(); converter.setTargetType(MessageType.TEXT); converter.setTypeIdPropertyName("_type"); return converter; } @Bean public JmsTemplate jmsTemplate(ConnectionFactory connectionFactory) { JmsTemplate jmsTemplate = new JmsTemplate(); jmsTemplate.setConnectionFactory(connectionFactory); jmsTemplate.setMessageConverter(jacksonJmsMessageConverter()); return jmsTemplate; } }In addition to the standard parts of a Spring Boot application class, you will add two beans that will be needed in this service. First, you need a
MessageConverterbean so that you can convert a Java object (POJO) into JSON format, and vice versa. This bean will be used to serialize and deserialize the objects you need to write onto the queues.The second bean you need is a
JmsTemplate. This is a standard Spring JMS bean that is used to access JMS functionality. You will use this bean to enqueue messages. Notice that this bean is configured to use theMessageConverterbean and that the JMSConnectionFactoryis injected. The Oracle Spring Boot Starter for AQ/JMS will create the JMSConnectionFactoryfor you.Note: The Oracle Spring Boot Starter for AQ/JMS will also inject a JDBC
Connectionbean which shares the same database transaction with the JMSConnectionFactory. This is not needed in this lab. The shared transaction enables you to write methods which can perform both JMS and JPA operations in an atomic transaction, which can be very helpful in some use cases and can dramatically reduce the amount of code needed to handle situations like duplicate message delivery or lost messages. -
Create the model classes
Create a new directory called
src/main/java/com/example/testrunner/modeland in this directory create two Java files. First,CheckDeposit.javawith this content. This class will be used to simulate the ATM sending the “deposit” notification:package com.example.testrunner.model; import lombok.AllArgsConstructor; import lombok.Data; import lombok.NoArgsConstructor; @Data @AllArgsConstructor @NoArgsConstructor public class CheckDeposit { private long accountId; private long amount; }Next,
Clearance.javawith this content. This class will be used to simulate the Back Office sending the “clearance” notification:package com.example.testrunner.model; import lombok.AllArgsConstructor; import lombok.Data; import lombok.NoArgsConstructor; @Data @AllArgsConstructor @NoArgsConstructor public class Clearance { private long journalId; } -
Create the controller
Create a new directory called
src/main/java/com/example/testrunner/controllerand in this directory create a new Java file calledTestRunnerController.javawith the following content. This class will have theRestControllerannotation so that it can expose REST APIs that you can call to trigger the simulation of the ATM and Back Office notifications. It will need theJmsTemplateto access JMS functionality, this can be injected with theAutoWiredannotation. Create two methods, one to send each notification:package com.example.testrunner.controller; import org.springframework.beans.factory.annotation.Autowired; import org.springframework.http.HttpStatus; import org.springframework.http.ResponseEntity; import org.springframework.jms.core.JmsTemplate; import org.springframework.web.bind.annotation.PostMapping; import org.springframework.web.bind.annotation.RequestBody; import org.springframework.web.bind.annotation.RequestMapping; import org.springframework.web.bind.annotation.RestController; import com.example.testrunner.model.CheckDeposit; import com.example.testrunner.model.Clearance; @RestController @RequestMapping("/api/v1/testrunner") public class TestRunnerController { @Autowired private JmsTemplate jmsTemplate; @PostMapping("/deposit") public ResponseEntity<CheckDeposit> depositCheck(@RequestBody CheckDeposit deposit) { jmsTemplate.convertAndSend("deposits", deposit); return new ResponseEntity<CheckDeposit>(deposit, HttpStatus.CREATED); } @PostMapping("/clear") public ResponseEntity<Clearance> clearCheck(@RequestBody Clearance clearance) { jmsTemplate.convertAndSend("clearances", clearance); return new ResponseEntity<Clearance>(clearance, HttpStatus.CREATED); } } -
Build a JAR file for deployment
Run the following command to build the JAR file.
$ mvn clean package -DskipTestsThe service is now ready to deploy to the backend.
-
Prepare the backend for deployment
The Oracle Backend for Microservices and AI admin service is not exposed outside the Kubernetes cluster by default. Oracle recommends using a kubectl port forwarding tunnel to establish a secure connection to the admin service.
Start a tunnel using this command in a new terminal window:
$ kubectl -n obaas-admin port-forward svc/obaas-admin 8080Get the password for the
obaas-adminuser. Theobaas-adminuser is the equivalent of the admin or root user in the Oracle Backend for Microservices and AI backend.$ kubectl get secret -n azn-server oractl-passwords -o jsonpath='{.data.admin}' | base64 -dStart the Oracle Backend for Microservices and AI CLI (oractl) in a new terminal window using this command:
$ oractl
 _   _           __    _    ___
/ \ |_)  _.  _. (_    /  |   |
\_/ |_) (_| (_| __)   \_ |_ _|_
========================================================================================
  Application Name: Oracle Backend Platform :: Command Line Interface
  Application Version: (1.3.0)
  :: Spring Boot (v3.3.3) ::

  Ask for help:
  - Slack: https://oracledevs.slack.com/archives/C03ALDSV272
  - email: obaas_ww@oracle.com

oractl:>
Connect to the Oracle Backend for Microservices and AI admin service using the
connectcommand. Enterobaas-adminand the username and use the password you collected earlier.oractl> connect username: obaas-admin password: ************** Credentials successfully authenticated! obaas-admin -> welcome to OBaaS CLI. oractl:> -
Create a binding for the Test Runner service
Create a binding so the Test Runner service can access the Oracle Autonomous Database as the
accountuser. Run this command to create the binding, and type in the password for theaccountuser when prompted. The password isWelcome1234##:oractl:> bind --app-name application --service-name testrunner --username account -
Deploy the Test Runner service
You will now deploy your Test Runner service to the Oracle Backend for Microservices and AI using the CLI. Run this command to deploy your service, make sure you provide the correct path to your JAR file. Note that this command may take 1-3 minutes to complete:
oractl:> deploy --app-name application --service-name testrunner --artifact-path /path/to/testrunner-0.0.1-SNAPSHOT.jar --image-version 0.0.1 --java-version ghcr.io/oracle/graalvm-native-image-obaas:21
uploading: testrunner/target/testrunner-0.0.1-SNAPSHOT.jarbuilding and pushing image...
creating deployment and service... successfully deployed
oractl:>
You can close the port forwarding session for the CLI now (just type a Ctrl+C in its console window).
-
Check that the
testrunnerservice is runningVerify that the testrunner application is up and running by running this command:
$ kubectl logs -n application svc/testrunnerThe output should be similar to this, look for
Started TestrunnerApplication2023-06-02 15:18:39.620 INFO 1 --- [ main] w.s.c.ServletWebServerApplicationContext : Root WebApplicationContext: initialization completed in 1806 ms 2023-06-02 15:18:40.915 INFO 1 --- [ main] o.s.b.w.embedded.tomcat.TomcatWebServer : Tomcat started on port(s): 8080 (http) with context path '' 2023-06-02 15:18:40.938 INFO 1 --- [ main] c.e.testrunner.TestrunnerApplication : Started TestrunnerApplication in 4.174 seconds (JVM running for 5.237) -
Test the endpoints
The Test Runner service is not exposed outside your Kubernetes cluster, so you must create a port-forwarding tunnel to access it. Create a tunnel using this command:
$ kubectl -n application port-forward svc/testrunner 8084:8080Call the deposit endpoint to send a deposit notification using this command:
$ curl -i -X POST -H 'Content-Type: application/json' -d '{"accountId": 2, "amount": 200}' http://localhost:8084/api/v1/testrunner/deposit
HTTP/1.1 201
Date: Wed, 31 May 2023 15:11:55 GMT
Content-Type: application/json
Transfer-Encoding: chunked
Connection: keep-alive

{"accountId":2,"amount":200}
Call the clear endpoint to send a clearance notification using this command. Note that you can use any
journalIdsince there is nothing receiving and processing these messages yet:$ curl -i -X POST -H 'Content-Type: application/json' -d '{"journalId": 4}' http://localhost:8084/api/v1/testrunner/clear HTTP/1.1 201 Date: Wed, 31 May 2023 15:12:54 GMT Content-Type: application/json Transfer-Encoding: chunked Connection: keep-alive {"journalId":4} -
Verify the expected messages are on the queues
Connect to the database as the
account(passwordWelcome12343##) and issue this SQL statement to check the payloads of the messages on the deposits queue:SQL> select qt.user_data.text_vc from deposits_qt qt; USER_DATA.TEXT_VC _______________________________ {"accountId":2,"amount":200}Issue this SQL statement to check the payloads of the messages on the clearances queue:
SQL> select qt.user_data.text_vc from clearances_qt qt;

USER_DATA.TEXT_VC
____________________
{"journalId":4}
That completes the Test Runner service. Next, you will build the Check Processing service which will receive these messages and process them.