Create the Check Processing Microservice
Next, you will create the “Check Processing” microservice which you will receive messages from the ATM and Back Office and process them by calling the appropriate endpoints on the Account service. This service will also introduce the use of service discovery using OpenFeign clients.
-
Create a new Java Project for the
checksservice.In the Explorer of VS Code open
Java Projectand click the plus sign to add a Java Project to your workspace.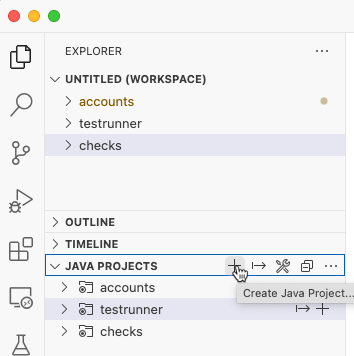
Select Spring Boot Project.
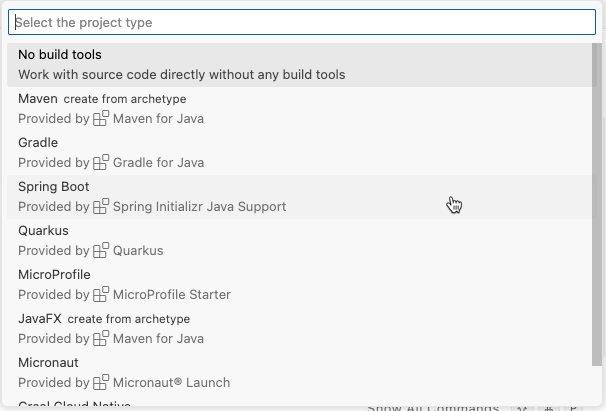
Select Maven Project.

Specify
3.3.4as the Spring Boot version.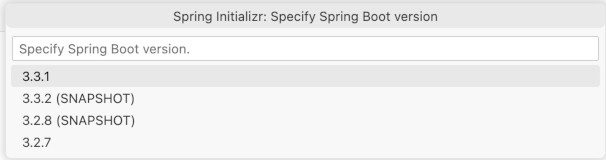
Use
com.exampleas the Group Id.
Enter
checksas the Artifact Id.
Use
JARas the Packaging Type.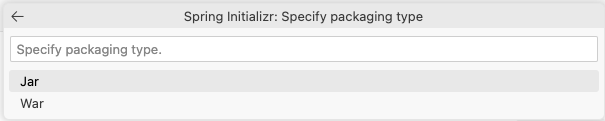
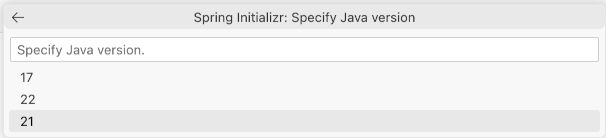
Select Java version
21.
Search for
Spring Web,Lombok,FeignandEureka Client. When all are selected press Enter.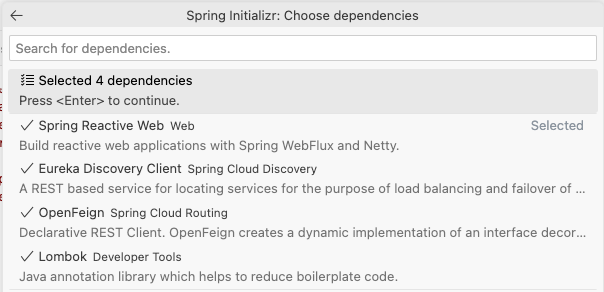
Press Enter to continue and create the Java Project

Select the
rootlocation for your project e.g. side by side with thechecks,testrunnerandaccountprojects.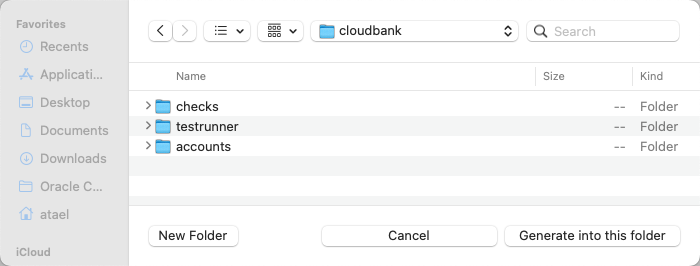
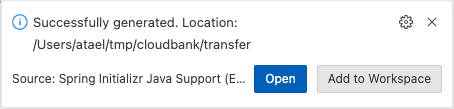
When the project opens click Add to Workspace
-
Update the
pom.xmlfile for Oracle Spring Boot StartersIt is very similar to the POM for the account and test runner services, however the dependencies are slightly different. This service will use the “Web” Spring Boot Starter which will allow it to expose REST endpoints and make REST calls to other services. It also uses the two Oracle Spring Boot Starters for UCP and Wallet to access the database. You will also add the Eureka client and OpenFeign dependencies to allow service discovery and client side load balancing. Open the
pom.xmland add the following to thepom.xml:<dependency> <groupId>com.oracle.database.spring</groupId> <artifactId>oracle-spring-boot-starter-aqjms</artifactId> <version>23.4.0</version> </dependency> <dependency> <groupId>com.oracle.database.spring</groupId> <artifactId>oracle-spring-boot-starter-wallet</artifactId> <type>pom</type> <version>23.4.0</version> </dependency> -
Create the Spring Boot application YAML file
In the
checksproject, rename the file calledapplication.propertiestoapplication.yamllocated in thesrc/main/resources. This will be the Spring Boot application configuration file. Add the following content:spring: application: name: checks datasource: url: ${spring.datasource.url} username: ${spring.datasource.username} password: ${spring.datasource.password} eureka: instance: hostname: ${spring.application.name} preferIpAddress: true client: service-url: defaultZone: ${eureka.service-url} fetch-registry: true register-with-eureka: true enabled: trueThis is the Spring Boot application YAML file, which contains the configuration information for this service. In this case, you need to provide the application name and the connection details for the database hosting the queues and the information for the Eureka server as the checks application will use a Feign client.
-
Create the main Spring Application class
In the
checksdirectory, create a new directory calledsrc/main/java/com/example/checksand in that directory, create a new Java file calledChecksApplication.javawith this content. This is a standard Spring Boot main class, notice theSpringBootApplicationannotation on the class. It also has theEnableJmsannotation which tells Spring Boot to enable JMS functionality in this application. Themainmethod is a normal Spring Boot main method:package com.example.checks; import jakarta.jms.ConnectionFactory; import org.springframework.boot.SpringApplication; import org.springframework.boot.autoconfigure.SpringBootApplication; import org.springframework.boot.autoconfigure.jms.DefaultJmsListenerContainerFactoryConfigurer; import org.springframework.cloud.openfeign.EnableFeignClients; import org.springframework.context.annotation.Bean; import org.springframework.jms.annotation.EnableJms; import org.springframework.jms.config.DefaultJmsListenerContainerFactory; import org.springframework.jms.config.JmsListenerContainerFactory; import org.springframework.jms.core.JmsTemplate; import org.springframework.jms.support.converter.MappingJackson2MessageConverter; import org.springframework.jms.support.converter.MessageConverter; import org.springframework.jms.support.converter.MessageType; @SpringBootApplication @EnableFeignClients @EnableJms public class ChecksApplication { public static void main(String[] args) { SpringApplication.run(ChecksApplication.class, args); } @Bean // Serialize message content to json using TextMessage public MessageConverter jacksonJmsMessageConverter() { MappingJackson2MessageConverter converter = new MappingJackson2MessageConverter(); converter.setTargetType(MessageType.TEXT); converter.setTypeIdPropertyName("_type"); return converter; } @Bean public JmsTemplate jmsTemplate(ConnectionFactory connectionFactory) { JmsTemplate jmsTemplate = new JmsTemplate(); jmsTemplate.setConnectionFactory(connectionFactory); jmsTemplate.setMessageConverter(jacksonJmsMessageConverter()); return jmsTemplate; } @Bean public JmsListenerContainerFactory<?> factory(ConnectionFactory connectionFactory, DefaultJmsListenerContainerFactoryConfigurer configurer) { DefaultJmsListenerContainerFactory factory = new DefaultJmsListenerContainerFactory(); // This provides all boot's default to this factory, including the message converter configurer.configure(factory, connectionFactory); // You could still override some of Boot's default if necessary. return factory; } }As in the Test Runner service, you will also need the
MessageConverterandJmsTemplatebeans. You will also need an additional bean in this service, theJmsListenerConnectionFactory. This bean will be used to create listeners that receive messages from JMS queues. Note that the JMSConnectionFactoryis injected as in the Test Runner service. -
Create the model classes
Create a directory called
src/main/java/com/example/testrunner/modeland in that directory create the two model classes.Note: These are in the
testrunnerpackage, not thecheckspackage! The classes used for serialization and deserialization of the messages need to be the same so that theMessageConverterknows what to do.First,
CheckDeposit.javawith this content:package com.example.testrunner.model; import lombok.AllArgsConstructor; import lombok.Data; import lombok.Getter; import lombok.NoArgsConstructor; import lombok.Setter; import lombok.ToString; @Data @AllArgsConstructor @NoArgsConstructor @Getter @Setter @ToString public class CheckDeposit { private long accountId; private long amount; }And then,
Clearance.javawith this content:package com.example.testrunner.model; import lombok.AllArgsConstructor; import lombok.Data; import lombok.Getter; import lombok.NoArgsConstructor; import lombok.Setter; import lombok.ToString; @Data @AllArgsConstructor @NoArgsConstructor @Getter @Setter @ToString public class Clearance { private long journalId; } -
Create the OpenFeign clients
OpenFeign In this step you will use OpenFeign to create a client. OpenFeign allows you to look up an instance of a service from the Spring Eureka Service Registry using its key/identifier, and will create a client for you to call endpoints on that service. It also provides client-side load balancing. This allows you to easily create REST clients without needing to know the address of the service or how many instances are running.
Create a directory called
src/main/java/com/example/checks/clientsand in this directory create a new Java interface calledAccountClient.javato define the OpenFeign client for the account service. Here is the content:package com.example.checks.clients; import org.springframework.cloud.openfeign.FeignClient; import org.springframework.web.bind.annotation.PathVariable; import org.springframework.web.bind.annotation.PostMapping; import org.springframework.web.bind.annotation.RequestBody; @FeignClient("account") public interface AccountClient { @PostMapping("/api/v1/account/journal") void journal(@RequestBody Journal journal); @PostMapping("/api/v1/account/journal/{journalId}/clear") void clear(@PathVariable long journalId); }In the interface, you define methods for each of the endpoints you want to be able to call. As you see, you specify the request type with an annotation, the endpoint path, and you can specify path variables and the body type. You will need to define the
Journalclass.In the same directory, create a Java class called
Journal.javawith the following content:package com.example.checks.clients; import lombok.AllArgsConstructor; import lombok.Data; import lombok.NoArgsConstructor; @Data @AllArgsConstructor @NoArgsConstructor public class Journal { private long journalId; private String journalType; private long accountId; private String lraId; private String lraState; private long journalAmount; public Journal(String journalType, long accountId, long journalAmount) { this.journalType = journalType; this.accountId = accountId; this.journalAmount = journalAmount; this.lraId = "0"; this.lraState = ""; } }Note: The
lraIdandlraStatefield are set to reasonable default values, since we are not going to be using those fields in this lab. -
Create the services
Next, you will create a service to implement the methods defined in the OpenFeign client interface. Create a directory called
src/main/java/com/example/checks/serviceand in that directory create a Java class calledAccountService.javawith this content. The services are very simple, you just need to use theaccountClientto call the appropriate endpoint on the Account service and pass through the data. Note theAccountClientwill be injected by Spring Boot because of theRequiredArgsConstructorannotation, which saves some boilerplate constructor code:package com.example.checks.service; import org.springframework.stereotype.Service; import com.example.checks.clients.AccountClient; import com.example.checks.clients.Journal; import com.example.testrunner.model.Clearance; import lombok.RequiredArgsConstructor; @Service @RequiredArgsConstructor public class AccountService { private final AccountClient accountClient; public void journal(Journal journal) { accountClient.journal(journal); } public void clear(Clearance clearance) { accountClient.clear(clearance.getJournalId()); } } -
Create the Check Receiver controller
This controller will receive messages on the
depositsJMS queue and process them by calling thejournalmethod in theAccountServicethat you just created, which will make a REST POST to the Account service, which in turn will write the journal entry into the accounts’ database.Create a directory called
src/main/java/com/example/checks/controllerand in that directory, create a new Java class calledCheckReceiver.javawith the following content. You will need to inject an instance of theAccountService(in this example the constructor is provided, so you can compare to the annotation used previously). Implement a method to receive and process the messages. To receive messages from the queues, use theJmsListenerannotation and provide the queue and factory names. This method should call thejournalmethod on theAccountServiceand pass through the necessary data. Also, notice that you need to add theComponentannotation to the class so that Spring Boot will load an instance of it into the application:package com.example.checks.controller; import org.springframework.jms.annotation.JmsListener; import org.springframework.stereotype.Component; import com.example.checks.clients.Journal; import com.example.checks.service.AccountService; import com.example.testrunner.model.CheckDeposit; import lombok.extern.slf4j.Slf4j; @Slf4j @Component public class CheckReceiver { private AccountService accountService; public CheckReceiver(AccountService accountService) { this.accountService = accountService; } @JmsListener(destination = "deposits", containerFactory = "factory") public void receiveMessage(CheckDeposit deposit) { log.info("Received deposit <" + deposit + ">"); accountService.journal(new Journal("PENDING", deposit.getAccountId(), deposit.getAmount())); } } -
Create the Clearance Receiver controller
In the same directory, create another Java class called
ClearanceReceiver.javawith the following content. This is very similar to the previous controller, but listens to theclearancesqueue instead, and calls theclearmethod on theAccountService:package com.example.checks.controller; import org.springframework.jms.annotation.JmsListener; import org.springframework.stereotype.Component; import com.example.checks.service.AccountService; import com.example.testrunner.model.Clearance; import lombok.extern.slf4j.Slf4j; @Slf4j @Component public class ClearanceReceiver { private AccountService accountService; public ClearanceReceiver(AccountService accountService) { this.accountService = accountService; } @JmsListener(destination = "clearances", containerFactory = "factory") public void receiveMessage(Clearance clearance) { log.info("Received clearance <" + clearance + ">"); accountService.clear(clearance); } }That completes the Check Processing service. Now you can deploy and test it.
-
Build a JAR file for deployment
Run the following command to build the JAR file.
$ mvn clean package -DskipTestsThe service is now ready to deploy to the backend.
-
Prepare the backend for deployment
The Oracle Backend for Microservices and AI admin service is not exposed outside the Kubernetes cluster by default. Oracle recommends using a kubectl port forwarding tunnel to establish a secure connection to the admin service.
Start a tunnel using this command in a new terminal window:
$ kubectl -n obaas-admin port-forward svc/obaas-admin 8080Get the password for the
obaas-adminuser. Theobaas-adminuser is the equivalent of the admin or root user in the Oracle Backend for Microservices and AI backend.$ kubectl get secret -n azn-server oractl-passwords -o jsonpath='{.data.admin}' | base64 -dStart the Oracle Backend for Microservices and AI CLI (oractl) in a new terminal window using this command:
$ oractl
 _   _           __    _    ___
/ \ |_)  _.  _. (_    /  |   |
\_/ |_) (_| (_| __)   \_ |_ _|_
========================================================================================
  Application Name: Oracle Backend Platform :: Command Line Interface
  Application Version: (1.3.0)
  :: Spring Boot (v3.3.3) ::

  Ask for help:
  - Slack: https://oracledevs.slack.com/archives/C03ALDSV272
  - email: obaas_ww@oracle.com

oractl:>
Connect to the Oracle Backend for Microservices and AI admin service using the
connectcommand. Enterobaas-adminand the username and use the password you collected earlier.oractl> connect username: obaas-admin password: ************** Credentials successfully authenticated! obaas-admin -> welcome to OBaaS CLI. oractl:> -
Create a binding for the Check service
Create a binding so the Check service can access the Oracle Autonomous Database as the
accountuser. Run this command to create the binding, and type in the password for theaccountuser when prompted. The password isWelcome1234##:oractl:> bind --app-name application --service-name checks --username account -
Deploy the Check service
You will now deploy your Check service to the Oracle Backend for Microservices and AI using the CLI. Run this command to deploy your service, make sure you provide the correct path to your JAR file. Note that this command may take 1-3 minutes to complete:
oractl:> deploy --app-name application --service-name checks --artifact-path /path/to/checks-0.0.1-SNAPSHOT.jar --image-version 0.0.1 --java-version ghcr.io/oracle/graalvm-native-image-obaas:21
uploading: testrunner/target/testrunner-0.0.1-SNAPSHOT.jarbuilding and pushing image...
creating deployment and service... successfully deployed
oractl:>
You can close the port forwarding session for the CLI now (just type a Ctrl+C in its console window).
-
Testing the service
Since you had messages already sitting on the queues, the service should process those as soon as it starts. You can check the service logs to see the log messages indicating this happened using this command:
$ kubectl -n application logs svc/checks
( ... lines omitted ...)
Received deposit <CheckDeposit(accountId=2, amount=200)>
Received clearance <Clearance(journalId=4)>
( ... lines omitted ...)
You can also look at the journal table in the database to see the results.