Configure SSL certificates
Secure Socket Layer (SSL) provides a secured communication for data sent over unsecured networks. In an SSL termination scenario, you can configure SSL between the client browser and the load balancer in your Oracle SOA Suite instance to ensure that applications are accessed securely. In an SSL end-to-end scenario, an Oracle SOA Suite domain is configured to use a self-signed SSL certificate that was generated during domain creation. Clients will typically receive a message indicating that the signing CA for the certificate is unknown and not trusted.
This section provides details on how to create and configure custom (CA-issued) SSL certificates for Oracle SOA Suite domains in both SSL end-to-end and SSL termination scenarios.
- Create custom SSL certificates in an SSL end-to-end scenario
- Create custom SSL certificates in an SSL termination at a load balancer
Create custom SSL certificates in an SSL end-to-end scenario
These steps describe how to replace the identity and trust keystore of an Oracle SOA Suite domain with a custom identity and custom trust keystore and register with digital certificates procured from any third party authority.
In this documentation, the registered domain is mydomain.com and the CA signed certificates are taken from mydomain.
Create a custom identity and custom trust keystore and generate a certificate signing request (CSR)
To create a custom identity and custom trust keystore and generate a CSR:
-
Log in to the Enterprise Manager (EM) Console and access the Keystores page by opening WebLogic Domain > Security > Keystore.
-
Under the
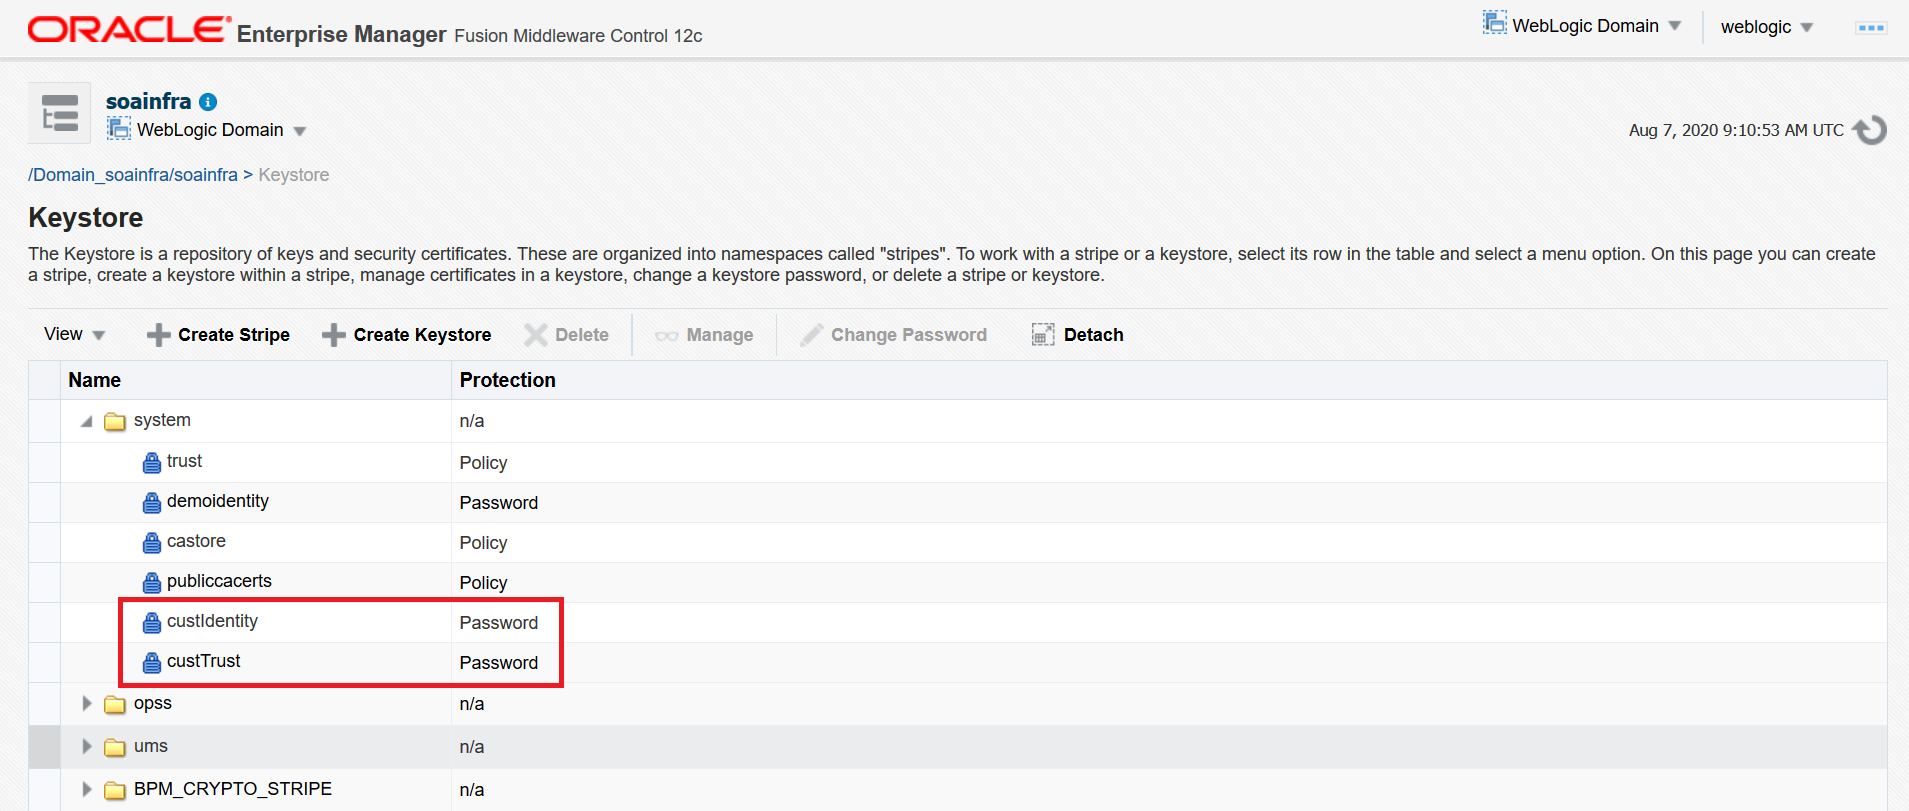
systemstripe, click Create Keystore to create a new keystore. -
Provide the following details for custom identity:
Keystore Name: custIdentity Protection: Select the Password option. Keystore Password: Enter the password. Confirm Password: Confirm the password.
-
Click Create Keystore to create another new keystore.
-
Provide the following details for custom trust:
- Keystore Name: custTrust
- Protection: Select the Password option.
- Keystore Password: Enter the password.
- Confirm Password: Confirm the password.
-
Click Manage on the custIdentity keystore name and provide the password that you specified previously.
-
Click Generate Keypair to create a new key pair, and provide the following details for custIdentity with alias as custIdentity and password:
- Alias Name: custIdentity
- Common Name: Common name, for example, soak8s.mydomain.com (Registered domain name)
- Organizational Unit: Name of the organizational unit
- Organization: Organization name
- Enter City, State, and Country names
- Key Type: RSA
- Key Size: 2048
- Password: Enter the password
-
Click OK to generate the keypair.
-
Select the newly created keypair and click Generate CSR.
-
Export the created CSR, share it with Certificate Authority, such as digicert CA, and get root, intermediate, and signed certificates. The certificate is generated for the domain name you used in the Common Name field.
It is not mandatory to create identity and trust keystore under the system stripe that comes with default provisioning. You can create a new custom stripe and create identity and trust keystores under it.
Share the CSR with CA to get CA-signed certificates
-
Select the new keypair under the
custIdentityand click Generate CSR. -
Export the created CSR and share it with the Certificate Authority and get root, intermediate, and signed certificates. The certificate is generated for the domain name you used in the Common Name field.
-
Download the certificates shared in the zip file from the CA. The zip file contains one of the following:
- the three certificates individually - root, intermediate, and signed certificates
- root and intermediate certificates in one chain and signed certificate separately
-
Double-click the certificate chain for root and intermediate certificates. You can see the full chain when you click on the certification path.
-
Extract the root and intermediate certificates individually by going to the certification path, select the certificate to be extracted (root or intermediate) and click View Certificate.
-
On the View Certificates pop-up, select the Details tab and click Copy to File.
-
In the Certificate Export wizard, click Next, then select Base 64 encoded X.509 (CER), and then click Next. Export the certificate.
-
Name the exported certificate as root and intermediate certificates respectively.
Import CA certificates
Certificate Authority (CA) certificates must be imported in the following order: first the signed server certificate, then the intermediate certificate, and then the root certificate.
To import CA certificates:
-
Use WLST commands to import the certificate chain in the identity keystore (custIdentity):
a. Combine the three certificates into a single text file called
chain.pemin the following order: signed server certificate, followed by intermediate certificate, followed by root certificate:-----BEGIN CERTIFICATE----- <signed server certificate> -----END CERTIFICATE----- -----BEGIN CERTIFICATE----- <intermediate certificate> -----END CERTIFICATE----- -----BEGIN CERTIFICATE----- <root certificate> -----END CERTIFICATE-----b. Place the
chain.pemin/tmpfrom where you will be executing thekubectlcommands (for example, on the master node).c. Enter the following command to change the file ownership to
1000:1000user/group:$ sudo chown 1000:1000 /tmp/chain.pemd. Copy
/tmp/chain.peminto the Administration Server pod (for example,soainfra-adminserver):$ kubectl cp /tmp/chain.pem soans/soainfra-adminserver:/tmp/chain.peme. Exec into the Administration Server pod to perform all operations:
$ kubectl exec -it soainfra-adminserver -n soans -- bashf. Start WLST and access the Oracle Platform Security Services (OPSS) key store service:
$ cd /u01/oracle/oracle_common/common/bin/
$ ./wlst.sh
:
:
wls:/offline> connect("weblogic","Welcome1","t3://soainfra-adminserver:7001")
:
:
wls:/soainfra/serverConfig/> svc = getOpssService(name='KeyStoreService')
g. Use the WLST
importKeyStoreCertificatecommand to importchain.pem:svc.importKeyStoreCertificate(appStripe='stripe', name='keystore', password='password', alias='alias', keypassword='keypassword', type='entrytype',filepath='absolute_file_path')For example:
wls:/soainfra/serverConfig/> svc.importKeyStoreCertificate(appStripe='system', name='custIdentity', password=welcome1, alias='custIdentity', keypassword='welcome1', type='CertificateChain', filepath='/tmp/chain.pem')e. Exit WLST:
exit() -
Use Oracle Enterprise Manager to import the certificate chain into the trust keystore (
custTrust):a. Log in to the Enterprise Manager Console and access the Keystores page by opening WebLogic domain > Security > Keystore.
b. Select the trust keystore (
custTrust) and click Manage.c. Click Import Certificate and import the certificates in this order:
-
the signed server certificate as a trusted certificate (alias
mySignedCert) -
the intermediate certificate from CA as a trusted certificate (alias
myInterCA) -
the root certificate from CA as a trusted certificate (alias
myRootCA)
-
Synchronize the local keystore with the security store
Synchronize keystores to synchronize information between the domain home and the Oracle Platform Security Services (OPSS) store in the database.
To synchronize keystores:
- Exec into the Administration server pod (for example,
soainfra-adminserver):$ kubectl exec -it soainfra-adminserver -n soans -- bash - Start WLST and access the Oracle Platform Security Services (OPSS) keystore service:
$ cd /u01/oracle/oracle_common/common/bin/ $ ./wlst.sh : : wls:/offline> connect("weblogic","Welcome1","t3://soainfra-adminserver:7001") : : wls:/soainfra/serverConfig/> svc = getOpssService(name='KeyStoreService') - Enter the following commands to synchronize the custom identity and custom trust keystores:
Note: This step is necessary only if you are using the
systemstripe. You do not need to synchronize the keystores if you are using a custom stripe.wls:/soainfra/serverConfig/> svc.listKeyStoreAliases(appStripe="system", name="custIdentity", password=" ****", type="*") wls:/soainfra/serverConfig/> syncKeyStores(appStripe='system',keystoreFormat='KSS') wls:/soainfra/serverConfig/> svc.listKeyStoreAliases (appStripe="system", name="myKSSTrust", password="****", type="*") wls:/soainfra/serverConfig/> syncKeyStores(appStripe='system',keystoreFormat='KSS')
Update the WebLogic keystores with custom identity and trust
To update the WebLogic keystores with custom identity and custom trust:
-
In the WebLogic Server Administration Console, open Servers > AdminServer > Configurations > Keystores tab.
-
Change the Keystores to Custom Identity and Custom Trust and Save.
-
Provide the values for Custom Identity:
- Custom Identity Keystore:
kss://system/custidentity - Custom Identity KeyStore Type:
KSS - Custom Identity PassPhrase: enter password given while creating the
custIdentitykeystore. - Confirm Custom Identity PassPhrase: reenter the password.
- Custom Identity Keystore:
-
Provide the values for Custom Trust:
- Custom Trust Keystore:
kss://system/custTrust - Custom Trust KeyStore Type:
KSS - Custom Trust PassPhrase: enter password given while creating the
custTrustkeystore. - Confirm Custom Trust PassPhrase: reenter the password.
- Custom Trust Keystore:
-
Click Save and then Activate changes.
-
Open the SSL tab and provide the following details:
- Private Key Alias:
custIdentity(this is the alias given while creating the key pair in thecustIdentitykeystore.) - Private Key PassPhrase: enter password given while creating the key pair under the
custIdentitykeystore. - Confirm Private Key PassPhrase: reenter the password.
- Private Key Alias:
-
In the Advanced section, change Hostname Verification to None. Click Save and Activate changes.
-
Repeat steps 1 to 7 for all Managed Servers.
-
Restart the domain.
-
Once the servers are up and running, you can check if the SSL URLs show the updated certificates.
For more details, refer to:
Create custom SSL certificates in an SSL termination at a load balancer
This section provides references to configure a custom SSL certificate at a load balancer.
There are multiple CA vendors in the marketplace today, each offering different levels of service at varying price points. Research and choose a CA vendor that meets your service-level and budget requirements.
For a CA vendor to issue you a CA-issued SSL certificate, you must provide the following information:
- Your custom domain name.
- Public information associated with the domain confirming you as the owner.
- Email address associated with the custom domain for verification.
Create a Certificate Signing Request (CSR) for your load balancer and submit the CSR to the CA vendor. After receiving the CA-issued certificate, refer to Administering Oracle SOA Cloud Service to import the CA-issued SSL certificate to the load balancer. If you are using openssl to create the certificates, you can refer to Manually Generate a Certificate Signing Request (CSR) Using OpenSSL to submit the CSR to the CA vendor.