![]()
Building Multi-Cloud Apps
Initial setup on Microsoft Azure: Creating VNet with subnets and virtual network gateway
Introduction
In this lab you will prepare your Azure account for hosting .NET application. You will first create an Azure Virtual Network (VNet) with the application subnet , that host a virtual machine. Then, in order to enable private connection to the Autonomous Database, which resides in Oracle Cloud Infrastructure, you will create an Azure Virtual Network Gateway The last step of the initial configuration on Azure side is to create a VM and connect to it. You will use it later for developing and deploying .NET application.
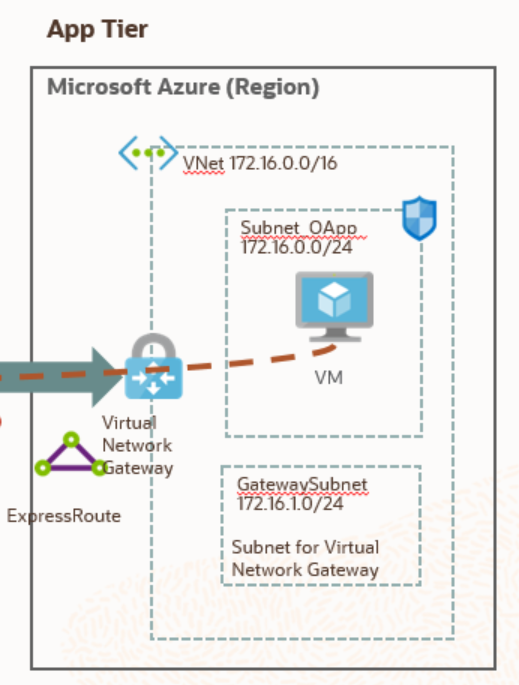
Here is the architecture, which you are going to create.
Lets get started!
Steps
STEP 1: Create an Azure Virtual Network (VNet)
-
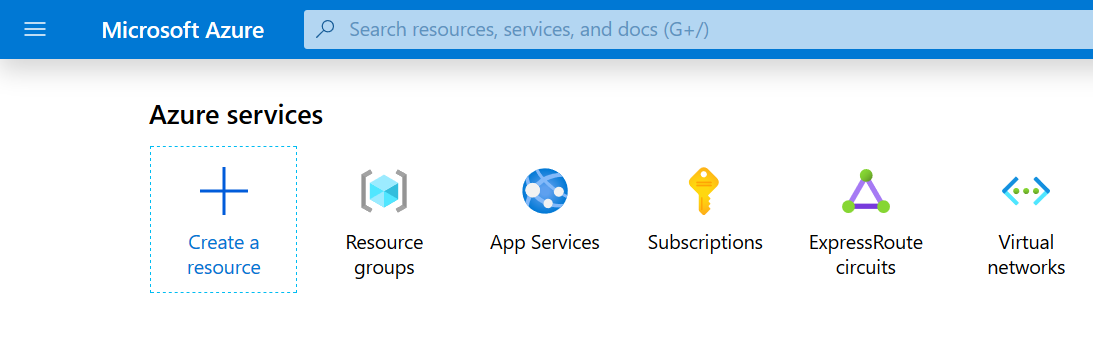
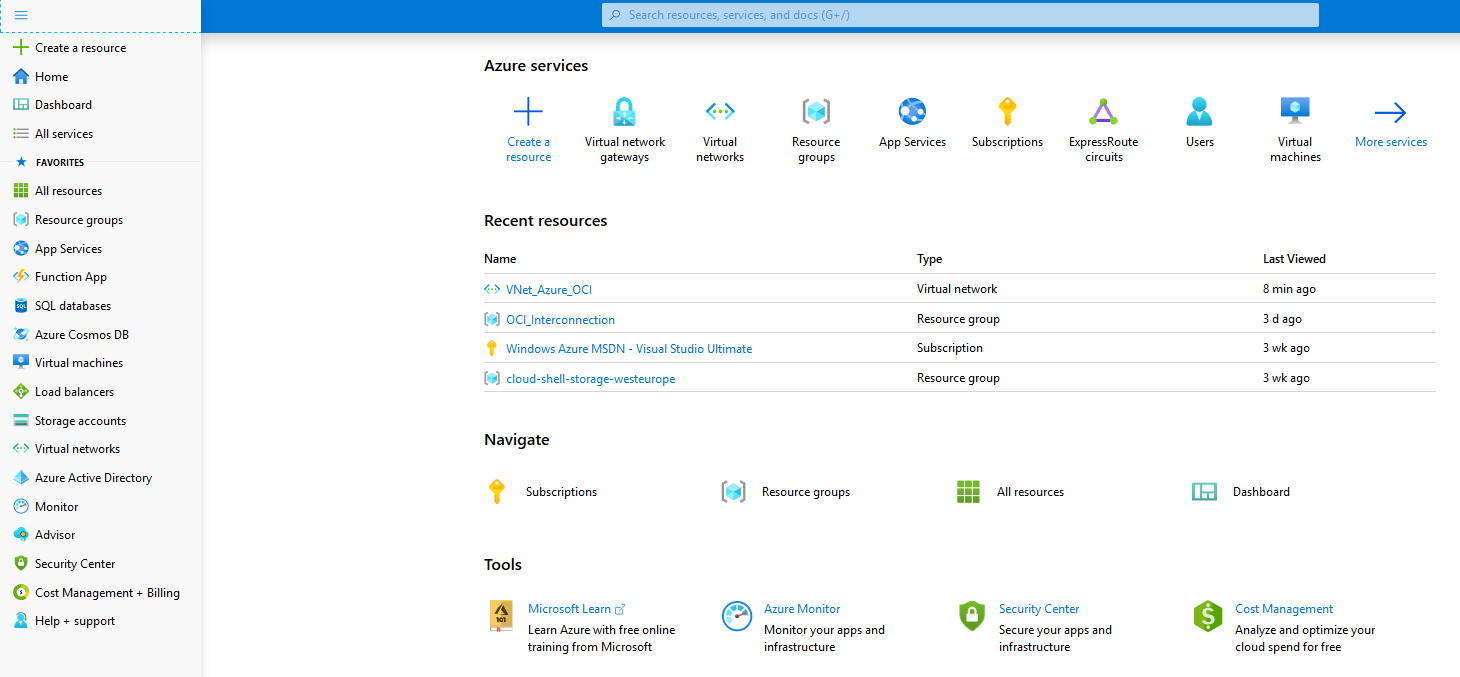
Sign in to the Azure portal.
On the upper-left side of the screen, select Create a resource > Networking > Virtual network.
-
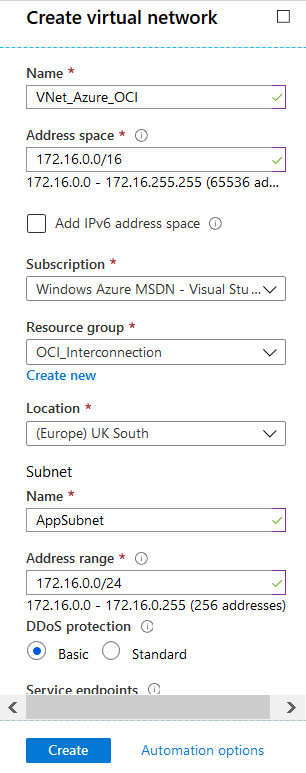
Once you clicked on Virtual network, provide the required information:
-
Enter a Name, such as VNet_Azure_OCI.
-
Provide an Address space for virtual network in CIDR notation, such as 172.16.0.0/16.
-
Choose your Subscription (Free Trial, Pay-As-You-Go, Other).
-
Under Resource Group, click Create New and enter a Name, such as OCI_Interconnection.
See more about Resource groups.
-
Select Location for your VNet.
Keep in mind, that OCI/Azure Interconnections is only available at the moment in:
-
(Europe) UK South
-
(US) East US
-
(Canada) Canada Central
-
-
Enter a Name of the Subnet, such as AppSubnet.
-
Provide an Address range for a subnet in CIDR notation, such as 172.16.0.0/24.
It must be contained by the address space of the virtual network.
-
Leave the rest of settings to default.
-
Click Create.
-
-
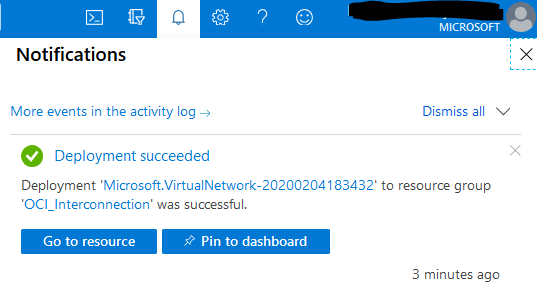
Once your VNet with a Subnet is created, you will get notification on the upper-right side of the screen:
This creates a virtual network (VNet) and a subnet, which are scoped to a single region within an Azure. Resources within a virtual network can communicate outbound with the internet, by default. An inbound connection can be achieved by attaching a public IP with the resource. You can also connect a virtual network with your on-premises network or other public clouds like Oracle Cloud Infrastructure by using Azure ExpressRoute. This connection is private and traffic does not go over the internet.
In order to create the interconnect between Azure virtual network and Oracle Cloud Infrastructure virtual cloud network (VCN), you must create a virtual network gateway. A virtual network gateway serves two purposes: exchange IP routes between the networks and route network traffic.
STEP 2: Create a Virtual Network Gateway
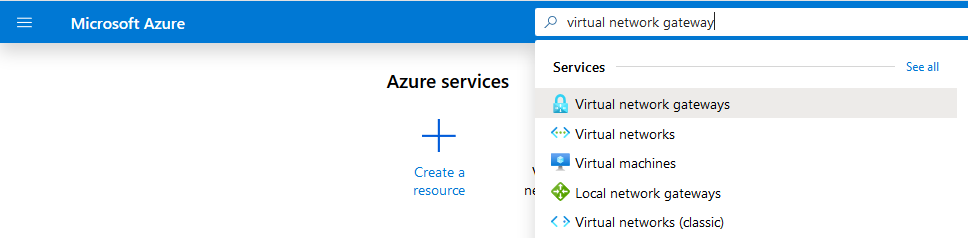
- On the upper-left side of the screen, search for ‘virtual network gateway’ resource and click on it. This is an easy way to search for any resource.
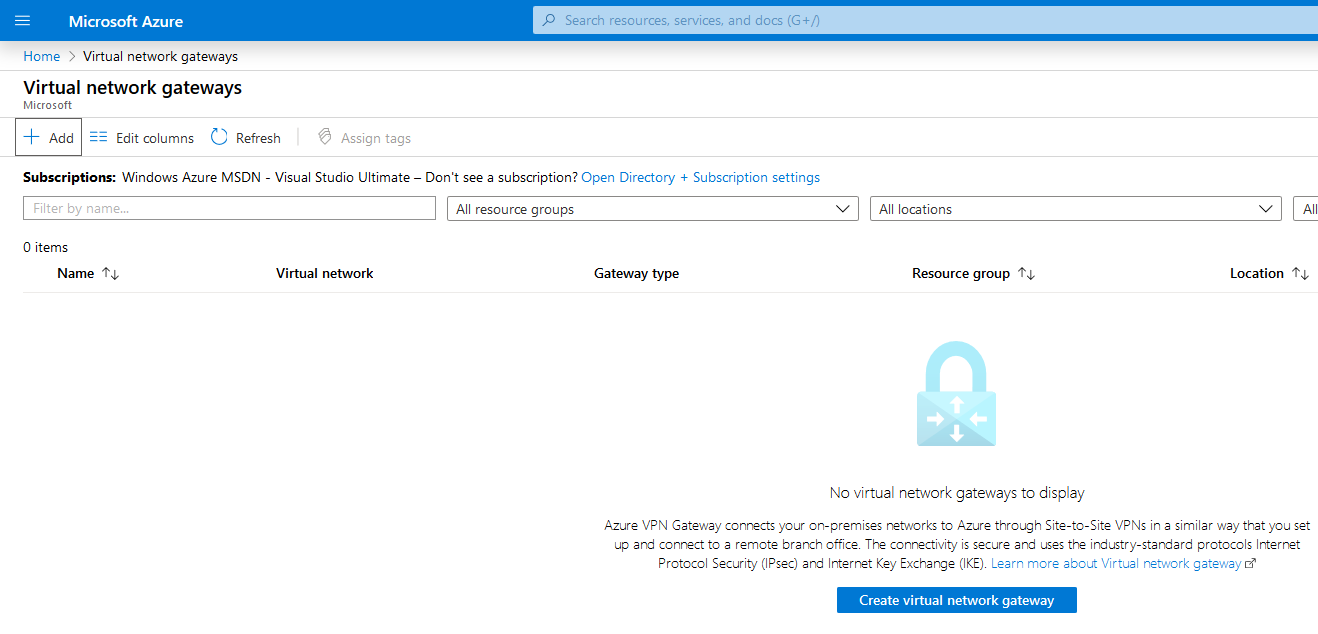
- Click Add button on the left or Create virtual network gateway button in the middle of the Virtual network gateways screen:
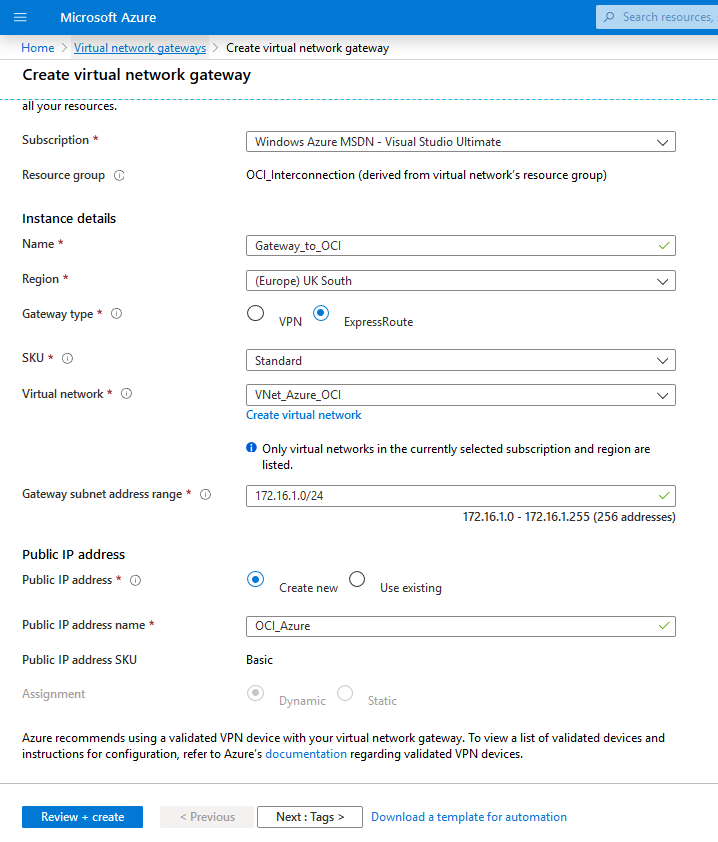
- Once you are on the Create virtual network gateway page, provide the required details:
- Select your Subscription in Project Details section (if you have just one, it will be populated automatically).
- In the **Instance Details **section, please provide:
- A Name for a gateway, such as Gateway_to_OCI.
- Select your Region, (Europe) UK South in this example.
- Select ExpressRoute as a Gateway type.
- Leave SKU type as Standard in order to don’t generate big charges.
- Select the Virtual Network you just created in the previous step: VNet_Azure_OCI.
- A Gateway subnet address range should be automatically populated as 172.16.1.0/24. You can change it, if you want.
- In the Public IP address section, please provide:
- Select Create new as the Public IP address.
- Enter Public IP address name, such as OCI_Azure.
- Click Review + create button at the bottom of the screen.
- Confirm a Virtual Gateway creation by clicking on Create button at the bottom of the screen.
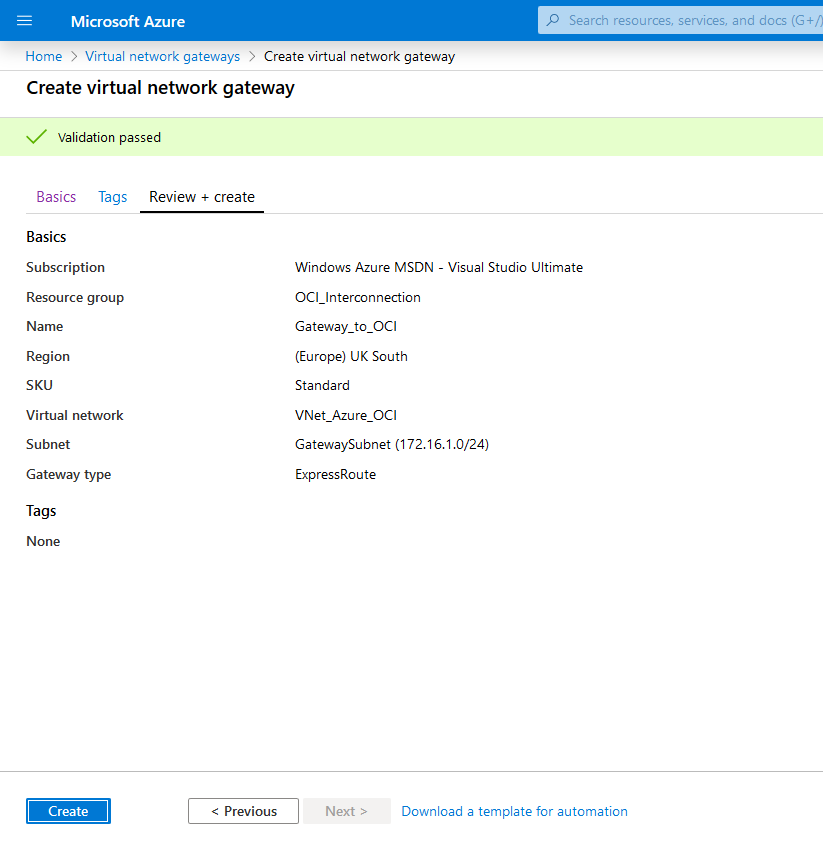
It make take up to 15-20 minutes for creating the virtual network gateway.
STEP 3: Create a Virtual Machine and connect to it
In the meantime, lets setup a virtual machine in your virtual network, where you will deploy your .NET application and test the connectivity to the database, once the interconnect is successfully setup.
- On the upper-left side of the screen click on hamburger menu, select Create a resource (you can see also Create a resource button under Azure services in the middle of the screen if you are in Azure Home screen).
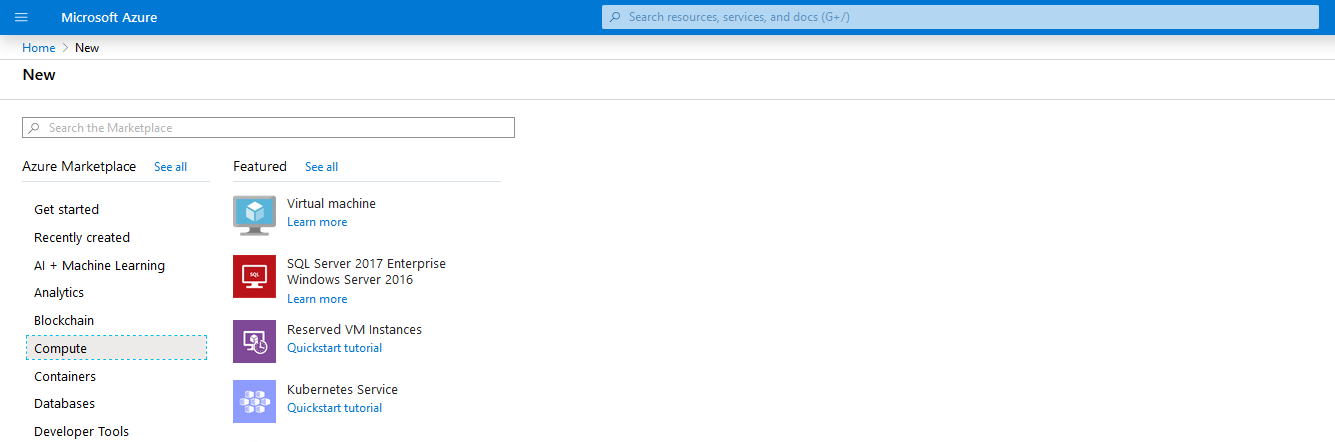
- On the next screen, please select Compute and then Virtual Machine.
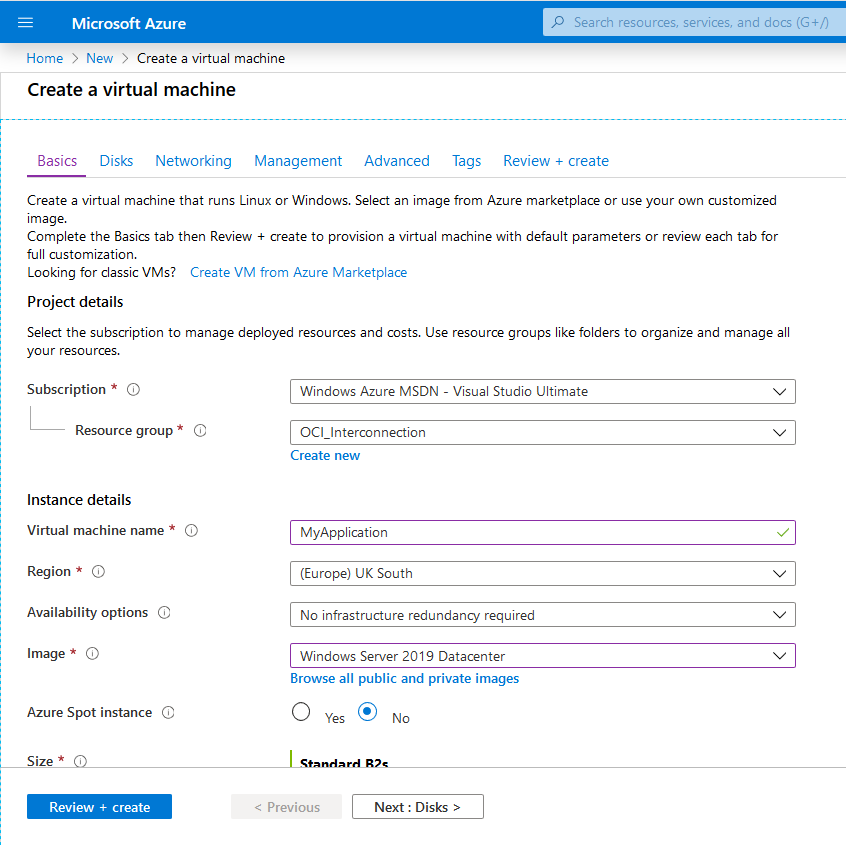
- On the Create a virtual machine screen provide the following details:
- Select your Subscription in case you have many. Otherwise it will be selected automatically.
- Select your Resource Group: OCI_Interconnection.
- Enter a Virtual machine name, such as MyApplication.
- Select your Region; (Europe) UK South in this example.
- Select Image as Windows Server 2019 Datacenter.
- Availability Options and Azure Spot Instance leave as default.
-
Scroll down and provide the rest of the details:
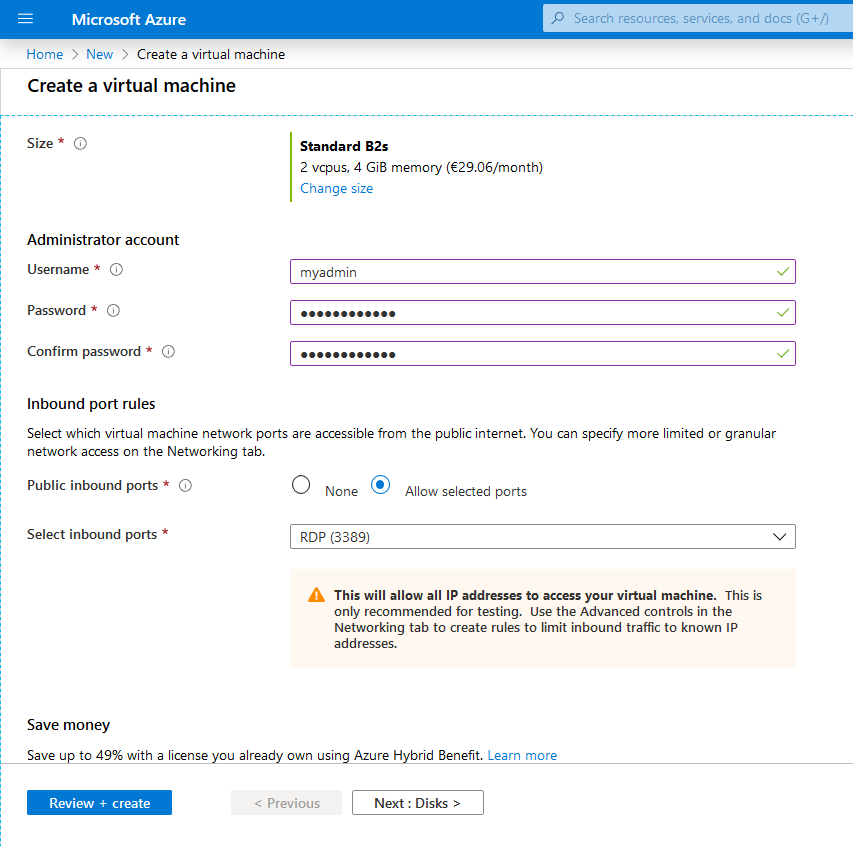
- Change the Size to Standard B2s.
-
Specify the username and password for the Administrator Account as the below example:
Username: myadmin
Password: WElcome_123#
- Select RDP (3389) as the only allowed inbound port at the moment.
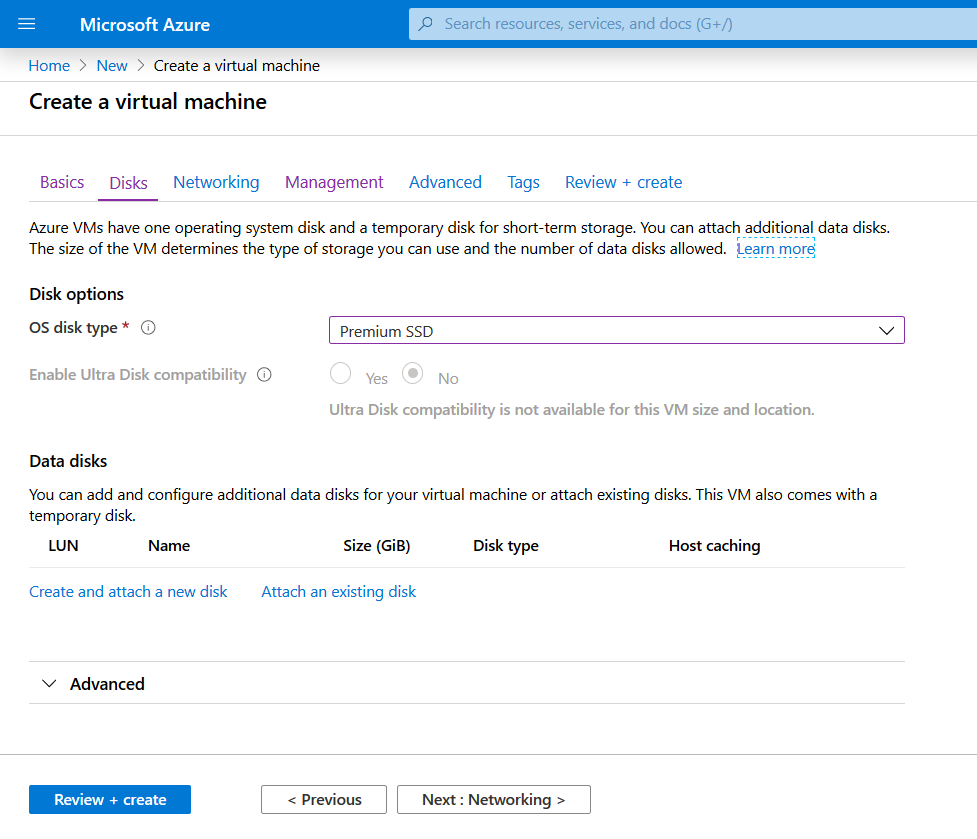
- Click Next : Disks > at the bottom of the screen.
- Leave the Disk Option as default and click Next : Networking >.
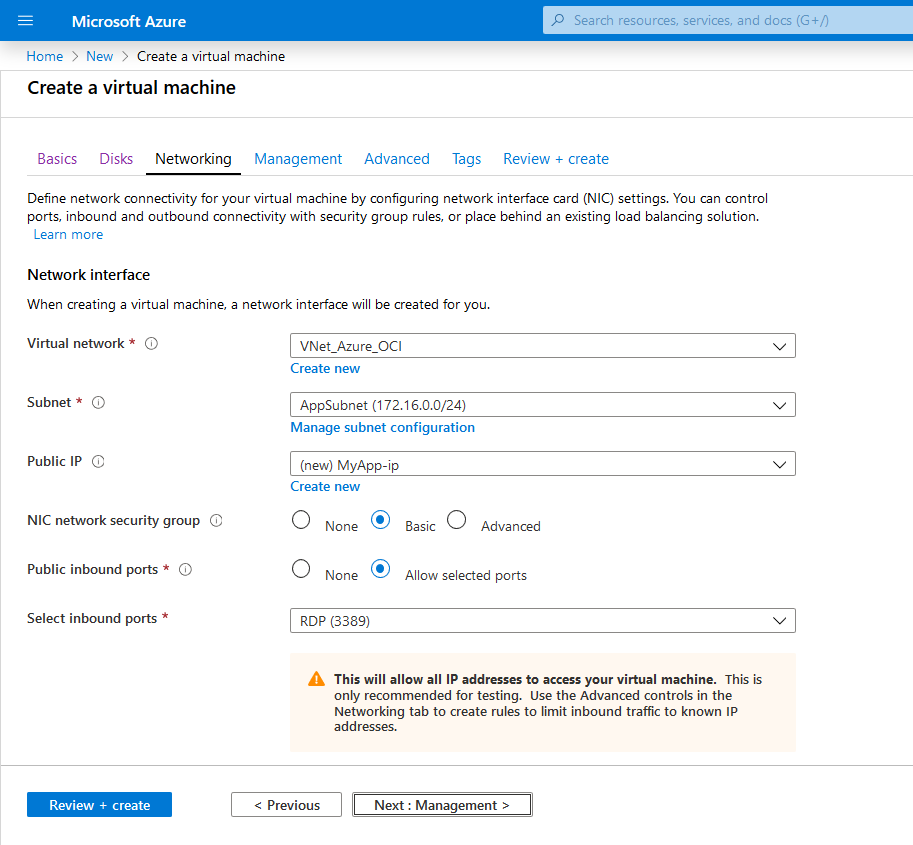
-
Verify, that created previously Virtual Network and Subnet have been selected, as well as the Inbound port RDP 3389.
-
Leave the rest of the options as default.
-
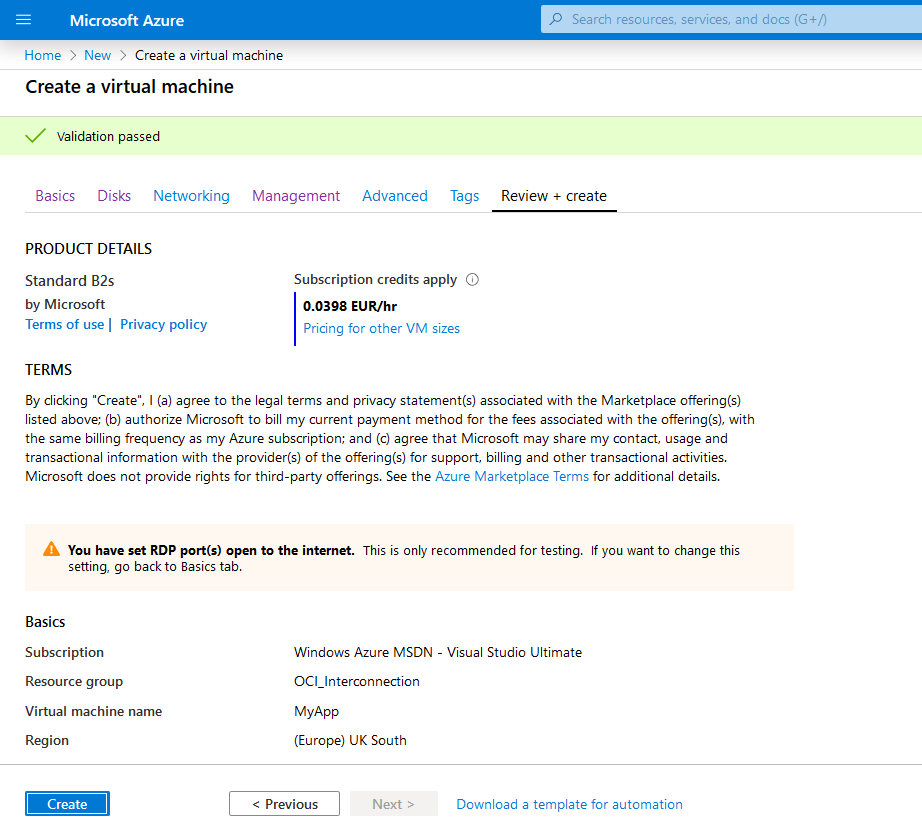
Click Review + create.
- Confirm the VM creation and click Create.
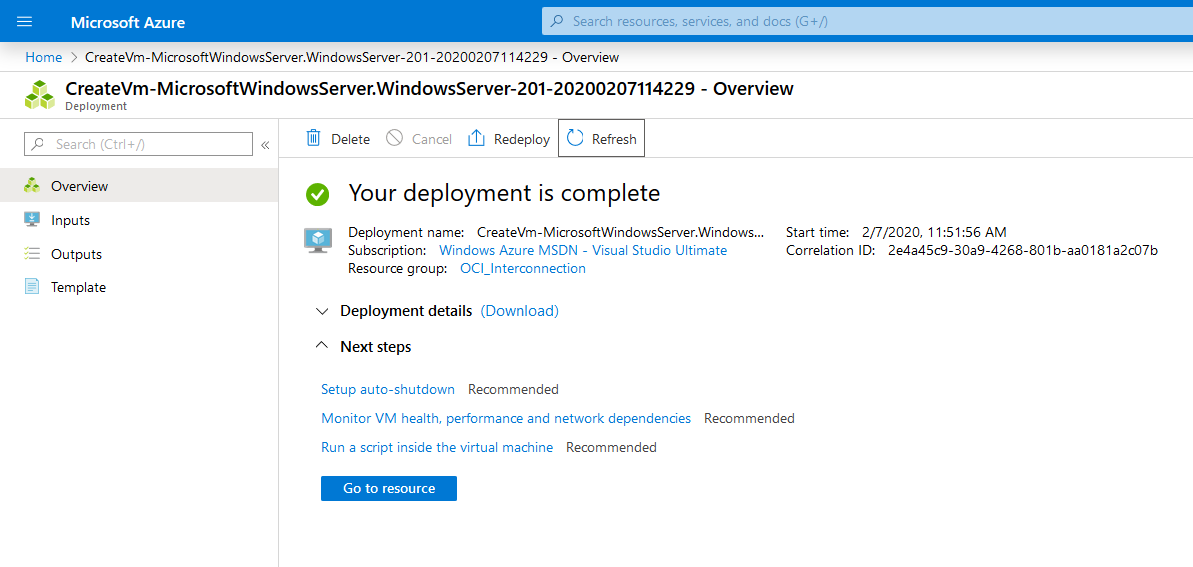
- Within a few minutes, you should get the message Your deployment is complete.
- Click Go to resource in order to check your VM details.
-
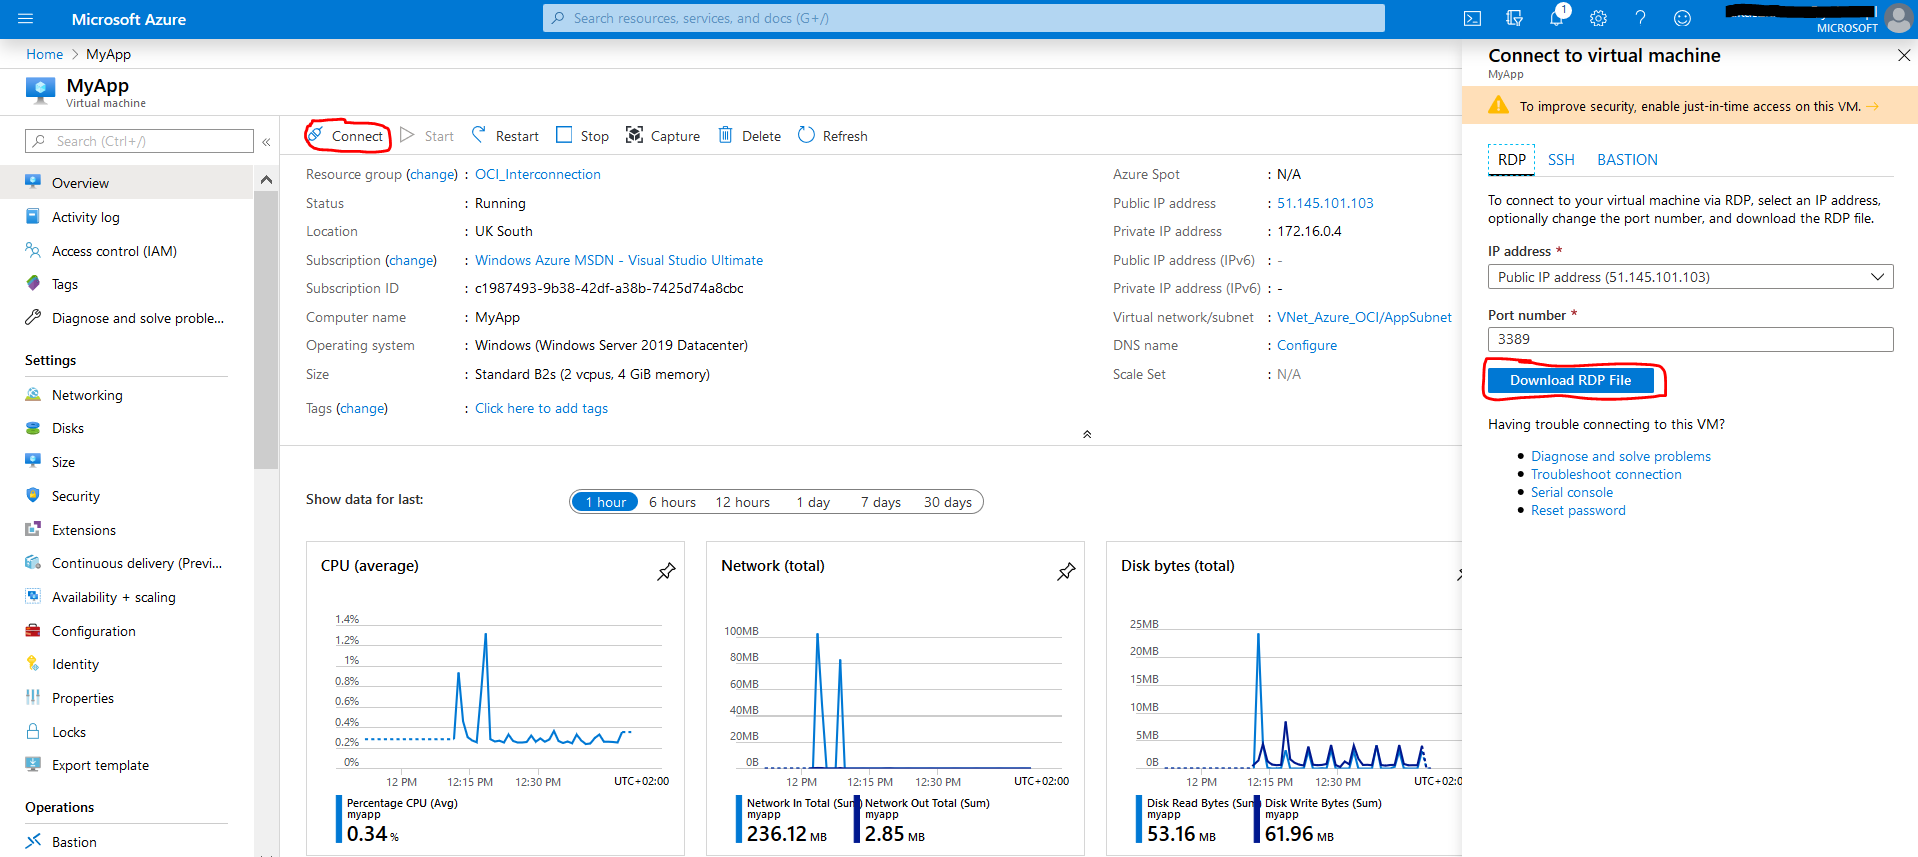
On the Virtual Machine details page, you will find all relevant information about VM status, location, OS, Size and Public/Private IPs and more.
- Click Connect and then Download RDP file.
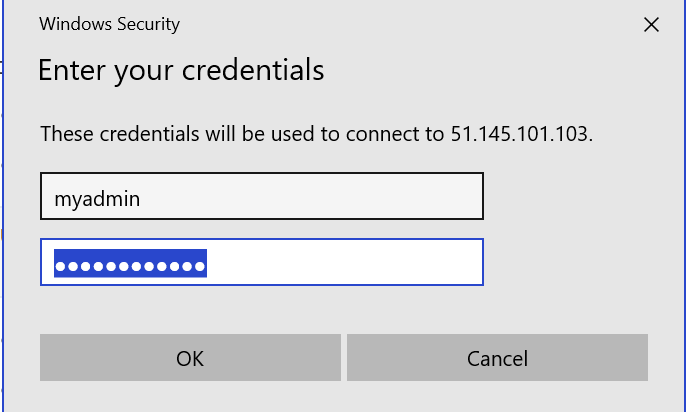
- New windows will pop up, select Open MyApp.rdp connection and click OK. You should see Windows Security window where you have to provide your Admin Account credentials and click again “OK”.
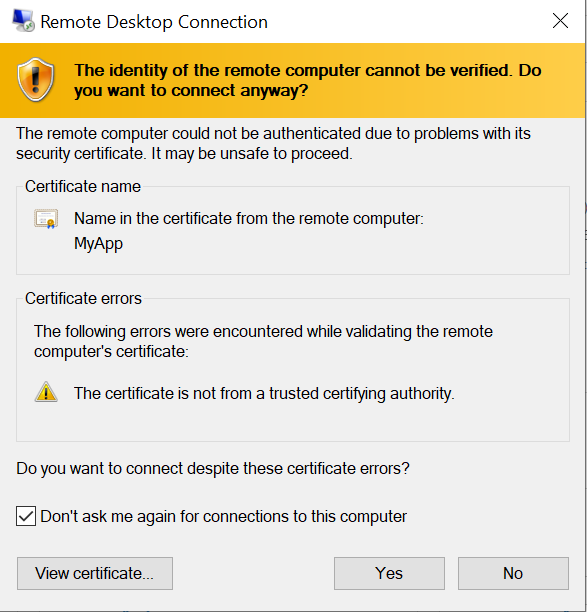
- Click Yes on the next screen and you should be connected to your VM.
- Now you should be connected to your VM and this completes the initial configuration for Microsoft Azure.
Congratulations, you are now ready to move to the next lab.