![]()
Building Multi-Cloud Apps
Initial setup on Oracle Cloud: Creating VCN with Dynamic Routing Gateway (DRG) and Service Gateway (SGW)
Introduction
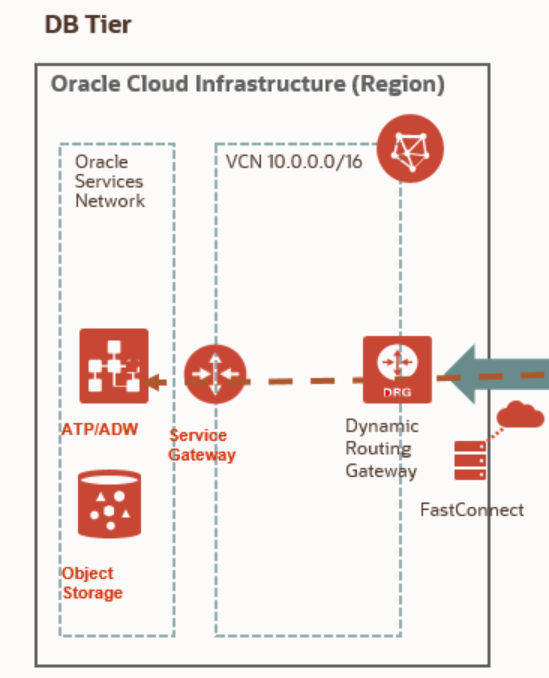
In this lab you will complete some initial steps on Oracle Cloud Infrastructure, in order to be able to create interconnection link afterwards. The first step is to create a transit Virtual Cloud Network (VCN). Let’s expand now the concept of transit routing, which was already described on the main page. In order to enable traffic routing through a VCN to an Autonomous Database, you will create a Dynamic Routing Gateway (DRG) and a Service Gateway (SWG) and attach them the VCN. Then, for each gateway (virtual router), you have to create a separate route table with appropriate routing rules. On one hand you will direct incoming traffic from Azure VNet through private interconnection link between Azure ExpressRoute and Oracle FastConnect to DRG and then through SWG to the Autonomous DB residing in the Oracle Services Network. Respectively, outcoming traffic from Autonomous DB will transit firstly through SWG, then to DRG and through the interconnection link and Virtual Network Gateway on Azure site to the application hosting on VM residing in Azure VNet.
Lets get started!
Steps
STEP 1: Create Virtual Cloud Network (VCN)
-
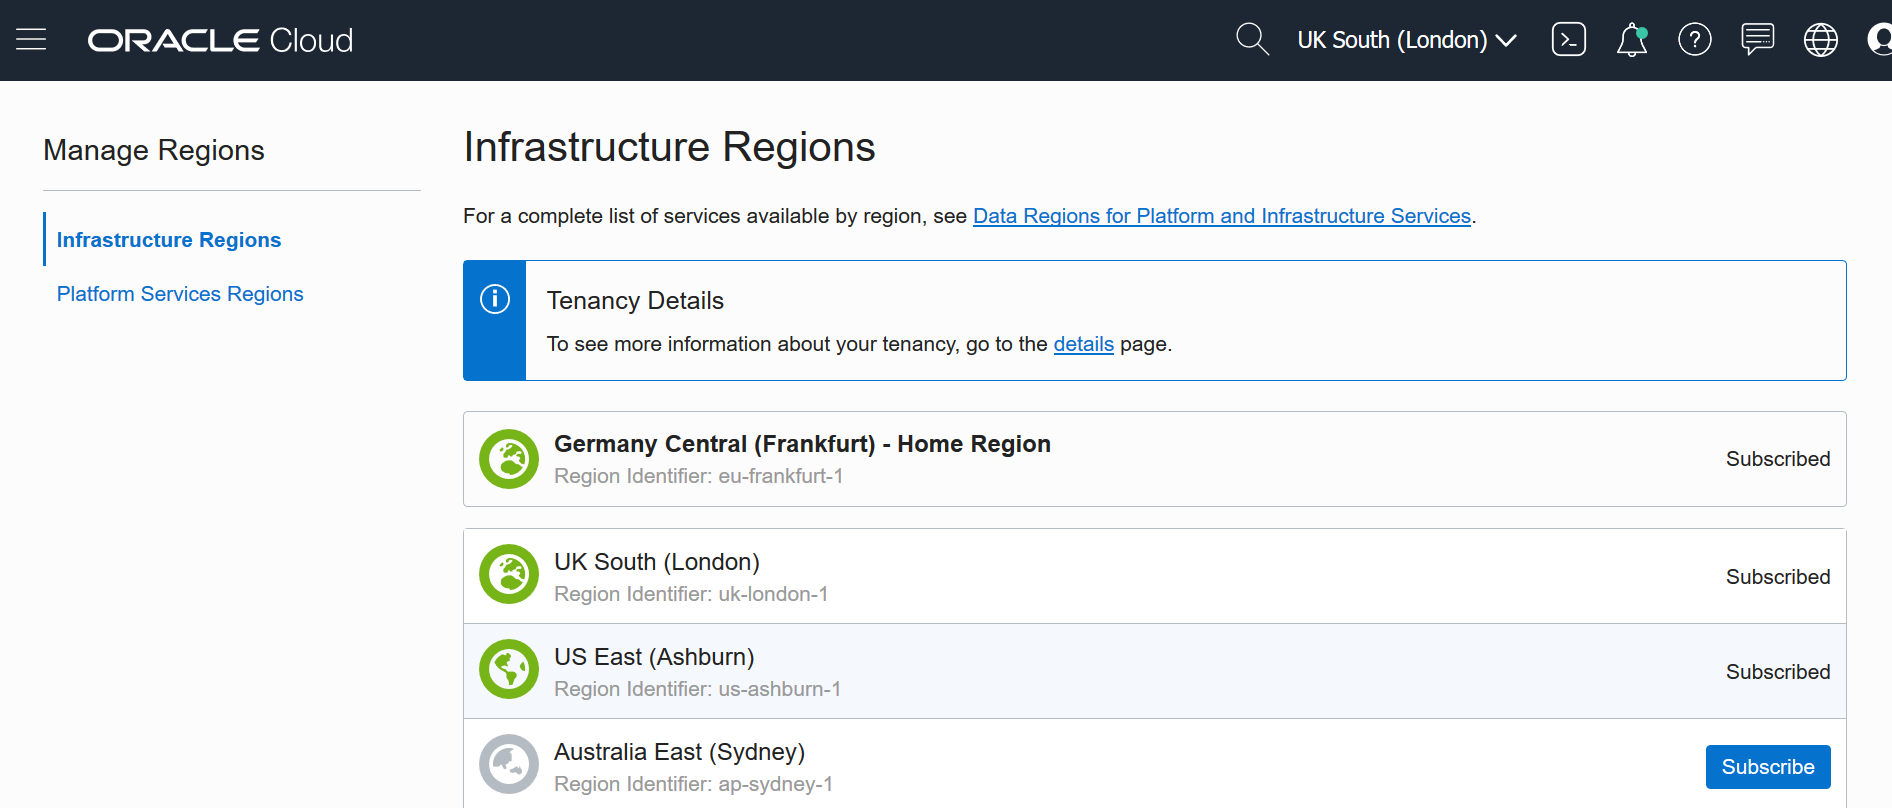
Sign in to OCI console. For this lab we use the OCI UK South (London) region in order to match the Azure UK South (London) region. For the UK South (London), please use Availability Domain 1 (AD1) in OCI when deploying the inter-connect for lower latencies. However two other region pairs are available: Azure East US with OCI US East (Ashburn) and Azure Canada Central with OCI Canada Southeast (Toronto) as per preview limitations.
- Select the appropriate region if available.

- In case the desired region is not visible on the list, click Manage Regions and then Subscribe button next to the appropiate region. Afterwards, the green circle should appear next to the region and you should be able to select it.
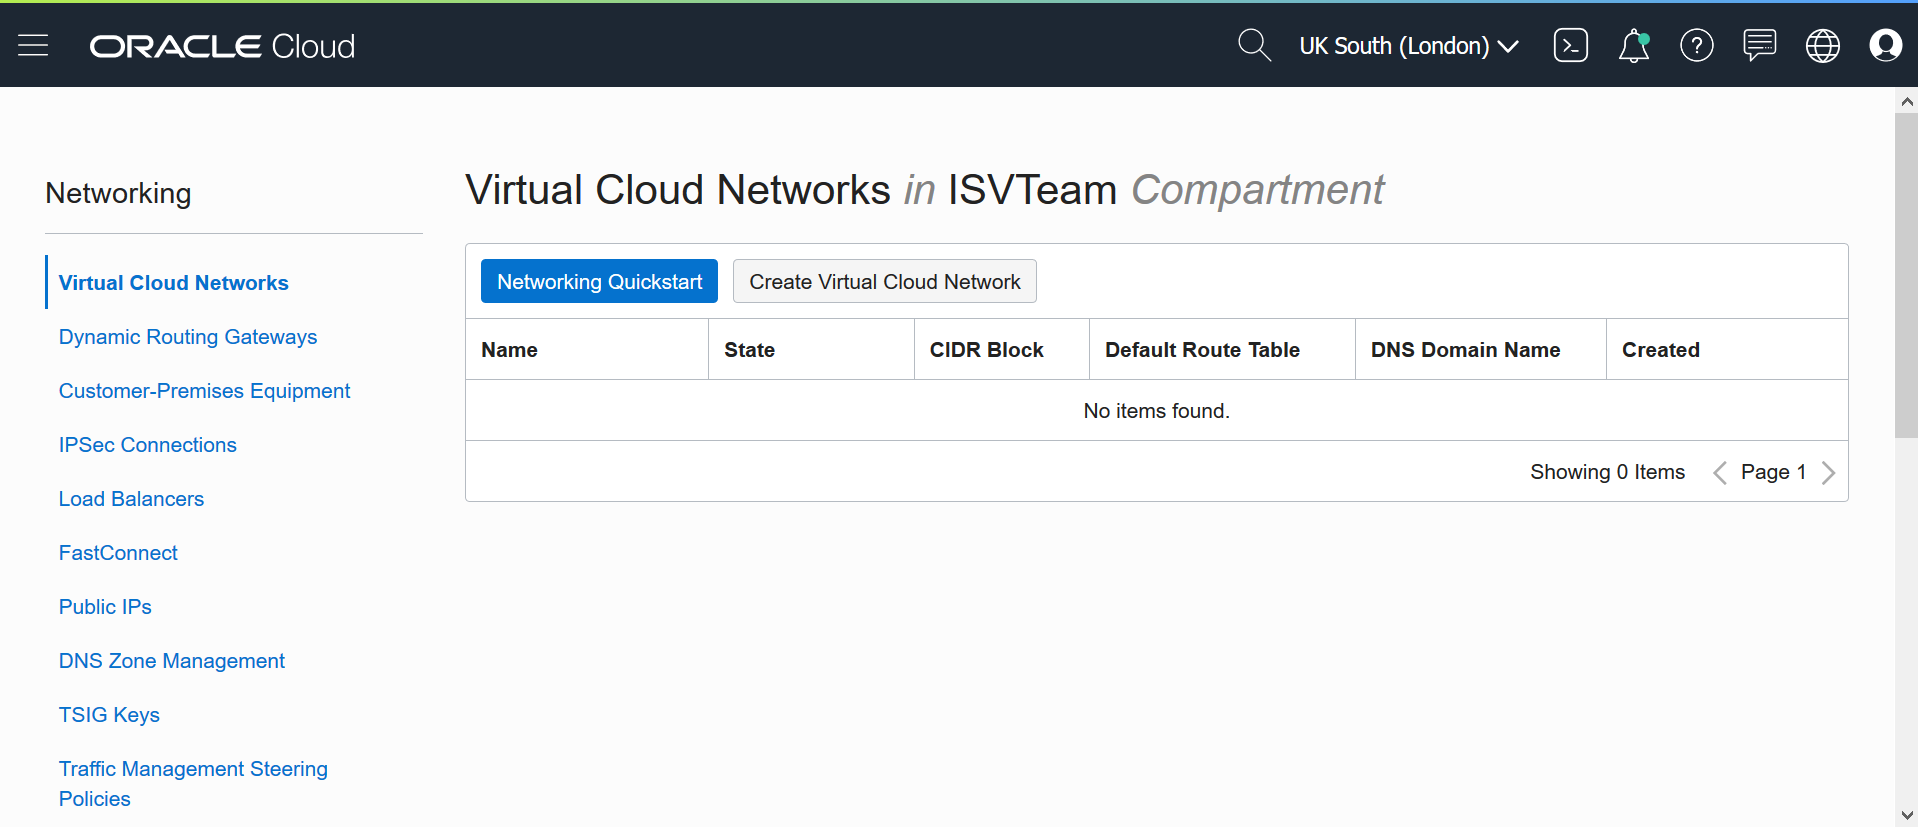
- Click on the hamburger menu icon on the top left of the screen, under Core Infratsructure section select Networking and then click on Virtual Cloud Networks.

- On the Networking page, click on Create Virtual Cloud Network button in the middle of the screen to start the VCN creation process.
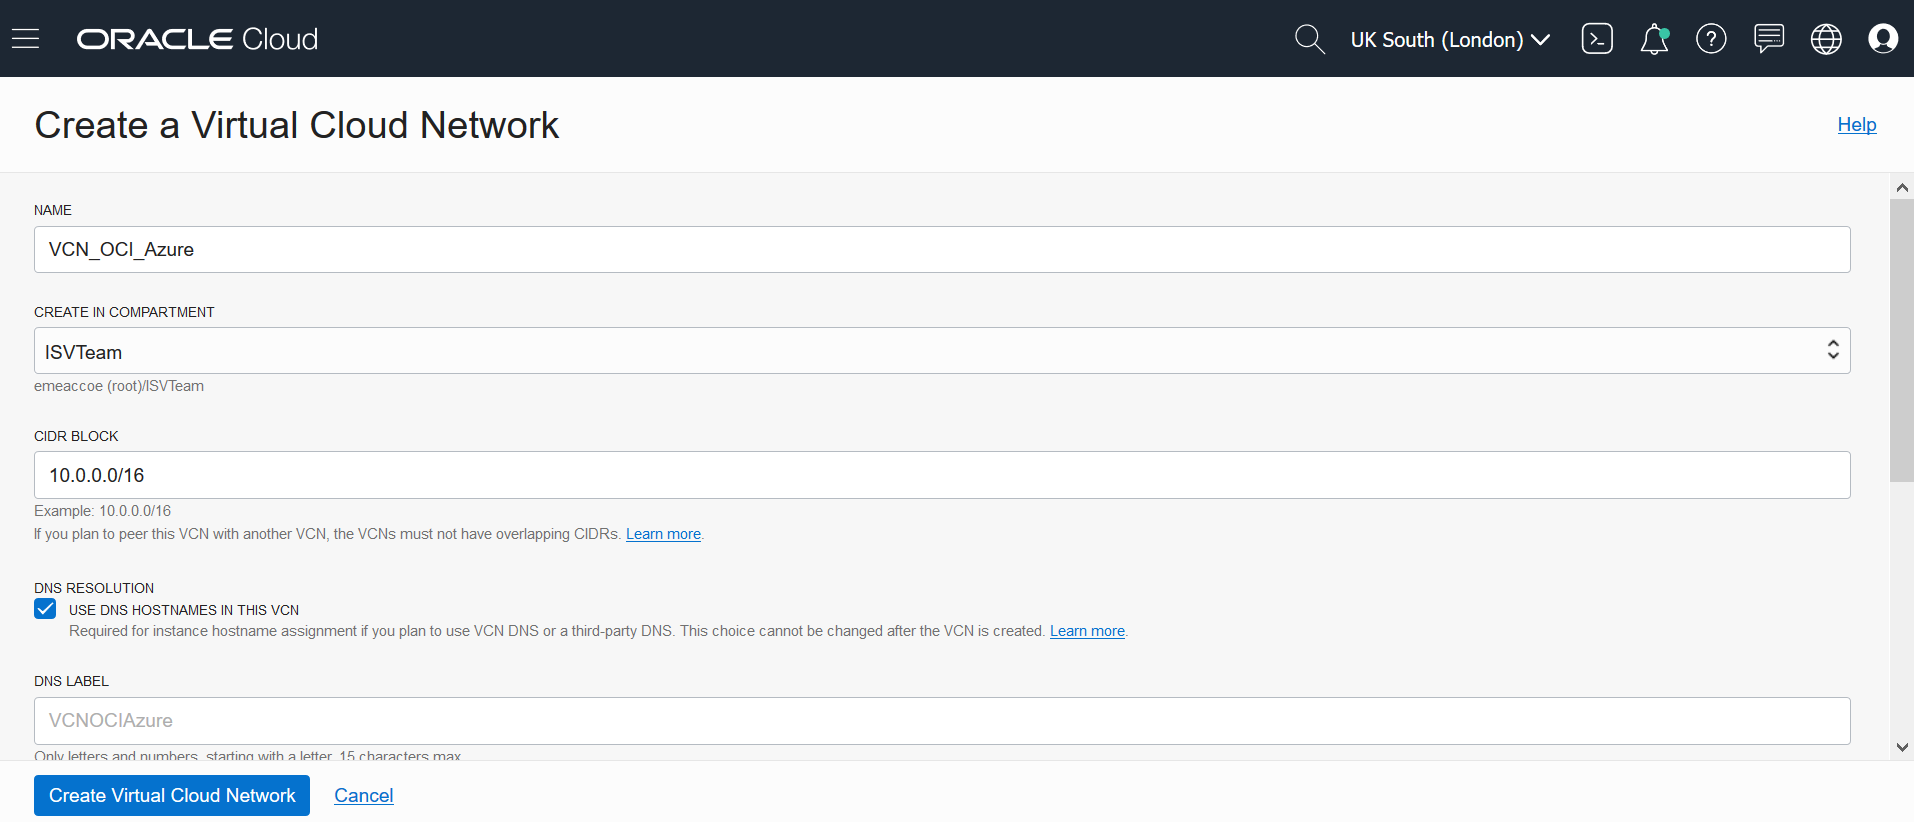
- This will bring up Create a Virtual Cloud Network screen where you specify the following:
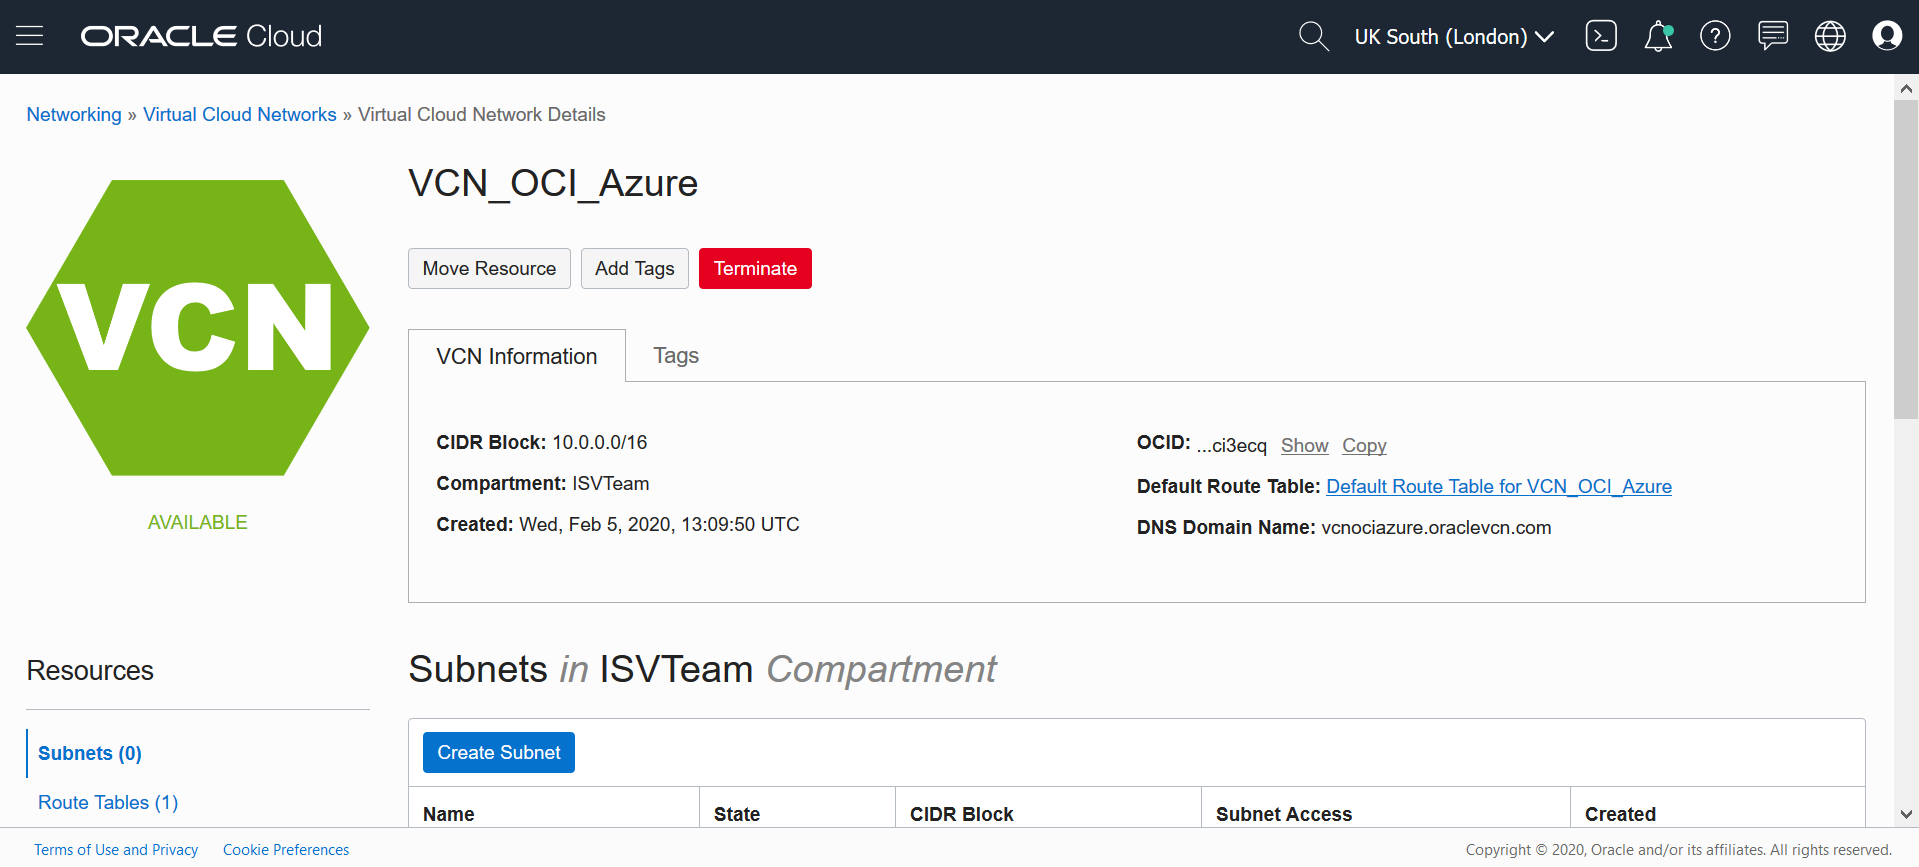
- Enter a Name, such as VCN_OCI_Azure.
- Choose the Compartment where you want to create your VCN. The compartments are used to organize and isolate logically your cloud resources. For the lab purpose, you can use your (root) compartment. Use the same compartment for all resources you are going to create.
- Provide a CIDR Block for your VCN, such as 10.0.0.0/16.
- Leave the rest of settings to default.
- Click Create Virtual Cloud Network.
- After your VCN is created, you should see your Virtual Cloud Network Details screen.
STEP 2: Create Dynamic Routing Gateway (DRG) and attach it to the created Virtual Cloud Network (VCN)
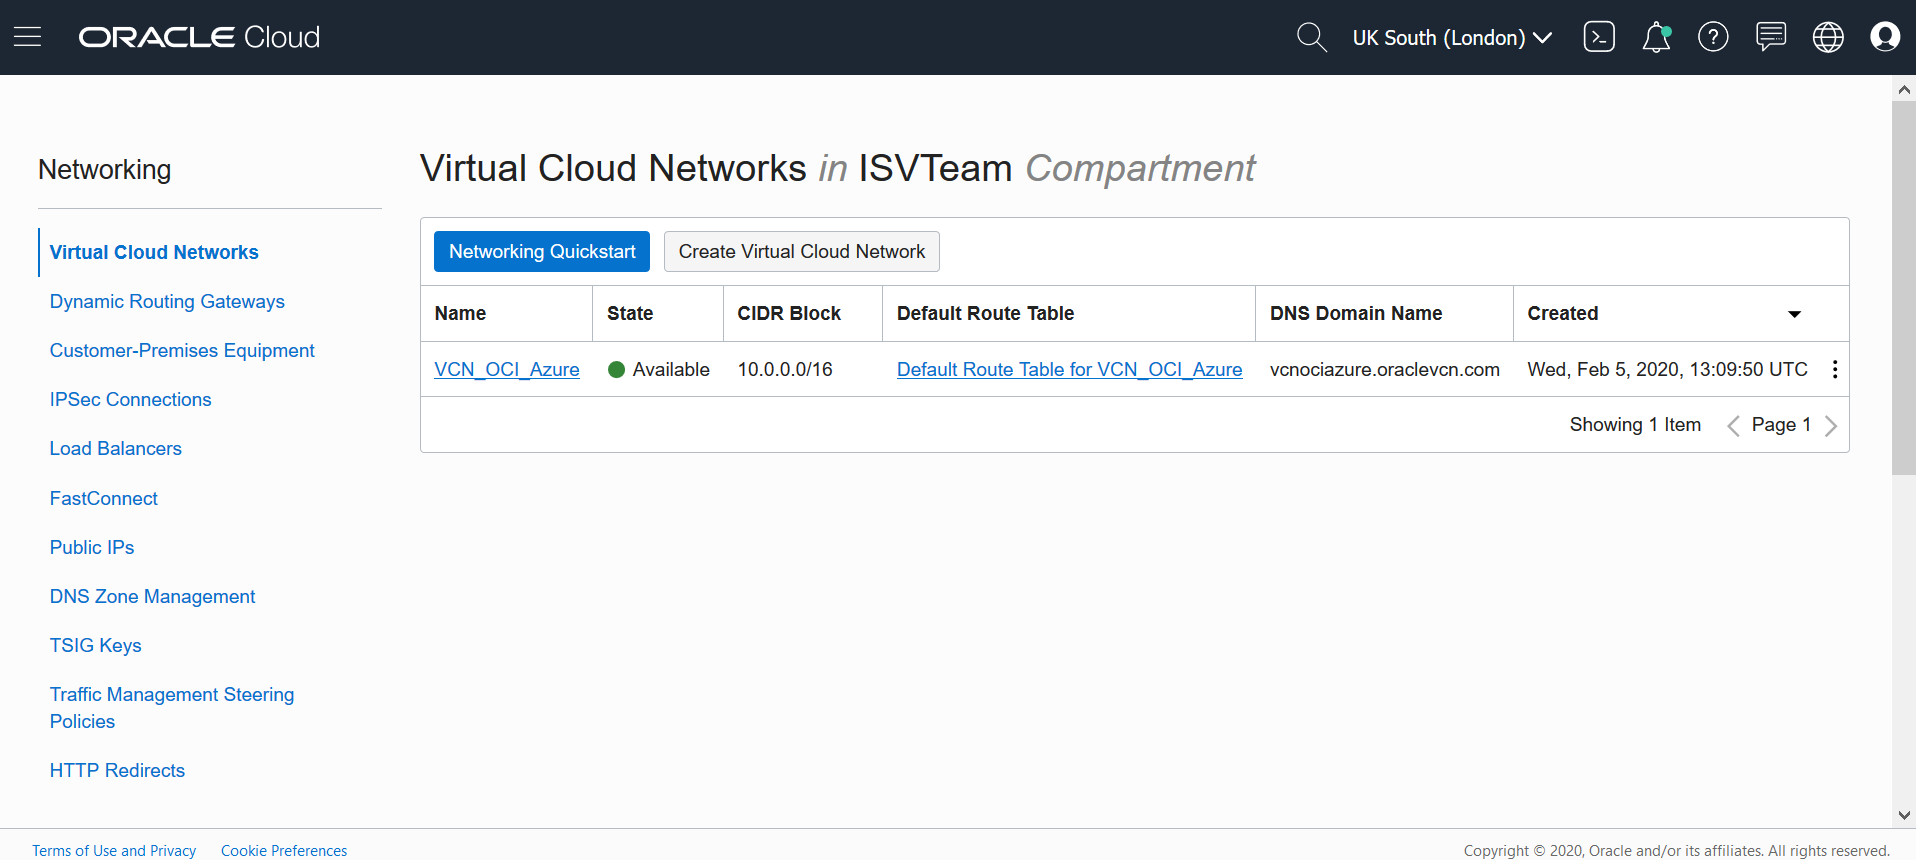
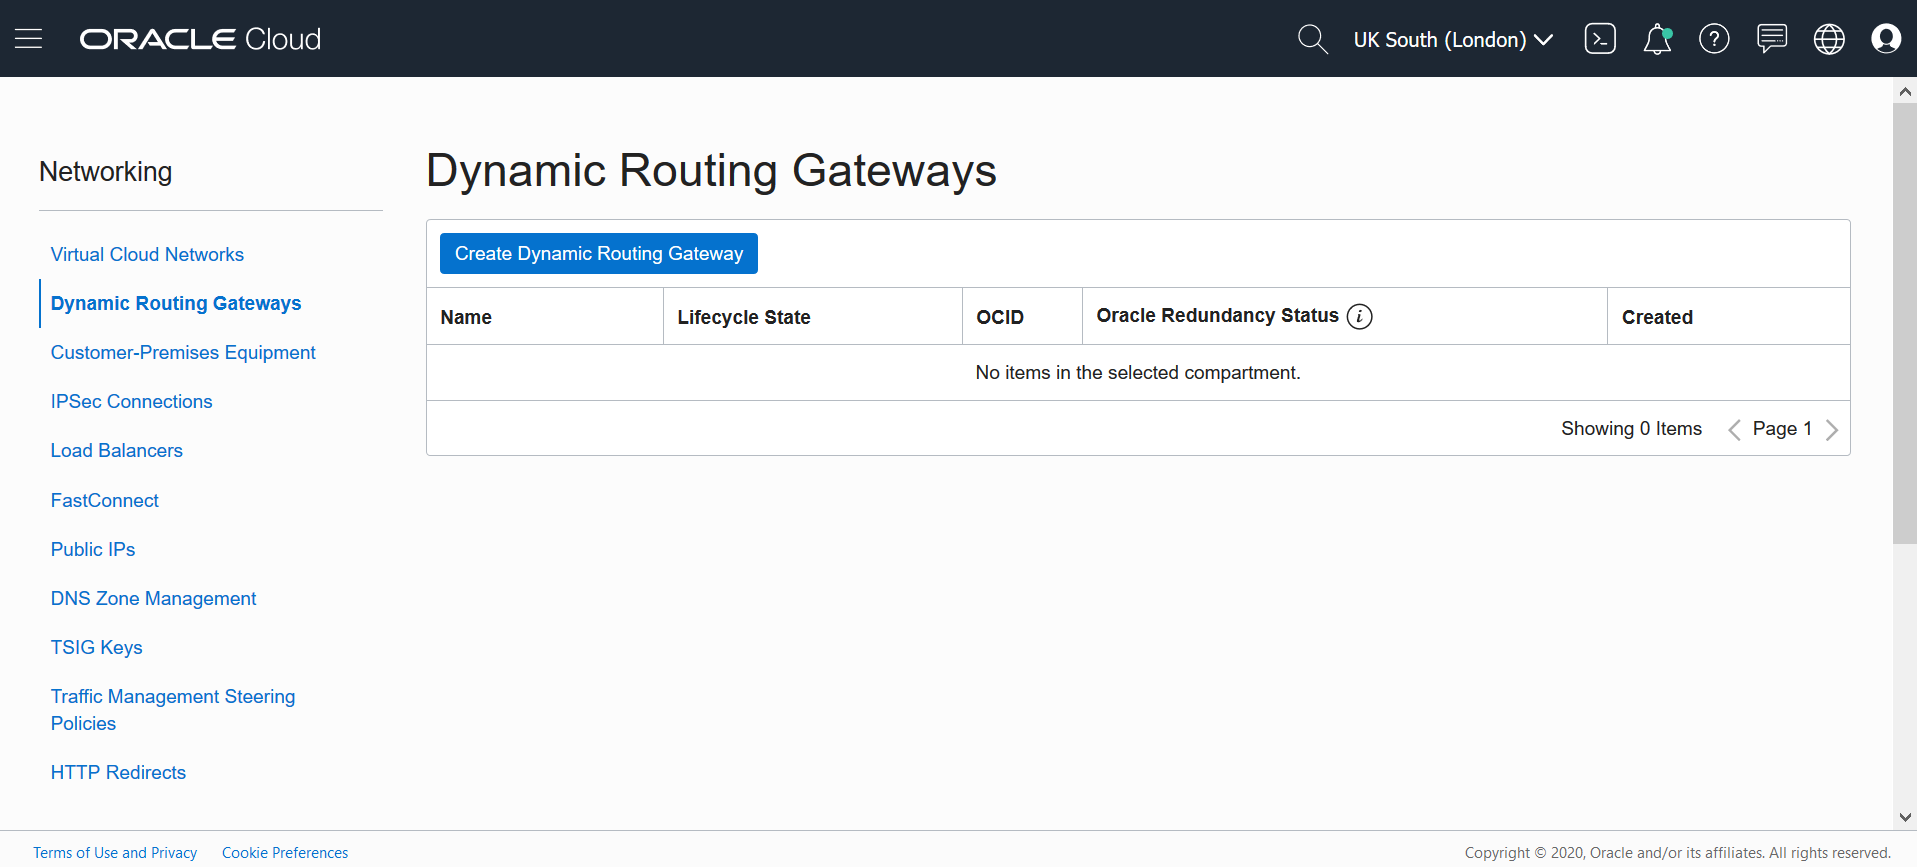
- Go one step back by clicking on Virtual Cloud Networks, you should see your created VCN in the middle of the screen and on the left side Networkin menu select Dynamic Routing Gateways.
- Then click on Create Dynamic Routing Gateway blue button.
-
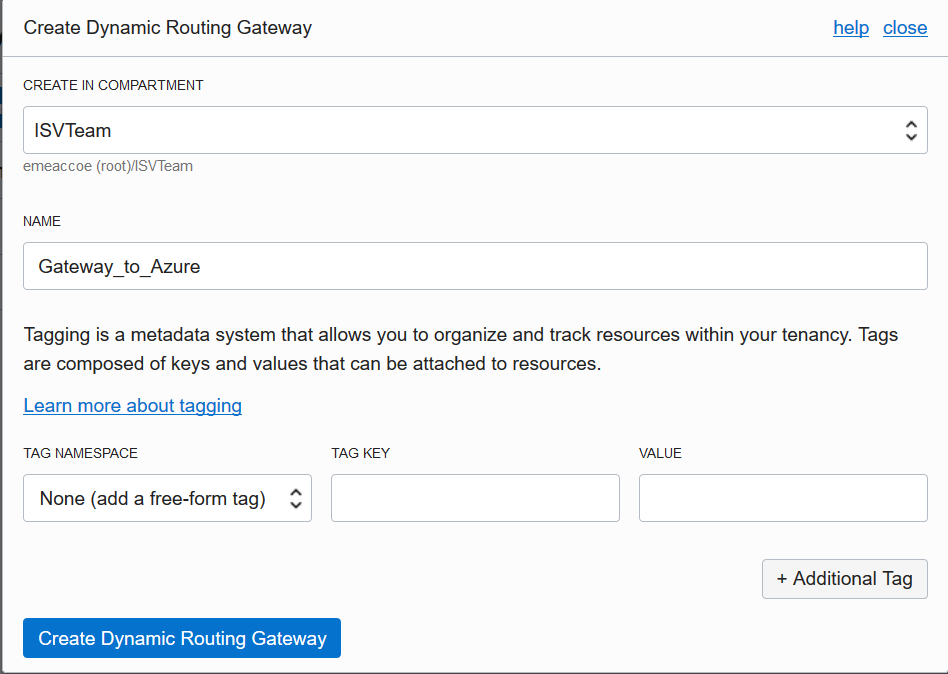
On the Create Dynamic Routing Gateway screen provide the following:
- Choose your Compartment.
- Enter a Name for your DRG, such as Gateway_to_Azure.
- Click Create Dynamic Routing Gateway button.
- As soon as your DRG is created, you should see that it is available (green sign). Let’s attach it to our VCN by selecting Virtual Cloud Networks on the left under Resources section and then click on Attach to Virtual Cloud Network blue button.
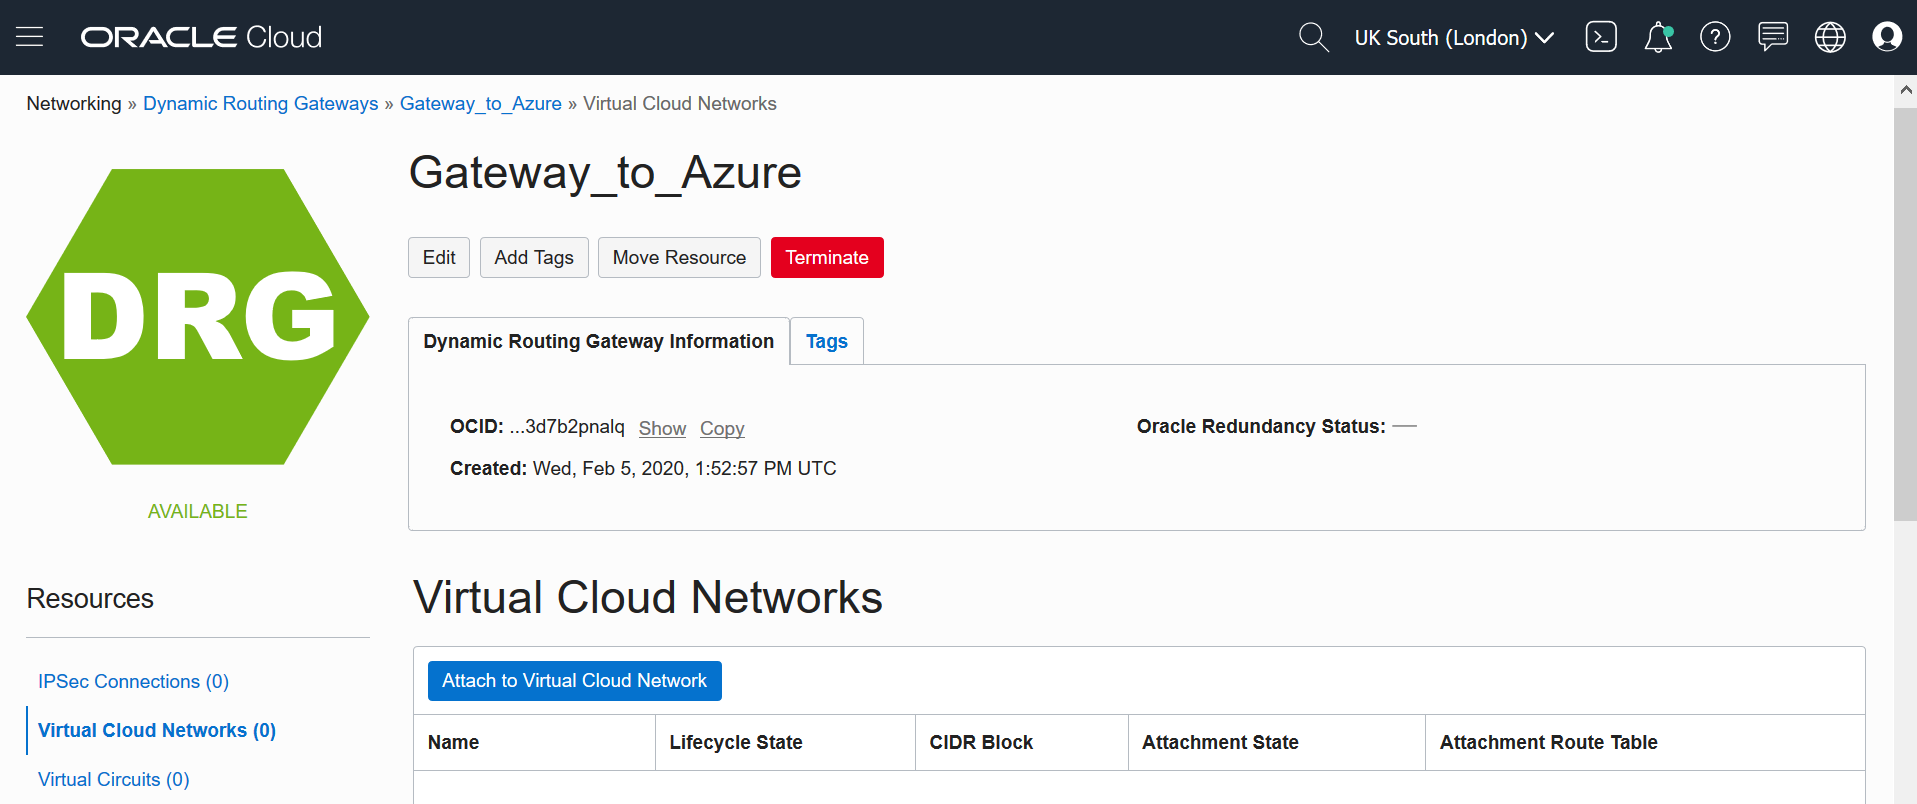
- The new window will pop up. Select your VCN VCN_OCI_Azure and click again on Attach to Virtual Cloud Network button.

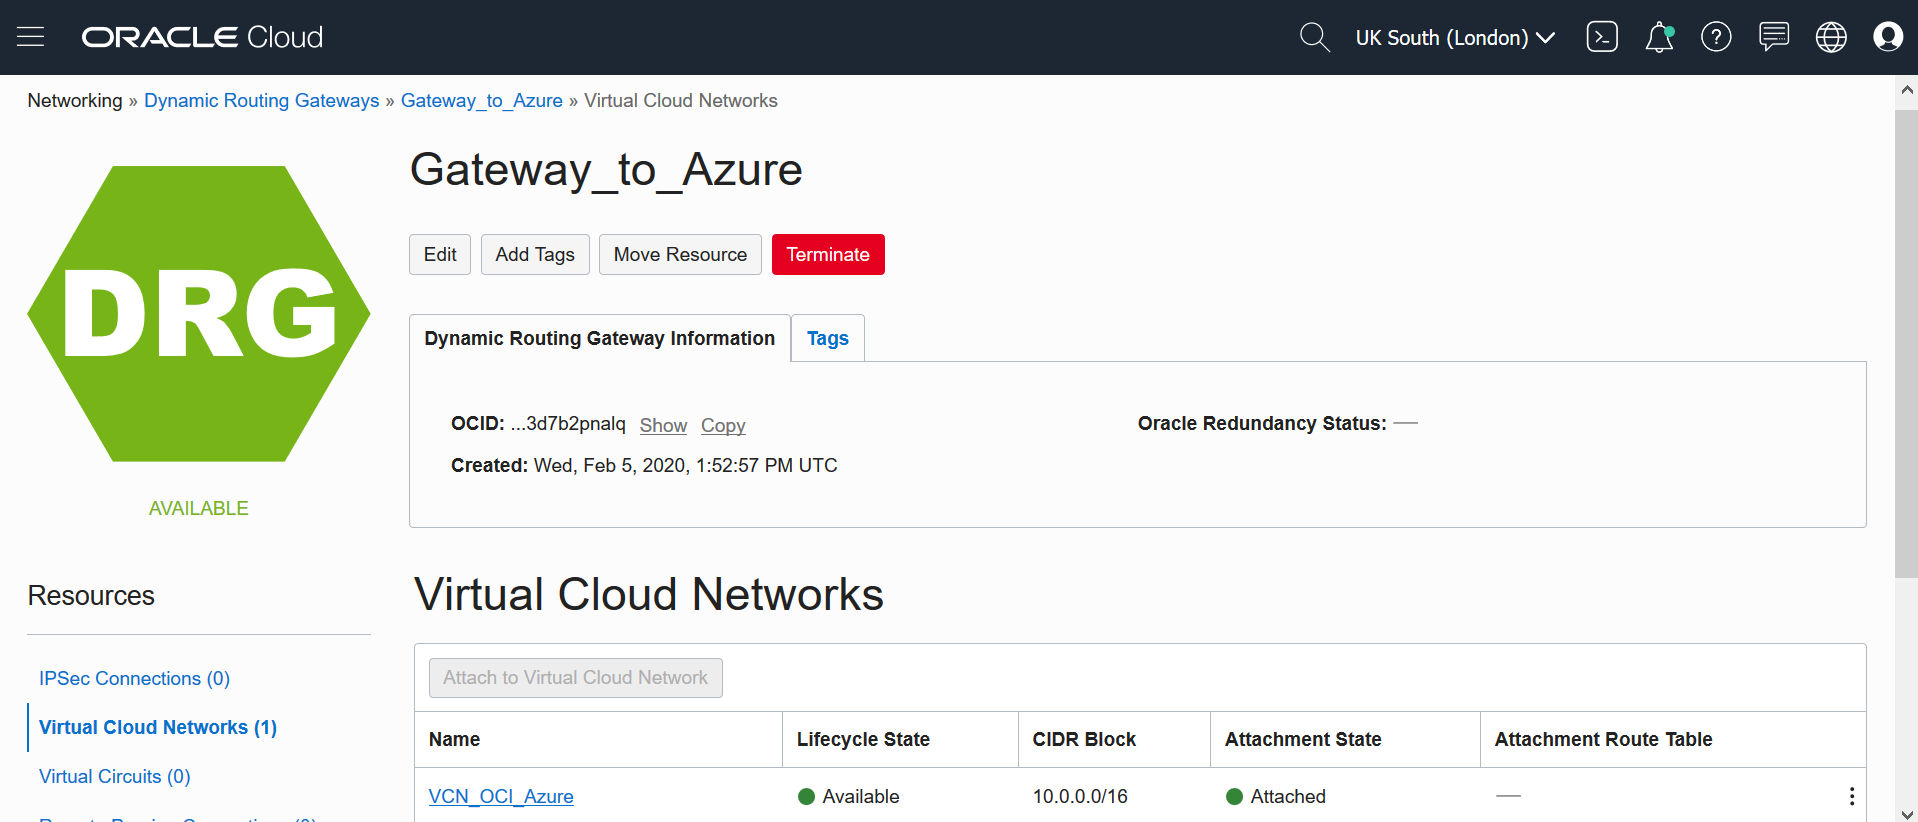
- Under Virtual Cloud Networks section, you can see the Attachment State with status Attached and green point next to it.
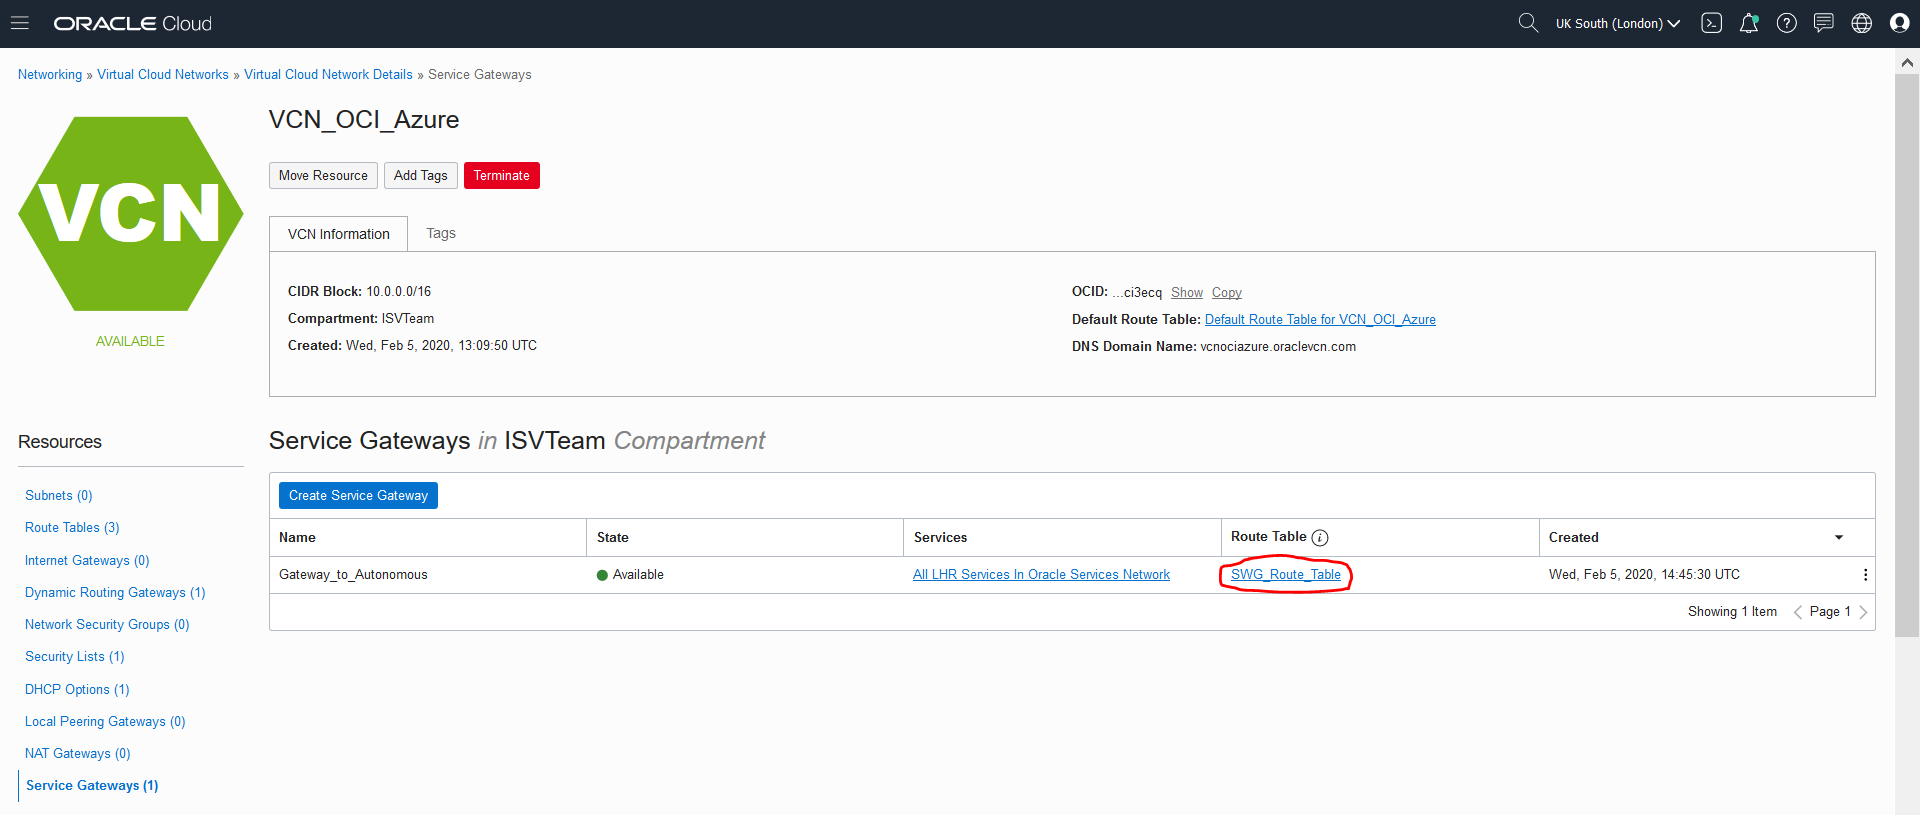
STEP 3: Create Service Gateway (SWG)
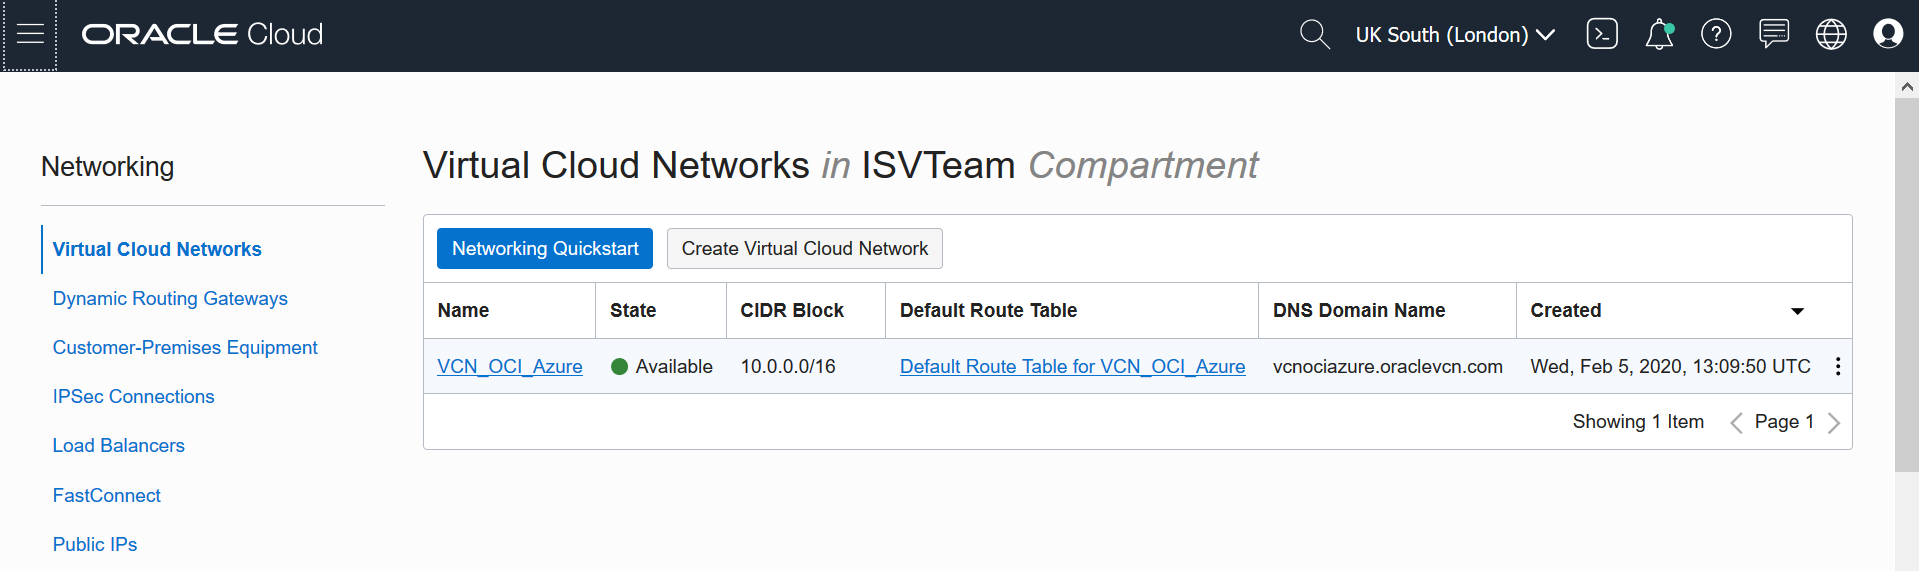
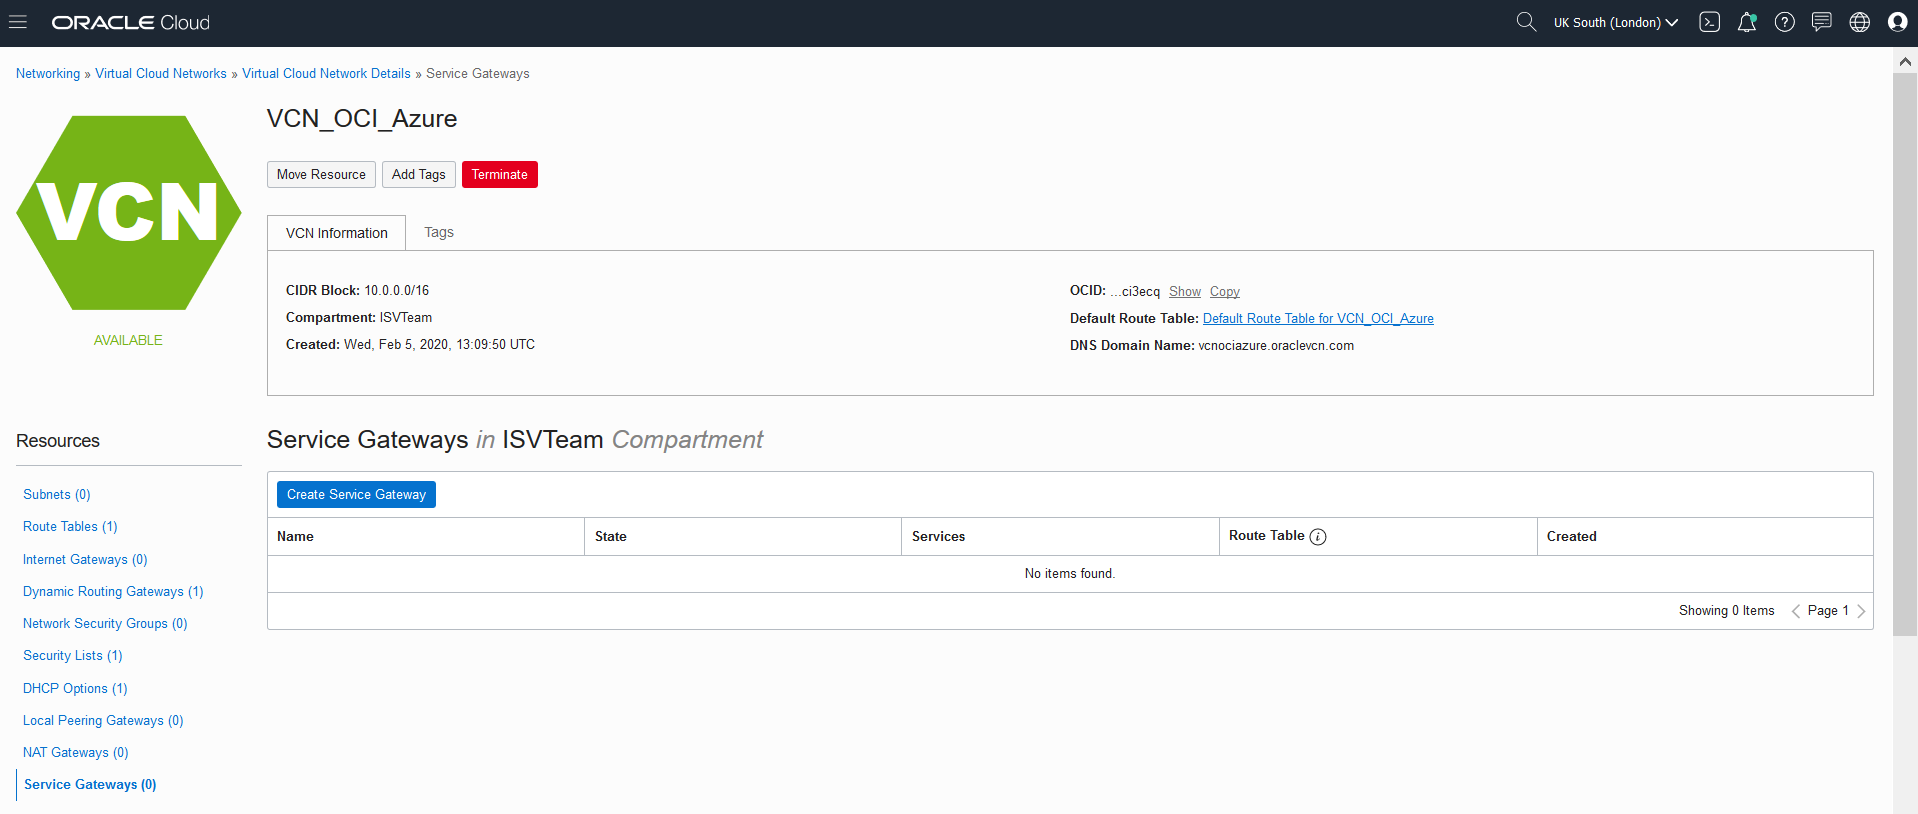
- Navigate back to the Virtual Cloud Networks page (Hamburger menu on the left –> Networking –> Virtual Cloud Networks) and click on the name of your created VCN.
- Under Resources section on the left, select Service Gateways and click on Create Service Gateway blue button.
-
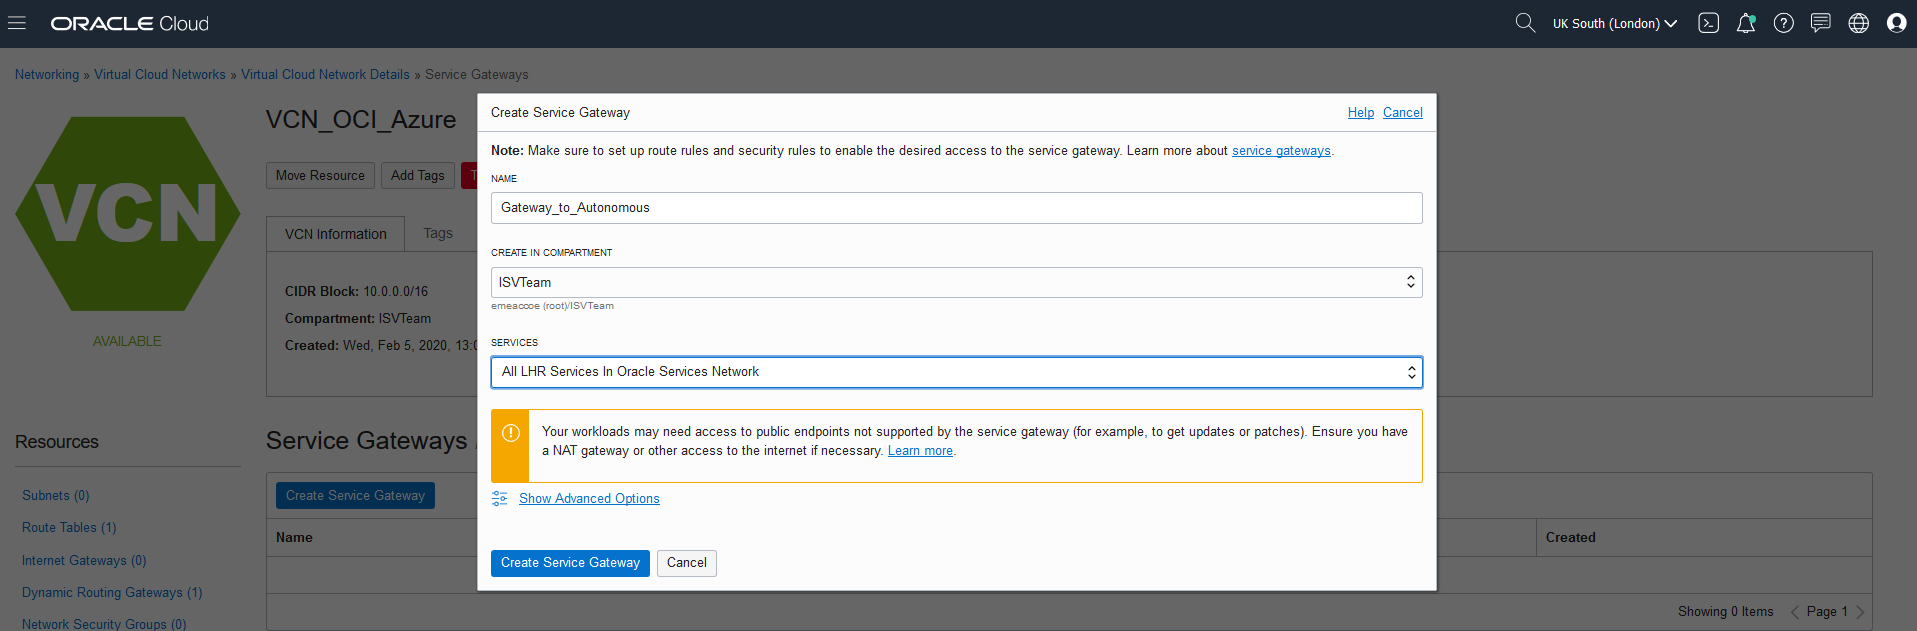
On the Create Service Gateway screen provide the following:
- Enter a Name, such as Gateway_to_Autonomous.
- Choose your Compartment.
- Select All LHR Services in Oracle Service Network under Services.
- Click Create Service Gateway button.
- You will see the message Your service gateway has been created, then click Close.
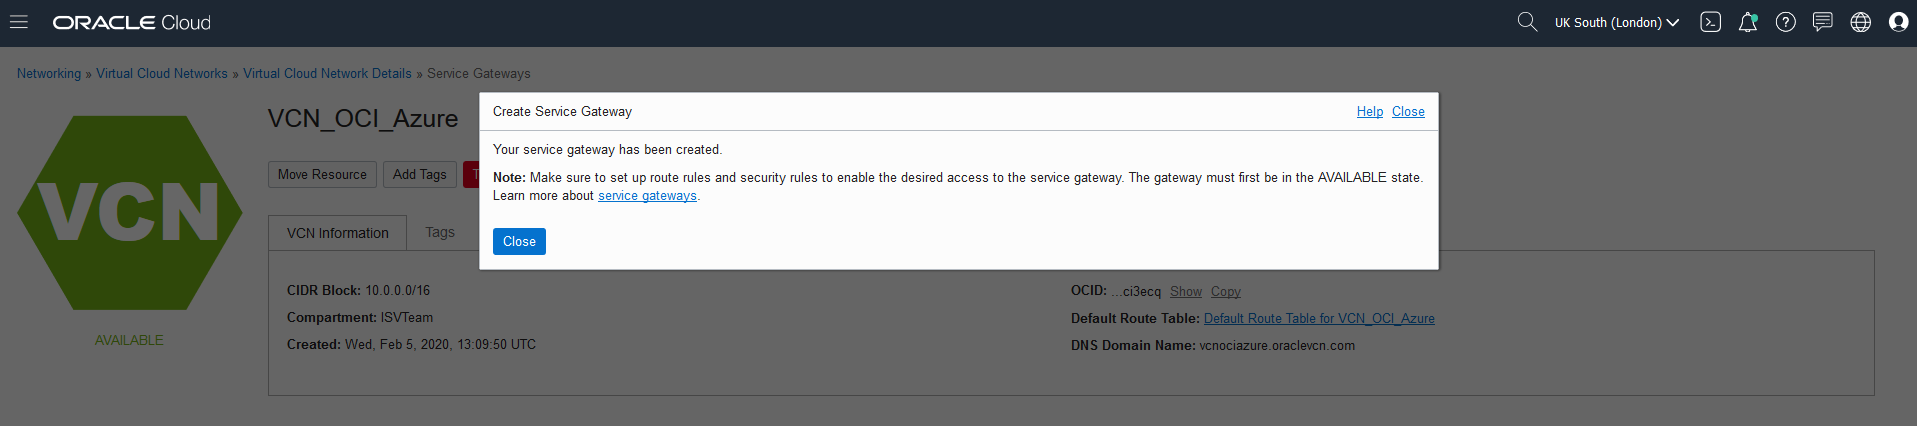
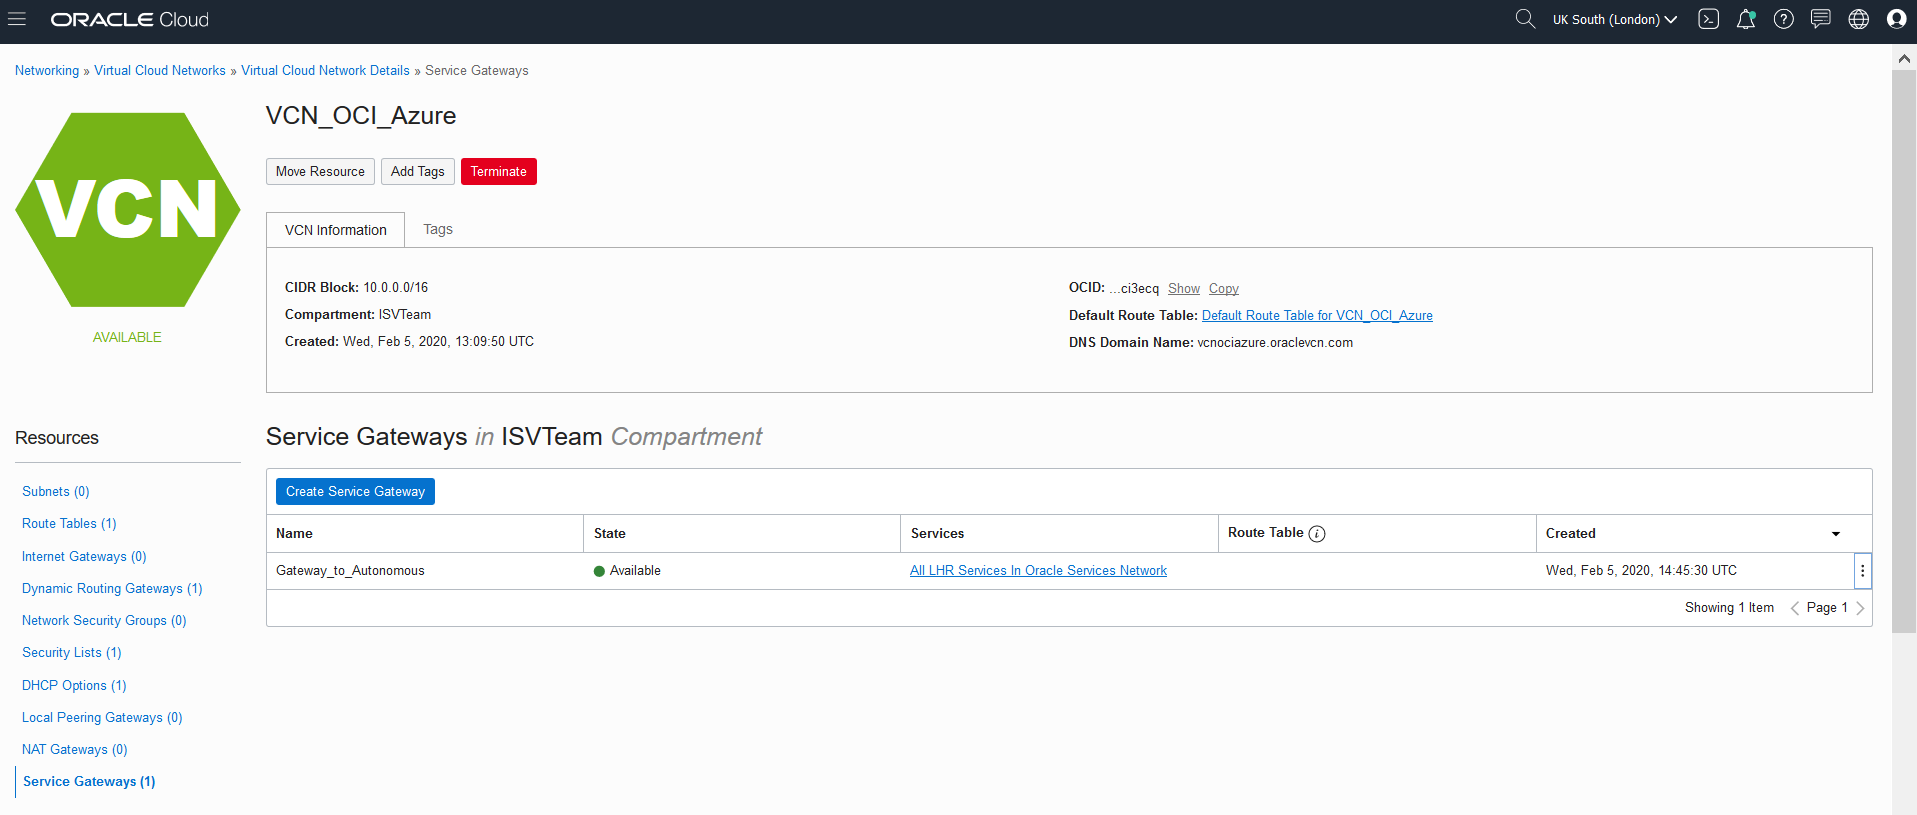
- Confirm, that your Service Gateway is in Available state.
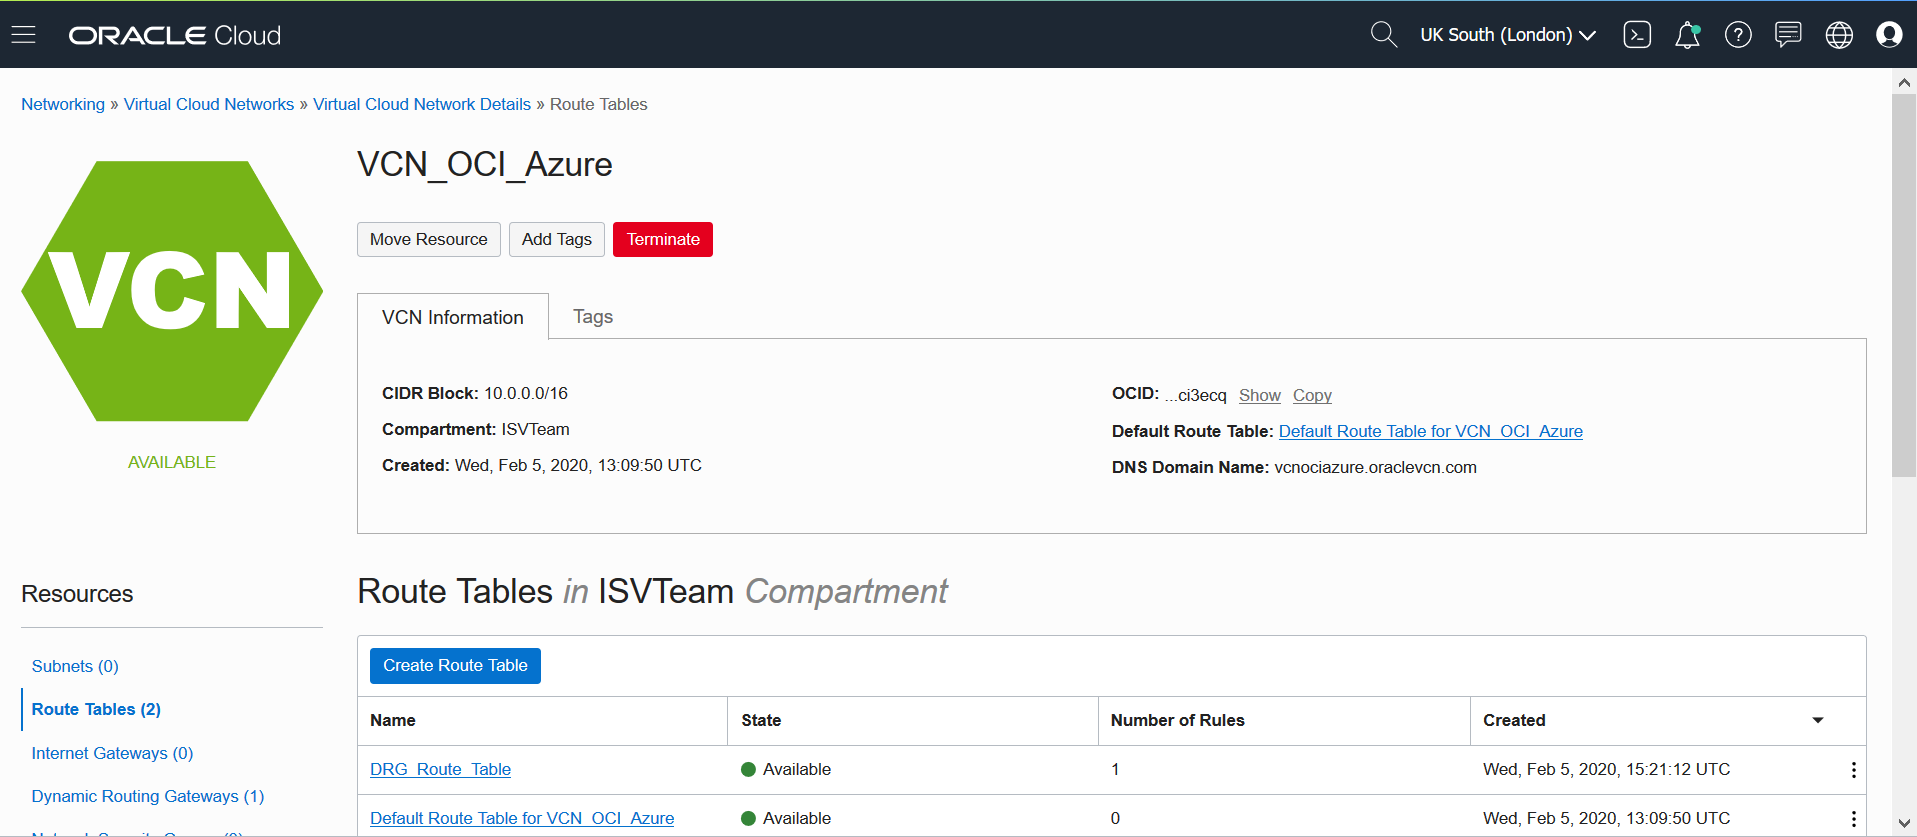
STEP 4: Create first route table and associate it with DRG
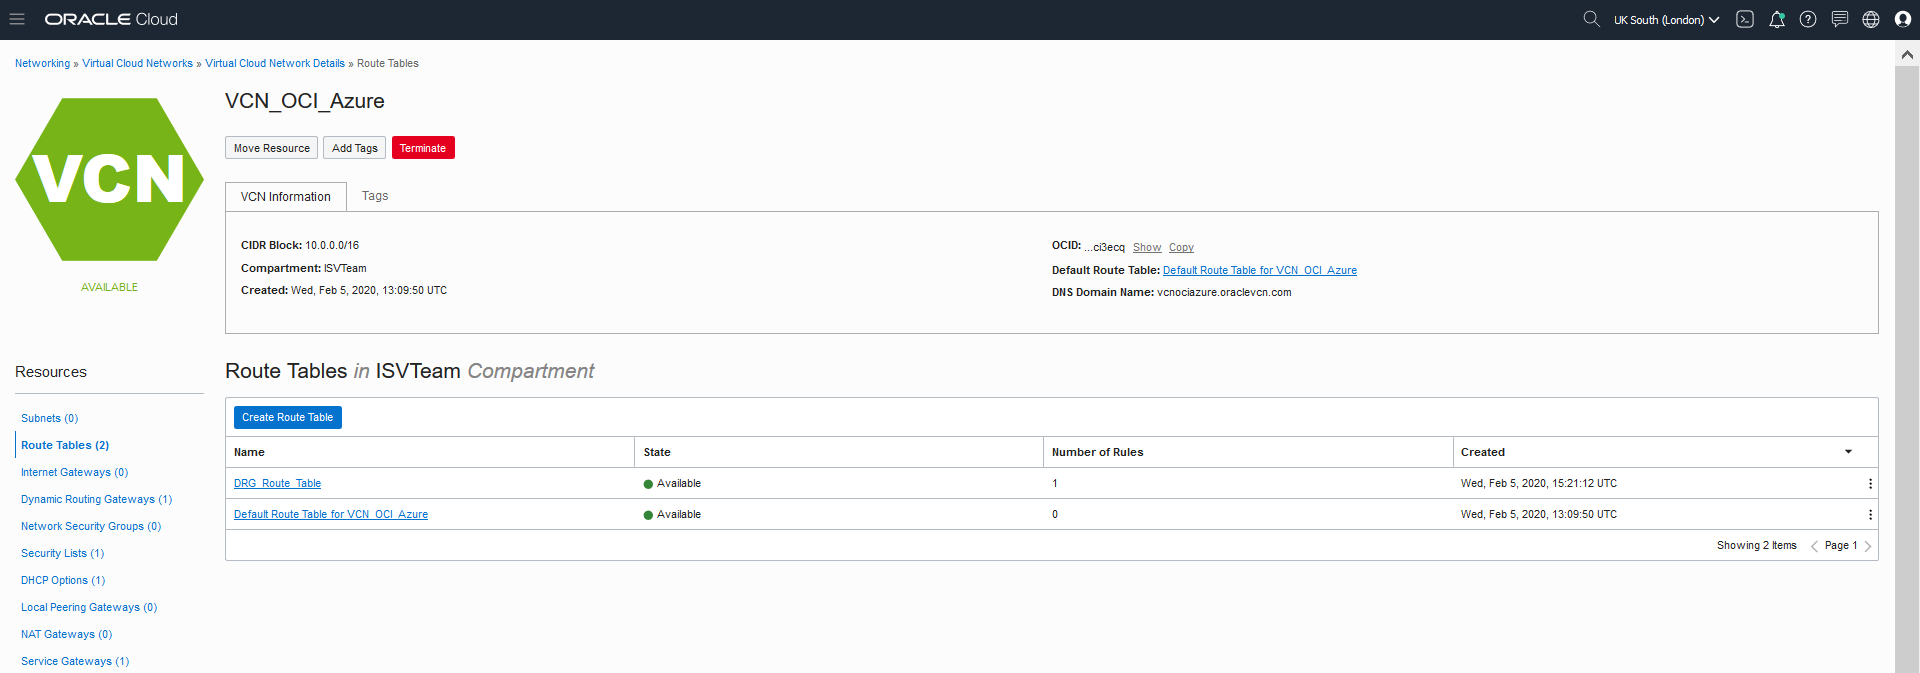
- Select Route Tables under Resources section on the left and click Create Route Table button.

You will see also Default Route Table for VCN, but we will not use it here.
-
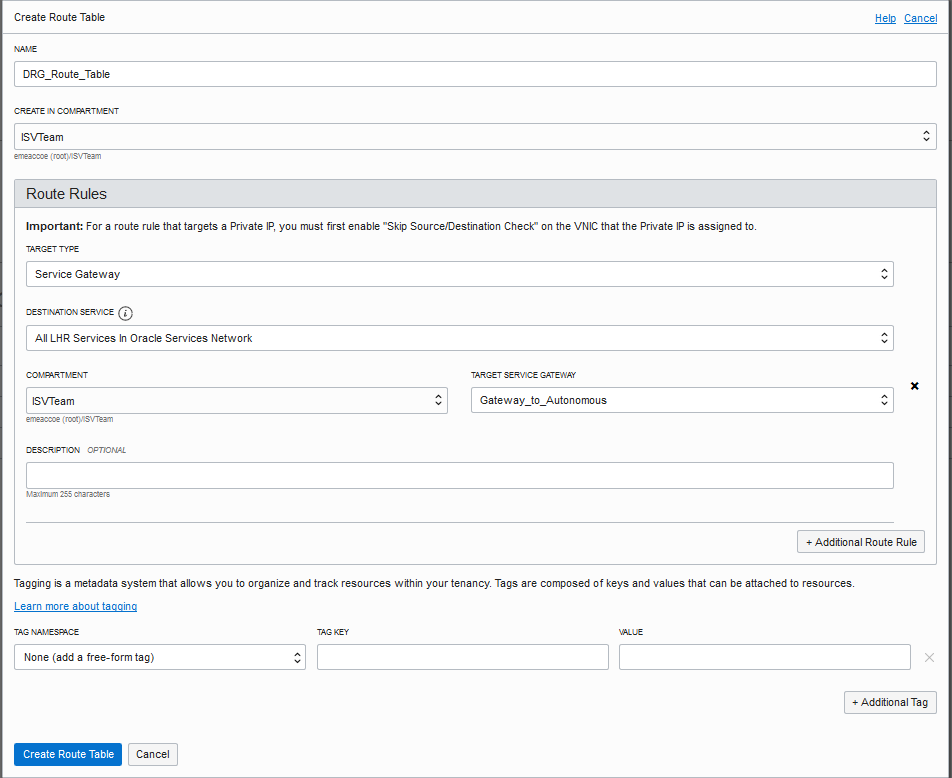
When the Create Route Table window will pop up, please provide:
-
Enter a Name, such as DRG_Route_Table.
-
Choose your Compartment.
-
Under Route Rules click on + Additional Route Rule button and select Target Type as Service Gateway.
-
Select Destination Service as All LHR Services in Oracle Service Network.
-
Select Target Service Gateway you created Gateway_to_Autonomous.
-
Click Create Route Table button.
-
- Newly created Route Table for DRG will appear on the list.
- Click on the Dynamic Routing Gateways under Resources section on the left menu, then on 3 vertical dots on the right next to your DRG and select Associate Route Table.
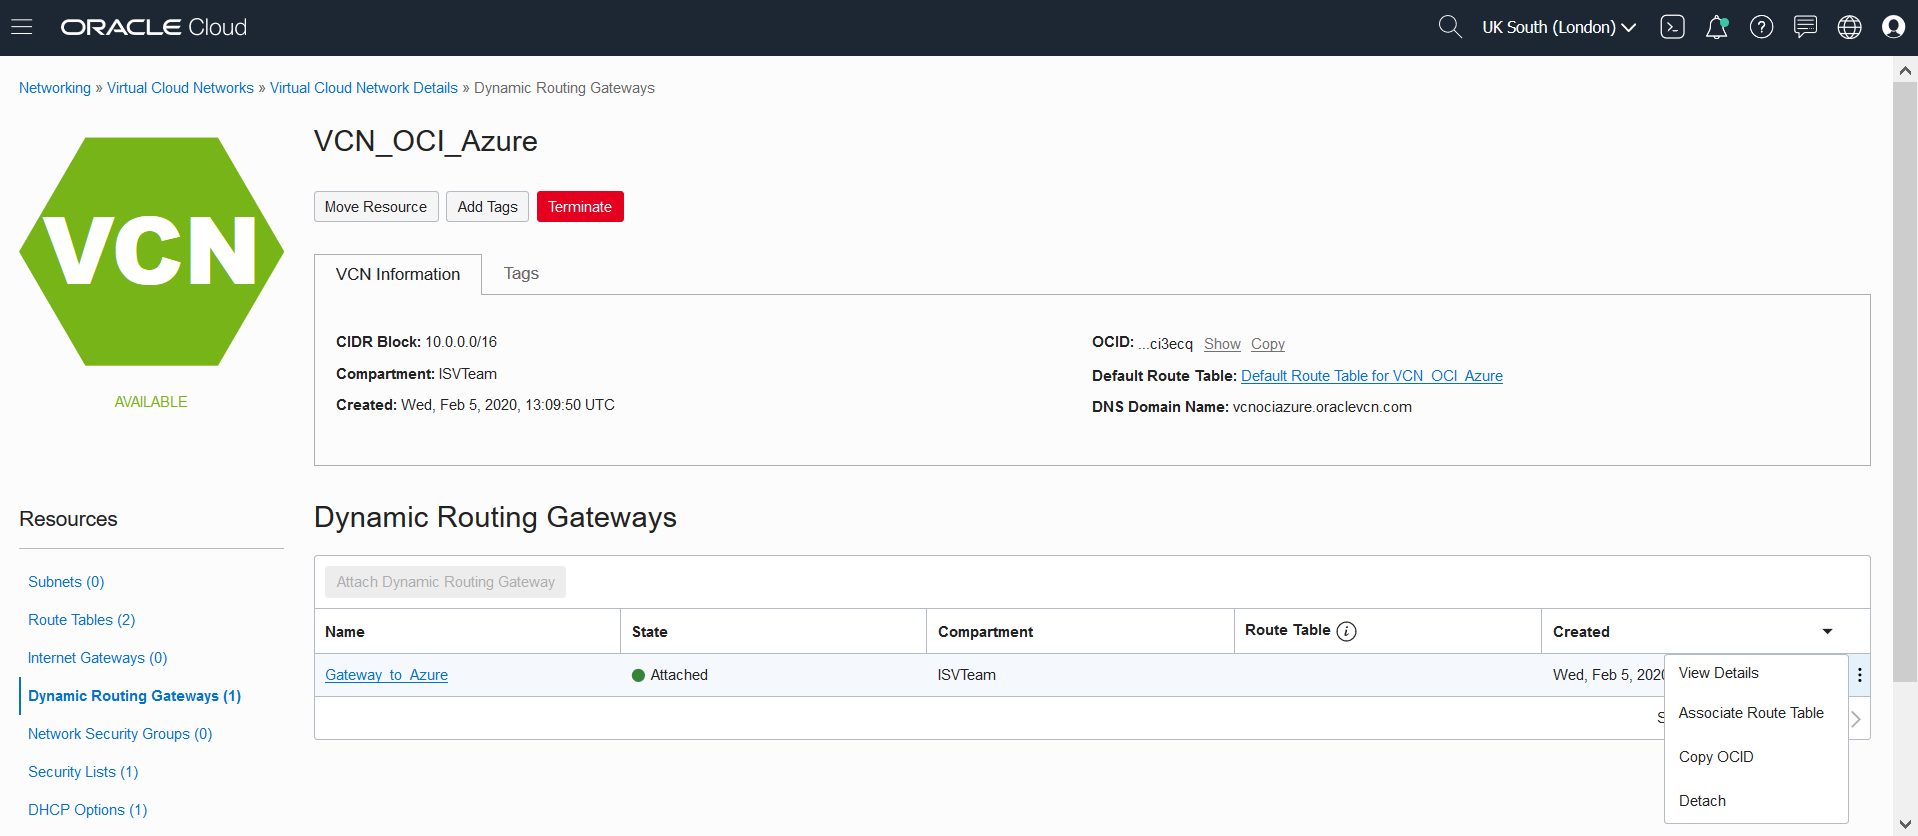
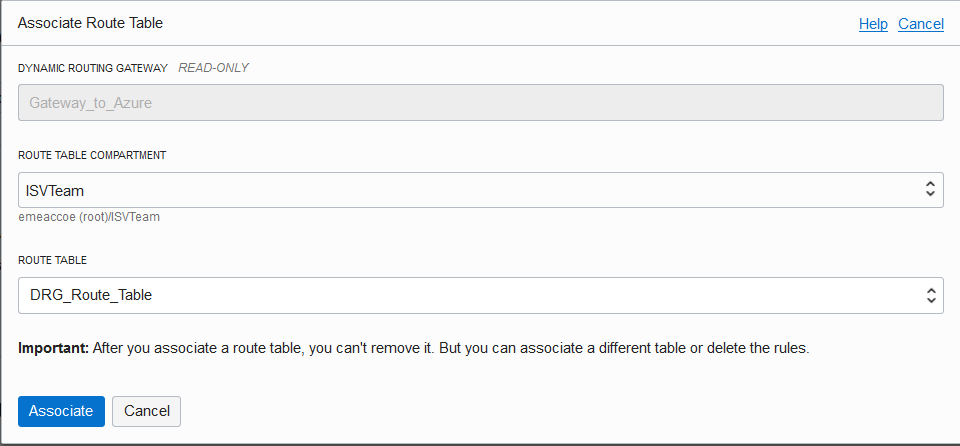
- The Associate Route Table window will pop up, select previously created route table DRG_Route_Table and click Associate.
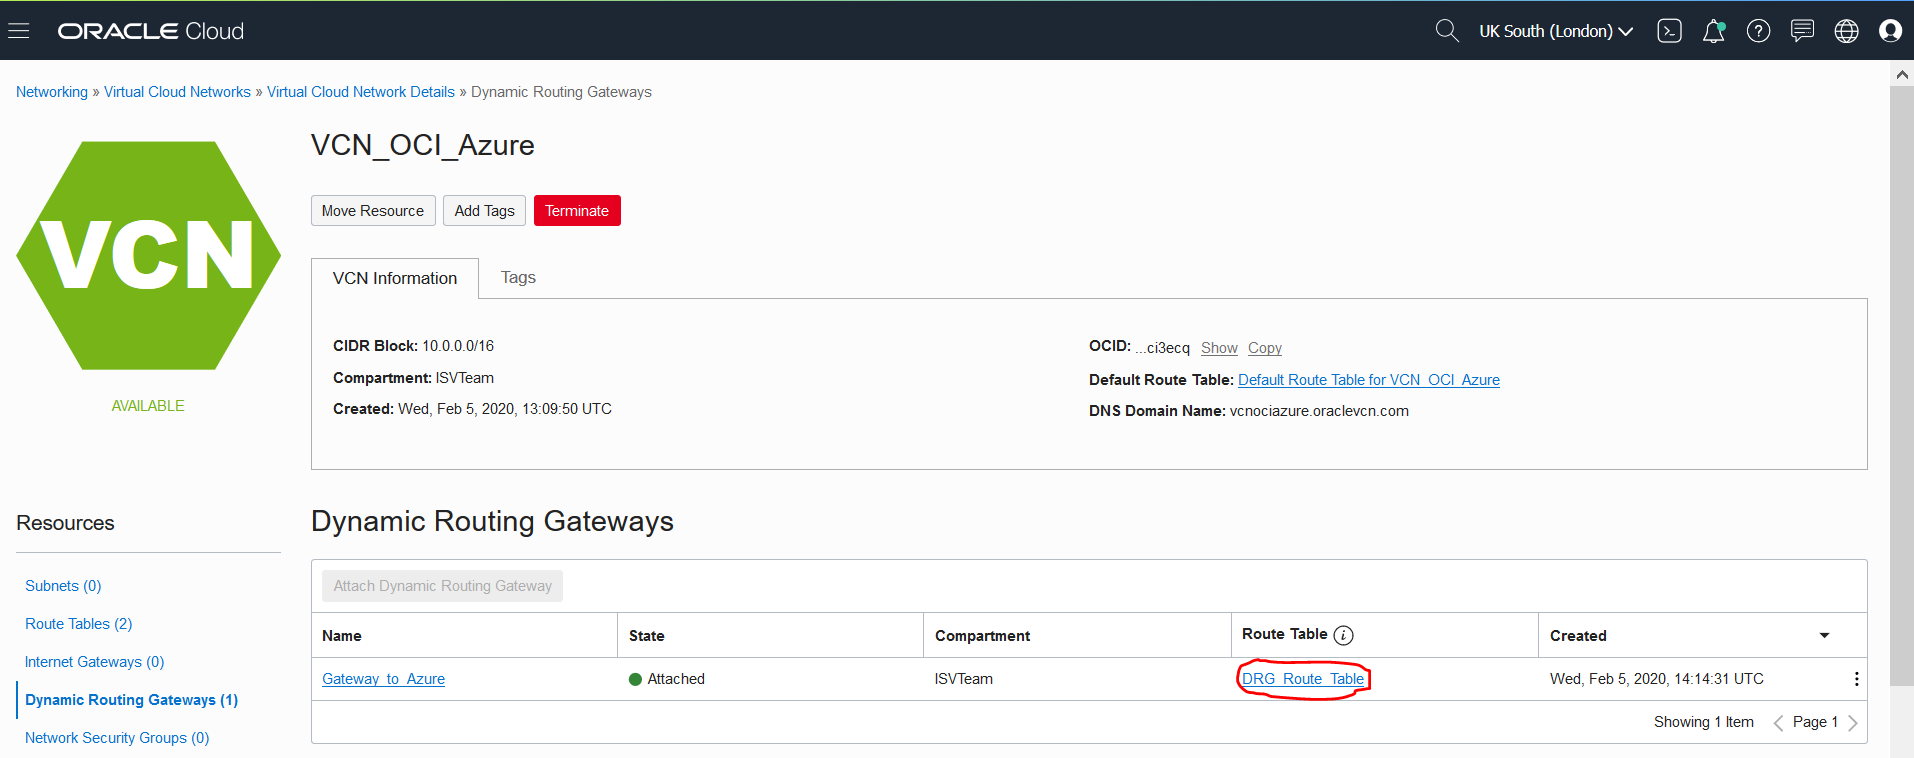
- Associated route table will appear next to your DRG.
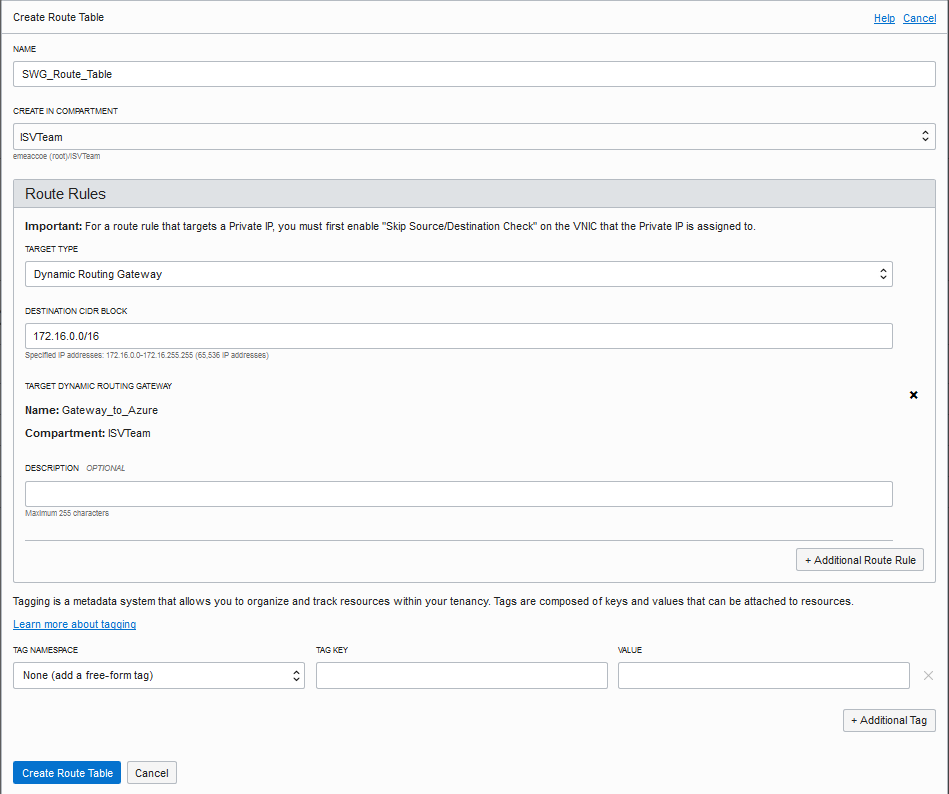
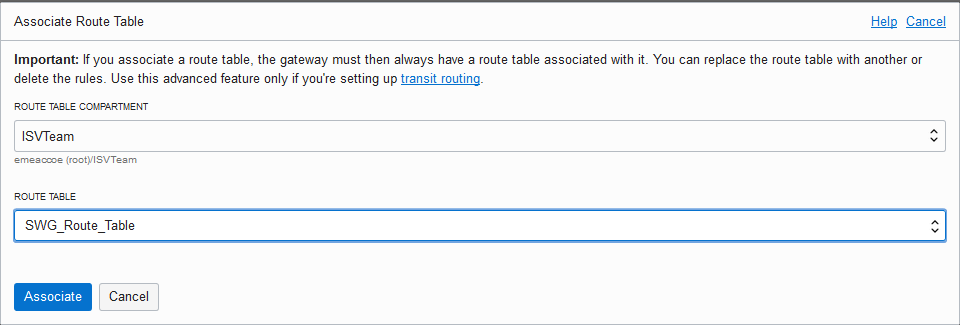
STEP 5: Create second route table and associate it with SWG
- Select again Route Tables under Resources section on the left and click Create Route Table button.
- When the Create Route Table window will pop up, please provide:
- Enter a Name, such as SWG_Route_Table.
- Choose your Compartment.
- Under Route Rules click on + Additional Route Rule button and select Target Type as Dynamic Routing Gateway.
- Enter Destination CIDR Block as 172.16.0.0/16 (CIDR Block of Azure VNet).
- Click Create Route Table button.
- Newly created Route Table for SWG will appear on the list.
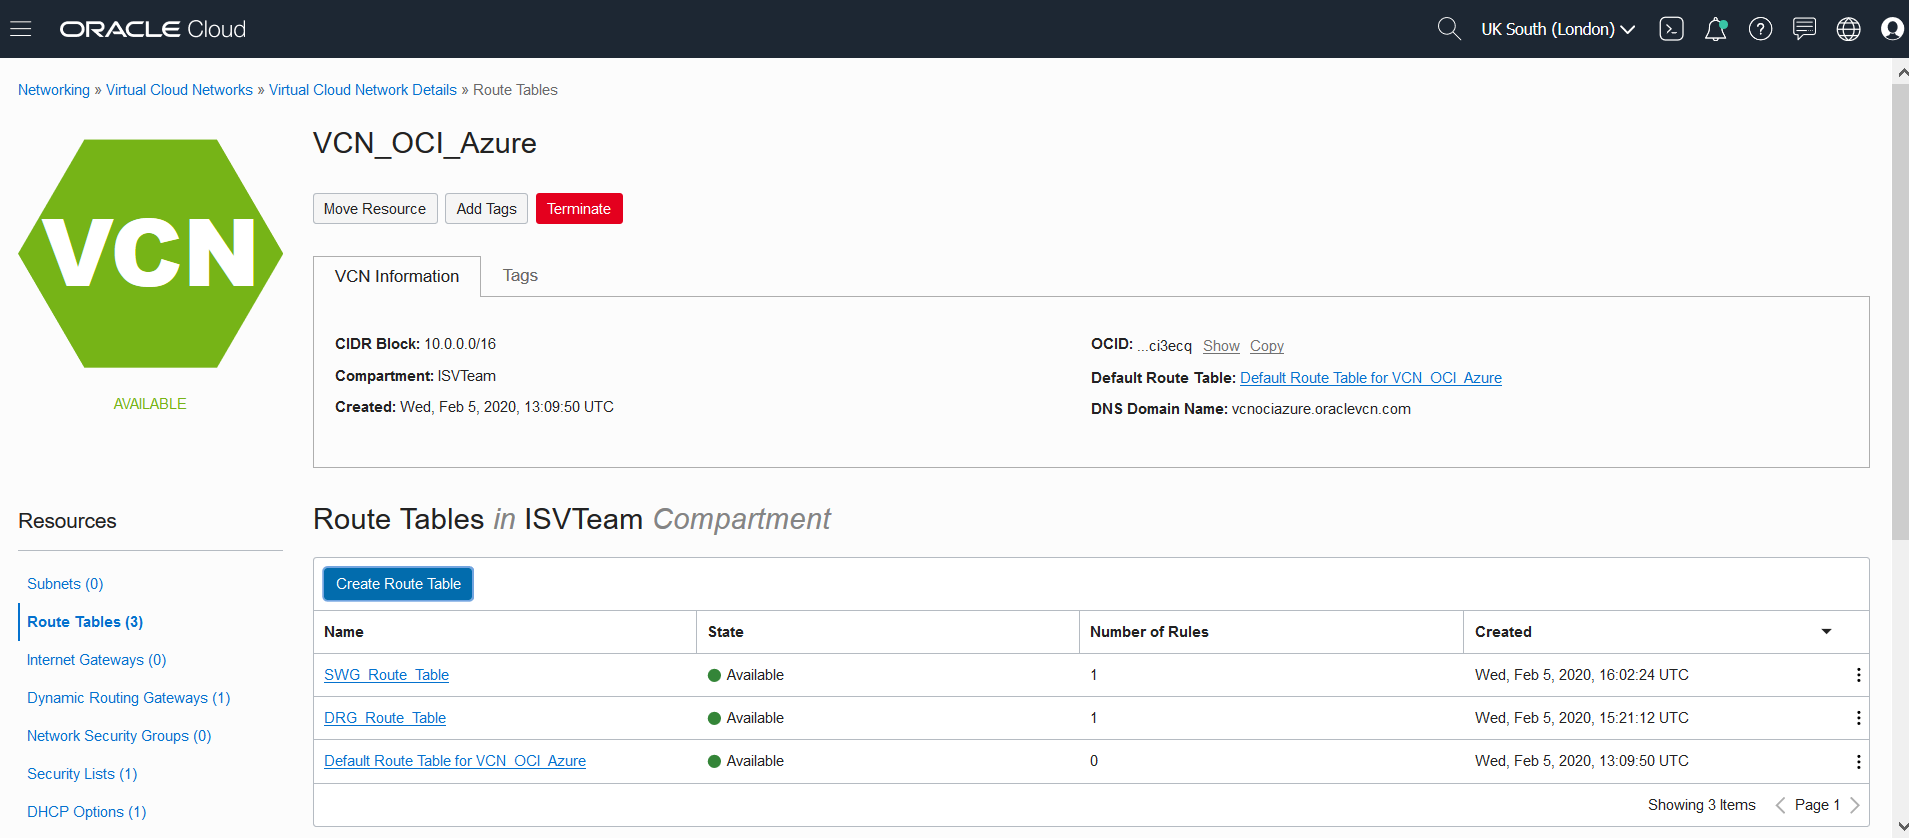
- Click on the Service Gateways under Resources section on the left menu, then on 3 vertical dots on the right next to your SWG and select Associate Route Table.
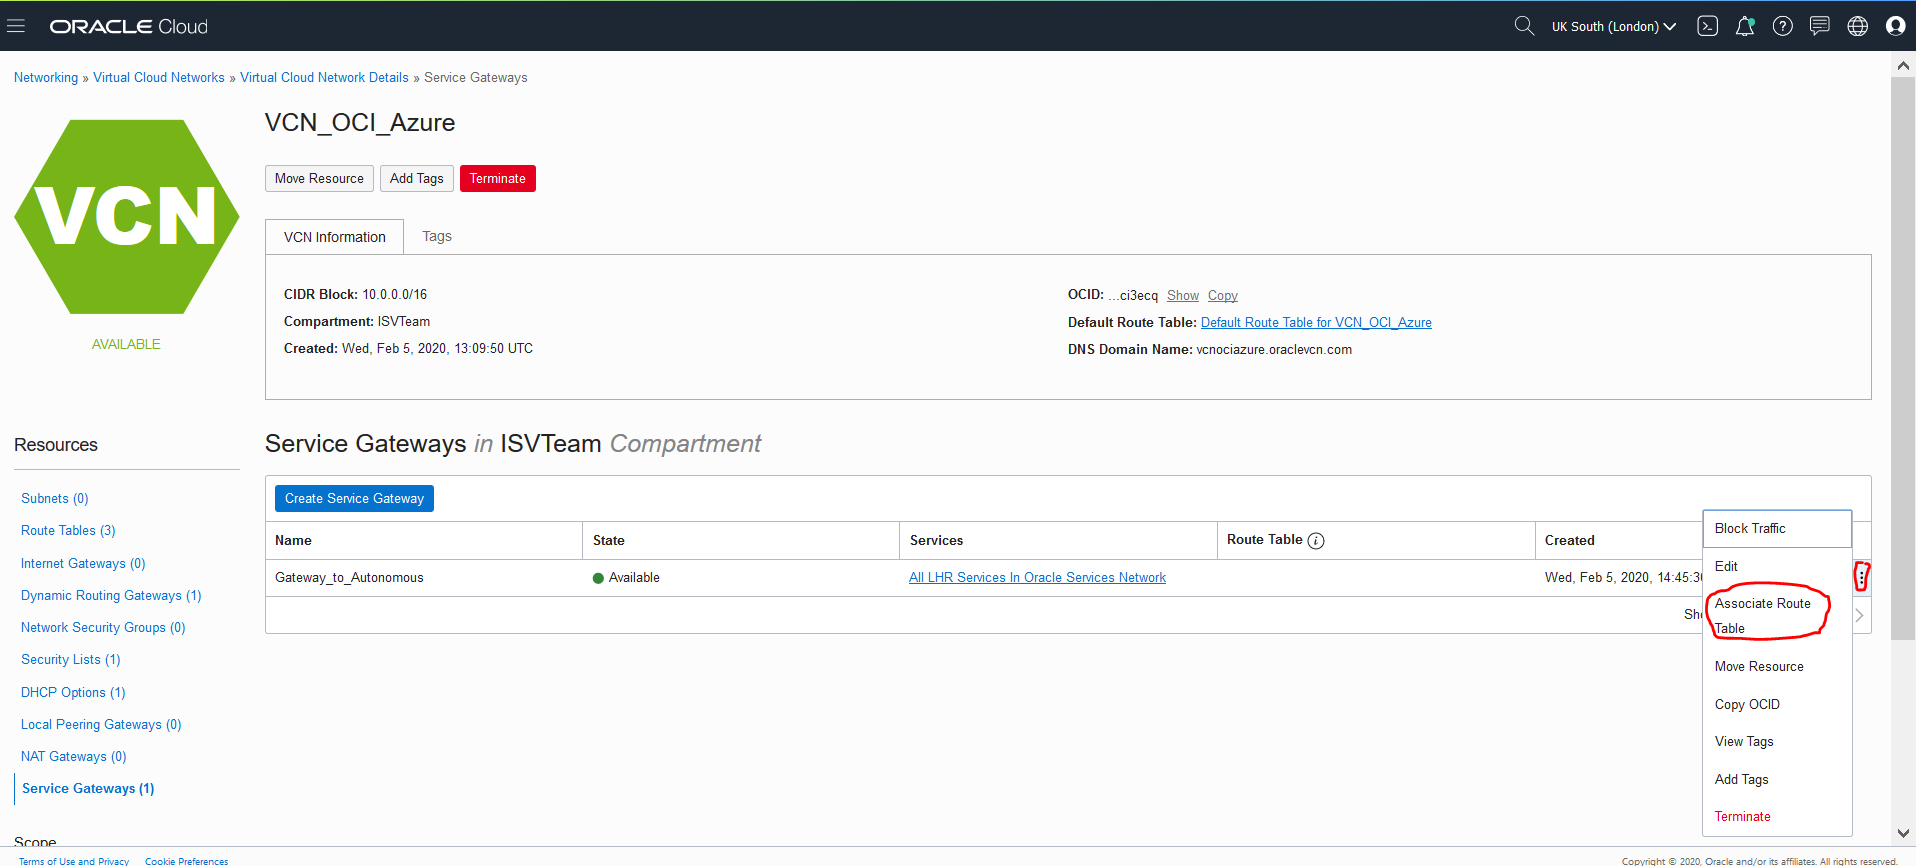
- The Associate Route Table window will pop up, select previously created route table SWG_Route_Table and click Associate.
- Associated route table will appear next to your SWG.
The initial configuration on Oracle Cloud is completed.
Congratulations, you are now ready to move to the next lab and provision the Autonomous Transaction Processing Database on OCI.