![]()
Creating and running as a docker container
Self guided student - video introduction
This video is an introduction to the Helidon in a Docker container lab. Depending on your browser settings it may open in this tab / window or open a new one. Once you've watched it please return to this page to continue the labs. [](https://youtu.be/SxVC2FGdN9k "Docker with Helidon introduction video") ---Introduction
Estimated module duration 20 mins.
Objectives
Docker has become the defacto way of packaging code into containers and then running them. In this module we show how we can package a microservice using JIB into a docker container, to separate the configuration from the code, to run the containers and push them to a repository.
If you chose to do the Kubernetes labs they can be adapted to use the containers you’re building here if you’d rather not use the ones we pre-built for you.
Prerequisites
Like the Helidon lab you perform the steps in thie module inside the client virtual machine
You will be running scripts in two locations, the storefront and the stockmanager project directories. The simplest approach is to use multiple terminal windows
-
Open two terminal windows (or tabs in a single window if you prefer)
-
In one switch to the storefront project directory
<copy>cd $HOME/workspace/helidon-labs-storefront/</copy>
- In one switch to the stockmanager project directory
<copy>cd $HOME/workspace/helidon-labs-stockmanager/</copy>
Make sure you keep track of which terminal is in which directory !
To run this part of the lab you need the working storefront and stockmanager microservices (as per the Helidon labs) connected to the database.
Make sure the zipkin container is running. You may have done this in the previous lab chapter and left it running.
- To check if it is already running type :
<copy>docker ps</copy>
- Check in the output if there is an entry named zipkin:
e3a7df18cd77 openzipkin/zipkin "/busybox/sh run.sh" 2 hours ago Up 2 hours 9410/tcp, 0.0.0.0:9411->9411/tcp zipkin
- If the entry is missing, relaunch it
<copy>docker run -d -p 9411:9411 --name zipkin --rm openzipkin/zipkin:2.24.1</copy>
Task 1: Jib - Docker image build tool
We will be using jib to build the docker images. The Maven pom.xml file contains the details of the jib tooling and it’s settings.
-
Open the storefront project, and on the top level, open the pom.xml file
-
Locate the jib-maven-plugin dependency , you may want to use Ctrl-F to bring up the Eclipse search window and search for
jib-maven-plugin
This defines what’s required for jib, including the base image to use. We will be using the Java 11 Oracle GraalVM Community Edition Docker image as a base image for our containers. We’ve chosen to use Graal rather than OpenJDK as it provides better Just In Time compilation performance and also the garbage collection. When running in a server environment both of those are important as they reduce startup overheads and make for more predictable responses to the callers. The Graal JVM also allows support for other languages, though we’re not making use of that capability in these labs. As it’s Java 11 it also means that it’s a Long Term Support version of Java. There are of course other options if you want instead of the Graal JVM.
More details on Graal
Though not covered in this lab if you want more details on the free to use community edition of the Graal JVM or the fully supported enterprise version which includes the Ahead-of-Time compilation capabilities for Java applications that compiles the Java byte code into native programs (and thus makes for a much faster startup and more efficient operations) or info on it's support for polyglot applications (which are becoming increasingly important). there are other labs available. The [Graal web site](https://www.graalvm.org/) provides more details on Graal. ---Size of the base image
Our base image includes a full command line environment, using a base image with command lines and so on makes the docker image larger than it strictly speaking needs to be. If you wanted to of course you could of course use a different Java base image. There are lots of possible docker base images we could use (some of these are listed in the JIB section of the pom.xml file) but the command line tools in this image allows us to connect to the image and see what’s going on internally as well as performing commands.
Later in the Kubernetes labs we will use the capability to run commands to simulate the failure of our microservice and see how Kubernetes handles that.
In a production environment a cut down version of a Java 11 base image would be used, as there wouldn’t be the need to work inside the container. Also we’d suggest using the Graal enterprise versions which has native compilation capabilities to produce a single executable with a smaller footprint.
Task 2: Handling configuration and other changing items
Self contained images
Initially you might think that the easiest thing to do when creating a docker image is to simply package up all of the configuration into the docker image so it’s entirely self contained. The problem with this is that quite often configuration information changes after the image has been built, for example between test and deployment, and creating different images for each configuration is challenging (you may have lots of different configuration options, and may not even be able to define them all) and worse can result in embedding things like database access or other security configuration information into the docker images. This latter is especially critical if you are storing your image on an external or public repository where it can be accessed by anyone!
To get around this docker provides a mechanism called volumes to have configuration files stored externally and injected into the container at run time.
Task 2a: Externalising the configuration
The following is an example of the approach taken when separating the executable from the configuration.
Firstly you’ll need to create a docker image that contains the required executable elements. We’ve actually set up tooling to support this using jib (Java Image Builder), which is a Maven plugin - you’ve been using Maven already to manage dependencies, though you may not have realized this.
Use the Maven package target (mvn package) to trigger jib to create the docker container in your local registry.
-
Switch to the terminal for the storefront project directory
-
Run maven
<copy>mvn package</copy>
[MVNVM] Using maven: 3.5.2
[INFO] Scanning for projects...
[INFO] ------------------------------------------------------------------------
[INFO] Detecting the operating system and CPU architecture
[INFO] ------------------------------------------------------------------------
[INFO] os.detected.name: osx
[INFO] os.detected.arch: x86_64
[INFO] os.detected.version: 10.15
[INFO] os.detected.version.major: 10
[INFO] os.detected.version.minor: 15
[INFO] os.detected.classifier: osx-x86_64
[INFO]
[INFO] ------------------------------------------------------------------------
[INFO] Building storefront 2.0.1.0
[INFO] ------------------------------------------------------------------------
[INFO]
[INFO] --- maven-resources-plugin:2.7:resources (default-resources) @ storefront ---
[INFO] Using 'UTF-8' encoding to copy filtered resources.
[INFO] Copying 3 resources

...
...
[INFO]
[INFO] ------------------------------------------------------------------------
[INFO] BUILD SUCCESS
[INFO] ------------------------------------------------------------------------
[INFO] Total time: 14.595 s
[INFO] Finished at: 2020-08-17T19:02:38+01:00
[INFO] Final Memory: 41M/200M
[INFO] ------------------------------------------------------------------------
Note : This may take a little time especially if Maven and docker need to download a lot of stuff. Fortunately for us they cache what they download, which speeds things up considerably the nest time they run.
Now repeat this step for the stockmanager:
-
Switch to the terminal for the stockmanager project directory
-
Run maven
<copy>mvn package</copy>
This operation will create two docker images, stored locally. The mvn package triggers jib to run which will build the docker image based on the properties in the jib section of the pom.xml file.
The jib tool has many advantages over creating a docker image by hand, because it uses the pom.xml file to know what dependencies to copy over, so any changes to the dependencies will automatically be handled when jib is run.
Note that jib does not copy every file into the right locations as needed by Helidon so there is a second stage to be done to get a functioning docker image for helidon. This runs a docker build against the image created by jib, the Dockerfile copies files in the container image from the resource to the classes directories and then removed the originals, resulting in a docker container that has everything in the places expected.
Once you’ve created the basic images by using mvn package you can manually create the new ones with the files in the right place using the docker command in the helidon-labs-stockmanager directory:
-
Switch to the terminal for the stockmanager project directory
-
Run a docker build
<copy>docker build --tag stockmanager --file Dockerfile .</copy>
Sending build context to Docker daemon  229.4kB
Step 1/3 : FROM jib-stockmanager:latest
 ---> 21ff68d7abaf
Step 2/3 : RUN cp -r /app/resources/* /app/classes
 ---> Running in 530a1de6f032
Removing intermediate container 530a1de6f032
 ---> 507b37292b2f
Step 3/3 : RUN rm -rf /app/resources
 ---> Running in 0f5275ae4108
Removing intermediate container 0f5275ae4108
 ---> 47d8ca5574a1
Successfully built 47d8ca5574a1
Successfully tagged stockmanager:latest
The –tag flag means that the resulting docker image is to be tagged (named) stockmanager, subsequently we can refer to it using the name, not it’s image id which is like a hashcode (e.g. 2655bfee0d99) and much harder to remember than the name!
The –file flag specified the name of the file containing the commands to execute to build the image, strictly this isn’t needed in this case as Dockerfile is the default for the docker build command
-
Switch to the terminal for the storefront project directory
-
Run the docker build
<copy>docker build --tag storefront --file Dockerfile .</copy>
Sending build context to Docker daemon  110.6kB
Step 1/3 : FROM jib-storefront:latest
 ---> d04bbcb28160
Step 2/3 : RUN cp -r /app/resources/* /app/classes
 ---> Running in 5849e8889fc4
Removing intermediate container 5849e8889fc4
 ---> 23e336c810e5
Step 3/3 : RUN rm -rf /app/resources
 ---> Running in 8c8a4b0fc6ad
Removing intermediate container 8c8a4b0fc6ad
 ---> 90bd16d9e6bc
Successfully built 90bd16d9e6bc
Successfully tagged storefront:latest
For your convenience in the future there are scripts buildStockmanagerLocalExternalConfig.sh and buildStorefrontLocalExternalConfig.sh in the helidon-labs-stockmanager and helidon-labs-storefront directories that will run a mvn build and the appropriate docker commands.
You will need to run each script from within the relevant directory (so buildStockmanagerLocalExternalConfig.sh in the helidon-labs-stockmanager directory and buildStorefrontLocalExternalConfig.sh from the helidon-labs-storefront directory) as that’s where maven and docker looks for the code and content.
Initially the scripts may take a few mins to run if docker needs to download the appropriate base layers, but once they are downloaded it should speed up. It’s best to let one build finish before starting the next one as it can re-use the content downloaded by the previous script.
If you look at the scripts you will see that they run the maven package process to create the docker image using jib. They then create a new docker image which has the changes needed to run helidon. These are the commands you’d have run by hand.
You can explore the containers by running them to give you shell access (This is why we used a larger docker base image that includes a shell and other Unix utilities, in production you’d use a minimal image).
- In the stockmanager terminal run the stockmanager container you just created:
<copy>docker run --tty --interactive --rm --entrypoint=/bin/bash stockmanager</copy>
This command creates a docker container running the shell which is connected to your terminal. Once you’re running in the container you can look around
Let’s take a look inside the container
- Inside the container type
<copy>ls</copy>
app   conf	  etc	lib64  opt   run   sys	var
bin   confsecure  home	media  proc  sbin  tmp	Wallet_ATP
boot  dev	  lib	mnt    root  srv   usr
- Inside the container type
<copy>ls Wallet_ATP</copy>
(No output)
- Inside the container type
<copy>ls conf</copy>
(No output)
- Inside the container type
<copy>ls confsecure</copy>
(No output)
- Now exit the container - Inside the container type
<copy>exit</copy>
As you can see there is nothing in the /conf /confsecure or /Wallet_ATP directories .jib was told as part of it’s config that these would be used for mounting external configuration, so it created the folders for us automatically.
When you exited the container it shutdown as nothing was running in it any more.
Docker Flags
The docker flags are handled as following, --tty means to allocate a terminal connection and connect the standard output / error to the docker run command, --interactive means that you can type and your input will be connected to the containers standard input, --rm means that the container will be removed when it exits (this means you can reuse the container name and don't have lots of expired containers hanging around) --entrypoint is the command to use when running the docker container, in this case the shell. jib actually set's up a java command to run your program as the default command if you don't override with --entrypoint. ---Let’s use docker volumes (the docker –volume flag) to inject the configuration for us, each volume argument is the host file system name (this needs to be an absolute pathname) and the location inside the container to mount it.
-
Switch to the terminal for the stockmanager project directory
-
Run the container with the volumes attached:
<copy>docker run --tty --interactive --volume `pwd`/Wallet_ATP:/Wallet_ATP --volume `pwd`/conf:/conf --volume `pwd`/confsecure:/confsecure --rm --entrypoint=/bin/bash stockmanager</copy>
As before we find ourselves in the container and the root directory looks the same, but the other directories now have content.
Let’s Look around again
- Inside the container type
<copy>ls</copy>
root@bc7d4ae0666b:/# ls
Wallet_ATP  app  app.yml  bin  boot  conf  confsecure dev	etc  home  lib	lib64  media  mnt  opt	proc  root  run  sbin  srv  sys  tmp  usr  var
- Inside the container type
<copy>ls conf</copy>
root@bc7d4ae0666b:/# ls /conf
stockmanager-config.yaml  stockmanager-network.yaml
- Inside the container type
<copy>ls confsecure</copy>
  root@bc7d4ae0666b:/# la /confsecure
stockmanager-security.yaml
- Inside the container type
<copy>ls Wallet_ATP</copy>
root@bc7d4ae0666b:/# ls /Wallet_ATP
cwallet.sso  ewallet.p12  keystore.jks	ojdbc.properties  sqlnet.ora  tnsnames.ora  truststore.jks
- Exit the container. Inside the container type
<copy>exit</copy>
We have added the configuration to the container, but without having to hard code it into the image. Of course this means that if we change the content of the files in the directories that those changes will be reflected inside the container.
Task 2b: What about the database configuration ?
In the Helidon labs we specified the database configuration using Java system properties, e.g. entries like
-Djavax.sql.DataSource.stockmanagerDataSource.dataSourceClassName=oracle.jdbc.pool.OracleDataSource
We did that rather than a config file to show how the different levels of the Helidon config system, specifically that config properties could be automatically used from the Java system properties. Now we’re going to show you a slightly different approach, we’re going to bring the database connection details in via an the system environment variables without changing the code This will work because Helidon first looks at the Java system properties, then it looks at the OS environment variables, so it will automatically pickup the values from the new location (If we used both then then the Java system properties would override the environment variables) Basically we’re trying to show you just how flexible the Helidon configuration system is!
If you are using a database provided by an instructor then they will give you the values for the database connection, or may have already set this up in your virtual machine. If you setup your own database then you will have specified a username and password (if you used our example that will be a username of HelidonLabs and a password of H3lid0n_Labs) have downloaded the wallet file from which you will have got the connection name, for example tg_high **yours will be different unless your database is called tg!
Docker provides several ways to do this, for example you can specify each individual variable on the command line using the –env flag, another way is to use the –env-file flag, this allows you to specify a file full of key/value pairs (like a Java properties file) and if you have multiple variables to set, or the variables or their names contain characters like . that have special meaning to the command shell this is the easiest way to do it.
For this lab the scripts that will run the stockmanager use the –env-file approach, so we need to make sure that the file reflects the database connection details.
-
Make sure you are in the terminal for the stockmanager project directory
-
Edit the
database-envfile, here I’m using vi, but you can use any editor
<copy>vi database-env</copy>
It will look like the following
javax.sql.DataSource.stockmanagerDataSource.dataSourceClassName=oracle.jdbc.pool.OracleDataSource
javax.sql.DataSource.stockmanagerDataSource.dataSource.url=jdbc:oracle:thin:@<database connection name>?TNS_ADMIN=./Wallet_ATP
javax.sql.DataSource.stockmanagerDataSource.dataSource.user=HelidonLabs
javax.sql.DataSource.stockmanagerDataSource.dataSource.password=H3lid0n_Labs
hibernate.dialect=org.hibernate.dialect.Oracle10gDialect
hibernate.hbm2ddl.auto=update
- On the line starting
javax.sql.DataSource.stockmanagerDataSource.dataSource.urlyou need to replace<database connection name>with the name of your high connection, e.g. tg_high Your connection name will be different (unless of course your database is called tg)
- If you created the database user with a different username and password you will need to replace those as well.
- Save the changes
To check that the environment variables are correctly set use the runBashContainer.sh script in the helidon-labs-stockmanager project. This basically does the docker run command above, using the environment variables and volumes.
Run the container with the configuration attached:
- In the VM shell type
<copy>bash runBashContainer.sh</copy>
executing in /Users/tg13456/Development/helidon-kubernetes-labs/helidon-labs-stockmanager
zipkin ip 172.17.0.2
bash-4.2#
Once in the container look at the environment (we’re going to sort the output to make it easier)
- In the container shell type :
<copy>printenv | sort</copy>
hibernate.dialect=org.hibernate.dialect.Oracle10gDialect
hibernate.hbm2ddl.auto=update
HOME=/root
HOSTNAME=cb3784c88b1f
JAVA_HOME=/opt/graalvm-ce-java11-20.1.0/
javax.sql.DataSource.stockmanagerDataSource.dataSourceClassName=oracle.jdbc.pool.OracleDataSource
javax.sql.DataSource.stockmanagerDataSource.dataSource.password=H3lid0n_Labs
javax.sql.DataSource.stockmanagerDataSource.dataSource.url=jdbc:oracle:thin:@tg_high?TNS_ADMIN=./Wallet_ATP
javax.sql.DataSource.stockmanagerDataSource.dataSource.user=HelidonLabs
LANG=en_US.UTF-8
PATH=/usr/local/sbin:/usr/local/bin:/usr/sbin:/usr/bin:/sbin:/bin
PWD=/
SHLVL=1
TERM=xterm
_=/usr/bin/printenv
(The precise details may vary of course)
You can see the environment variables we have set (in this case it is of course using tg_high for the DB connection name in the URL, yours will be different
- Exit the container by typing in the container
<copy>exit</copy>
Why not use the Java system properties in the docker entry point ?
When you specified the Java system properties you did that using Eclipse, you can of course also do it using the `java` command, e.g. `java -Djavax.sql.DataSource.stockmanagerDataSource.dataSourceClassName=oracle.jdbc.pool.OracleDataSource .....` The problem is that the actual command a docker container runs is hard coded in the docker image, that would mean that your database security credentials would be visible in the image (always a very bad thing to have happen). Also it would mean that to change any of the database credentials (e.g. the password) you would need to create a new docker image. Of course if we did that it would also mean we couldn't show you how to use environment variables as well! ---Task 3: Running the services locally in Docker
Docker has been installed in the development VM and is automatically started for you.
To save having to copy and paste (or type!) each time there are scripts runStorefrontLocalExternalConfig.sh and runStockmanagerLocalExternalConfig.sh (in each of the helidon-labs-storefront and helidon-labs-stockmanager directories respectively).
This script uses a docker command to locates the IP addresses of the containers running dependencies (for stockmanager this is zipkin, and for the storefront this is zipkin and stockmanager) and injects the IP addresses and suitable hostnames into the containers as it starts them using the –add-host option to the docker run command.
The script also uses the –publish flag to the docker run command this sets up a port connection from the specified port on the host OS to the specified port within the container. This is how we make a network service available to outside the docker container.
If you have not stopped the stockmanager and storefront applications you were running in the helidon labs then they will have ownership of the ports
- Check now that the stockmanager and storefront applicationsthey are not running inside of your Eclipse environment
If when running the docker containers you get bind errors.
If when running the docker containers you get bind errors like this : ``` docker: Error response from daemon: driver failed programming external connectivity on endpoint stockmanager (6e43692b6b949efc6f48d2dc18a7d5b9954bb0e16ad8b5cdba341fcabb673c89): Error starting userland proxy: listen tcp 0.0.0.0:9081: bind: address already in use. ``` It means you've not stopped the storefront and / or stock manager programs running in Eclipse ---As the storefront depends on the stockmanager (and both depend on zipkin) it’s important to ensure that the order shown below is followed
-
Switch to the terminal for the stockmanager project directory
-
Run the Stockmanager container via script:
<copy>bash runStockmanagerLocalExternalConfig.sh</copy>
Keep the terminal window open to see any log info it generates
-
Switch to the terminal for the storefront project directory
-
Run the Storefront container via script
<copy>bash runStorefrontLocalExternalConfig.sh</copy>
-
Open another new terminal window
-
Call the stocklevel method of the application:
<copy>curl -i -X GET -u jack:password http://localhost:8080/store/stocklevel</copy>
HTTP/1.1 200 OK
Content-Type: application/json
Date: Mon, 23 Dec 2019 16:37:30 GMT
connection: keep-alive
content-length: 184
[{"itemCount":4980,"itemName":"rivet"},{"itemCount":4,"itemName":"chair"},{"itemCount":981,"itemName":"door"},{"itemCount":25,"itemName":"window"},{"itemCount":20,"itemName":"handle"}]
This call should return the entries you added earlier.
You may still get a 424 Failed dependency message: it’s because the lazy initialization has taken a while as the back end request has times out (remember the @Timeout annotation on the StorefrontResouce is set to 15 seconds!)
If you do just re-run the request a few times till you get the expected response
The outputs for the storefront and stockmanager containers will display the log data generated as the operation was performed.
Storefront example output
2020.01.07 17:29:34 INFO io.helidon.microprofile.faulttolerance.CommandRetrier Thread[helidon-2,5,server]: About to execute command with key listAllStock1387953623 on thread helidon-2
2020.01.07 17:29:34 INFO com.oracle.labs.helidon.storefront.resources.StorefrontResource Thread[hystrix-io.helidon.microprofile.faulttolerance-2,5,server]: Requesting listing of all stock
2020.01.07 17:29:34 INFO com.oracle.labs.helidon.storefront.resources.StorefrontResource Thread[hystrix-io.helidon.microprofile.faulttolerance-2,5,server]: Found 4 items
Stockmanager example output
^[c2020.01.07 17:29:11 INFO com.arjuna.ats.arjuna Thread[helidon-1,5,server]: ARJUNA012170: TransactionStatusManager started on port 35375 and host 127.0.0.1 with service com.arjuna.ats.arjuna.recovery.ActionStatusService
2020.01.07 17:29:11 INFO com.oracle.labs.helidon.stockmanager.resources.StockResource Thread[helidon-1,5,server]: Getting all stock items
2020.01.07 17:29:12 INFO org.hibernate.jpa.internal.util.LogHelper Thread[helidon-1,5,server]: HHH000204: Processing PersistenceUnitInfo [name: HelidonATPJTA]
2020.01.07 17:29:12 INFO org.hibernate.Version Thread[helidon-1,5,server]: HHH000412: Hibernate Core {5.4.9.Final}
2020.01.07 17:29:12 INFO org.hibernate.annotations.common.Version Thread[helidon-1,5,server]: HCANN000001: Hibernate Commons Annotations {5.1.0.Final}
2020.01.07 17:29:13 INFO com.zaxxer.hikari.HikariDataSource Thread[helidon-1,5,server]: HikariPool-1 - Starting...
2020.01.07 17:29:18 INFO com.zaxxer.hikari.HikariDataSource Thread[helidon-1,5,server]: HikariPool-1 - Start completed.
2020.01.07 17:29:18 INFO org.hibernate.dialect.Dialect Thread[helidon-1,5,server]: HHH000400: Using dialect: org.hibernate.dialect.Oracle10gDialect
2020.01.07 17:29:23 INFO org.hibernate.engine.transaction.jta.platform.internal.JtaPlatformInitiator Thread[helidon-1,5,server]: HHH000490: Using JtaPlatform implementation: [org.hibernate.engine.transaction.jta.platform.internal.JBossStandAloneJtaPlatform]
Hibernate:
    SELECT
        departmentName,
        itemName,
        itemCount
    FROM
        StockLevel
    WHERE
        departmentName='timg'
2020.01.07 17:29:24 INFO com.oracle.labs.helidon.stockmanager.resources.StockResource Thread[helidon-1,5,server]: Returning 4 stock items
If you want to see the traces in zipkin use the URL http://localhost:9411/zipkin as before
To stop the containers do Ctrl-C in each of the windows, or in a separate terminal use docker to stop them
- Stop the containers, in the terminal you used for the curl command run
<copy>docker stop storefront stockmanager</copy>
Why use volumes for stuff that's not secret ?
You may be asking in the storefront why do we need to inject configuration using the docker volumes, and not just copy it in to the image, after all it has no database connection details ? The reason is that though we could certainly build the configuration into the container that we should not do this with the authentication data, for a test environment you'd want to inject some hard coded authentication data, but in production you'd want to inject an external authentication service. You certainly would want the microservice to not have default authentication info that would be used if you forgot to do this, having a default that opens up security is a bad thing! Of course in a production environment you'd probably have a separate folder containing the relevant configuration information (it's highly likely that multiple services would use the same database setup for example) to the host configuration would be in there, not in the development folder. ---Task 4: Pushing your images to a container repository
The docker container images are currently only held locally, that’s not good if you want to distribute them or run them in other locations. We can save the images in an external repository, This could be public - e.g. dockerhub.com, private to your organization or in a cloud registry like the Oracle OCIR. Note that if you wanted to there are docker image save and docker image load commands that will save and load image files from a tar ball, but that’s unlikely to be as easy to use as a repository, especially when trying to manage distribution across a large enterprise environment.
Task 4a: Getting your docker credentials and other information
There are a few details (registry id, authentication tokens and the like) you will need to get before you push your images. Note that this is needed for the Oracle Cloud Infrastructure Registry, if you use another registry the details needed there may differ.
The following instructions cover how to prepare to interact with the Oracle Cloud Infrastructure Docker Registry. They tell you how to get the following bits of information
- Oracle Cloud Infrastructure Registry region code
- Tenancy Object Storage Namespace
- Full Username
- Authentication Token
Once you have got this information please save it in a notepad or something as you will need it later.
Be sure you save the information you gather, some of it can only be retrieved once
Determining the Oracle Cloud Infrastructure Registry region code
The OCIR region code is based on the IATA code for the city hosting the region, for example Frankfurt has an IATA core of fra and Amsterdam is ams. Unfortunately some cities (e.g. London) have multiple airports, in others the IATA airport code refers to an old name for the city, or the airport itself is not directly named after the city it serves, so we need to look the right code up based on our region.
- To determine your region look at the top of your Oracle Cloud GUI in the web browser and you’ll see your current region.

- If you click on the name you’ll get a list of regions enabled for your tenancy and your home region
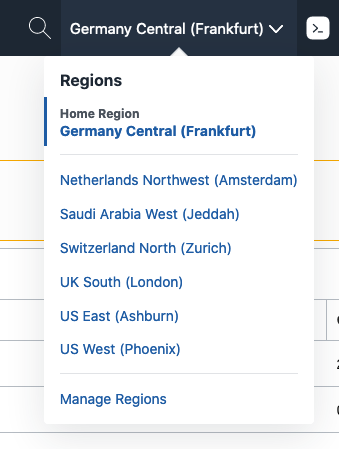
You can see here in this example we’re using the Frankfurt region, which is also our home region.
-
Now go to the OCIR Availability By Region list.
-
Locate your region on the list and then to the right identify the region code, for example we can see below in the case of Frankfurt the OCIR region code to use is
frafor Sydney it’ssyd

Determining your tenancy Object Storage Namespace
-
Navigate to the Tenancy Information screen
-
Click the Hamburger menu
-
In the menu, scroll down to Administration,
-
Click Administration then Tenancy Details
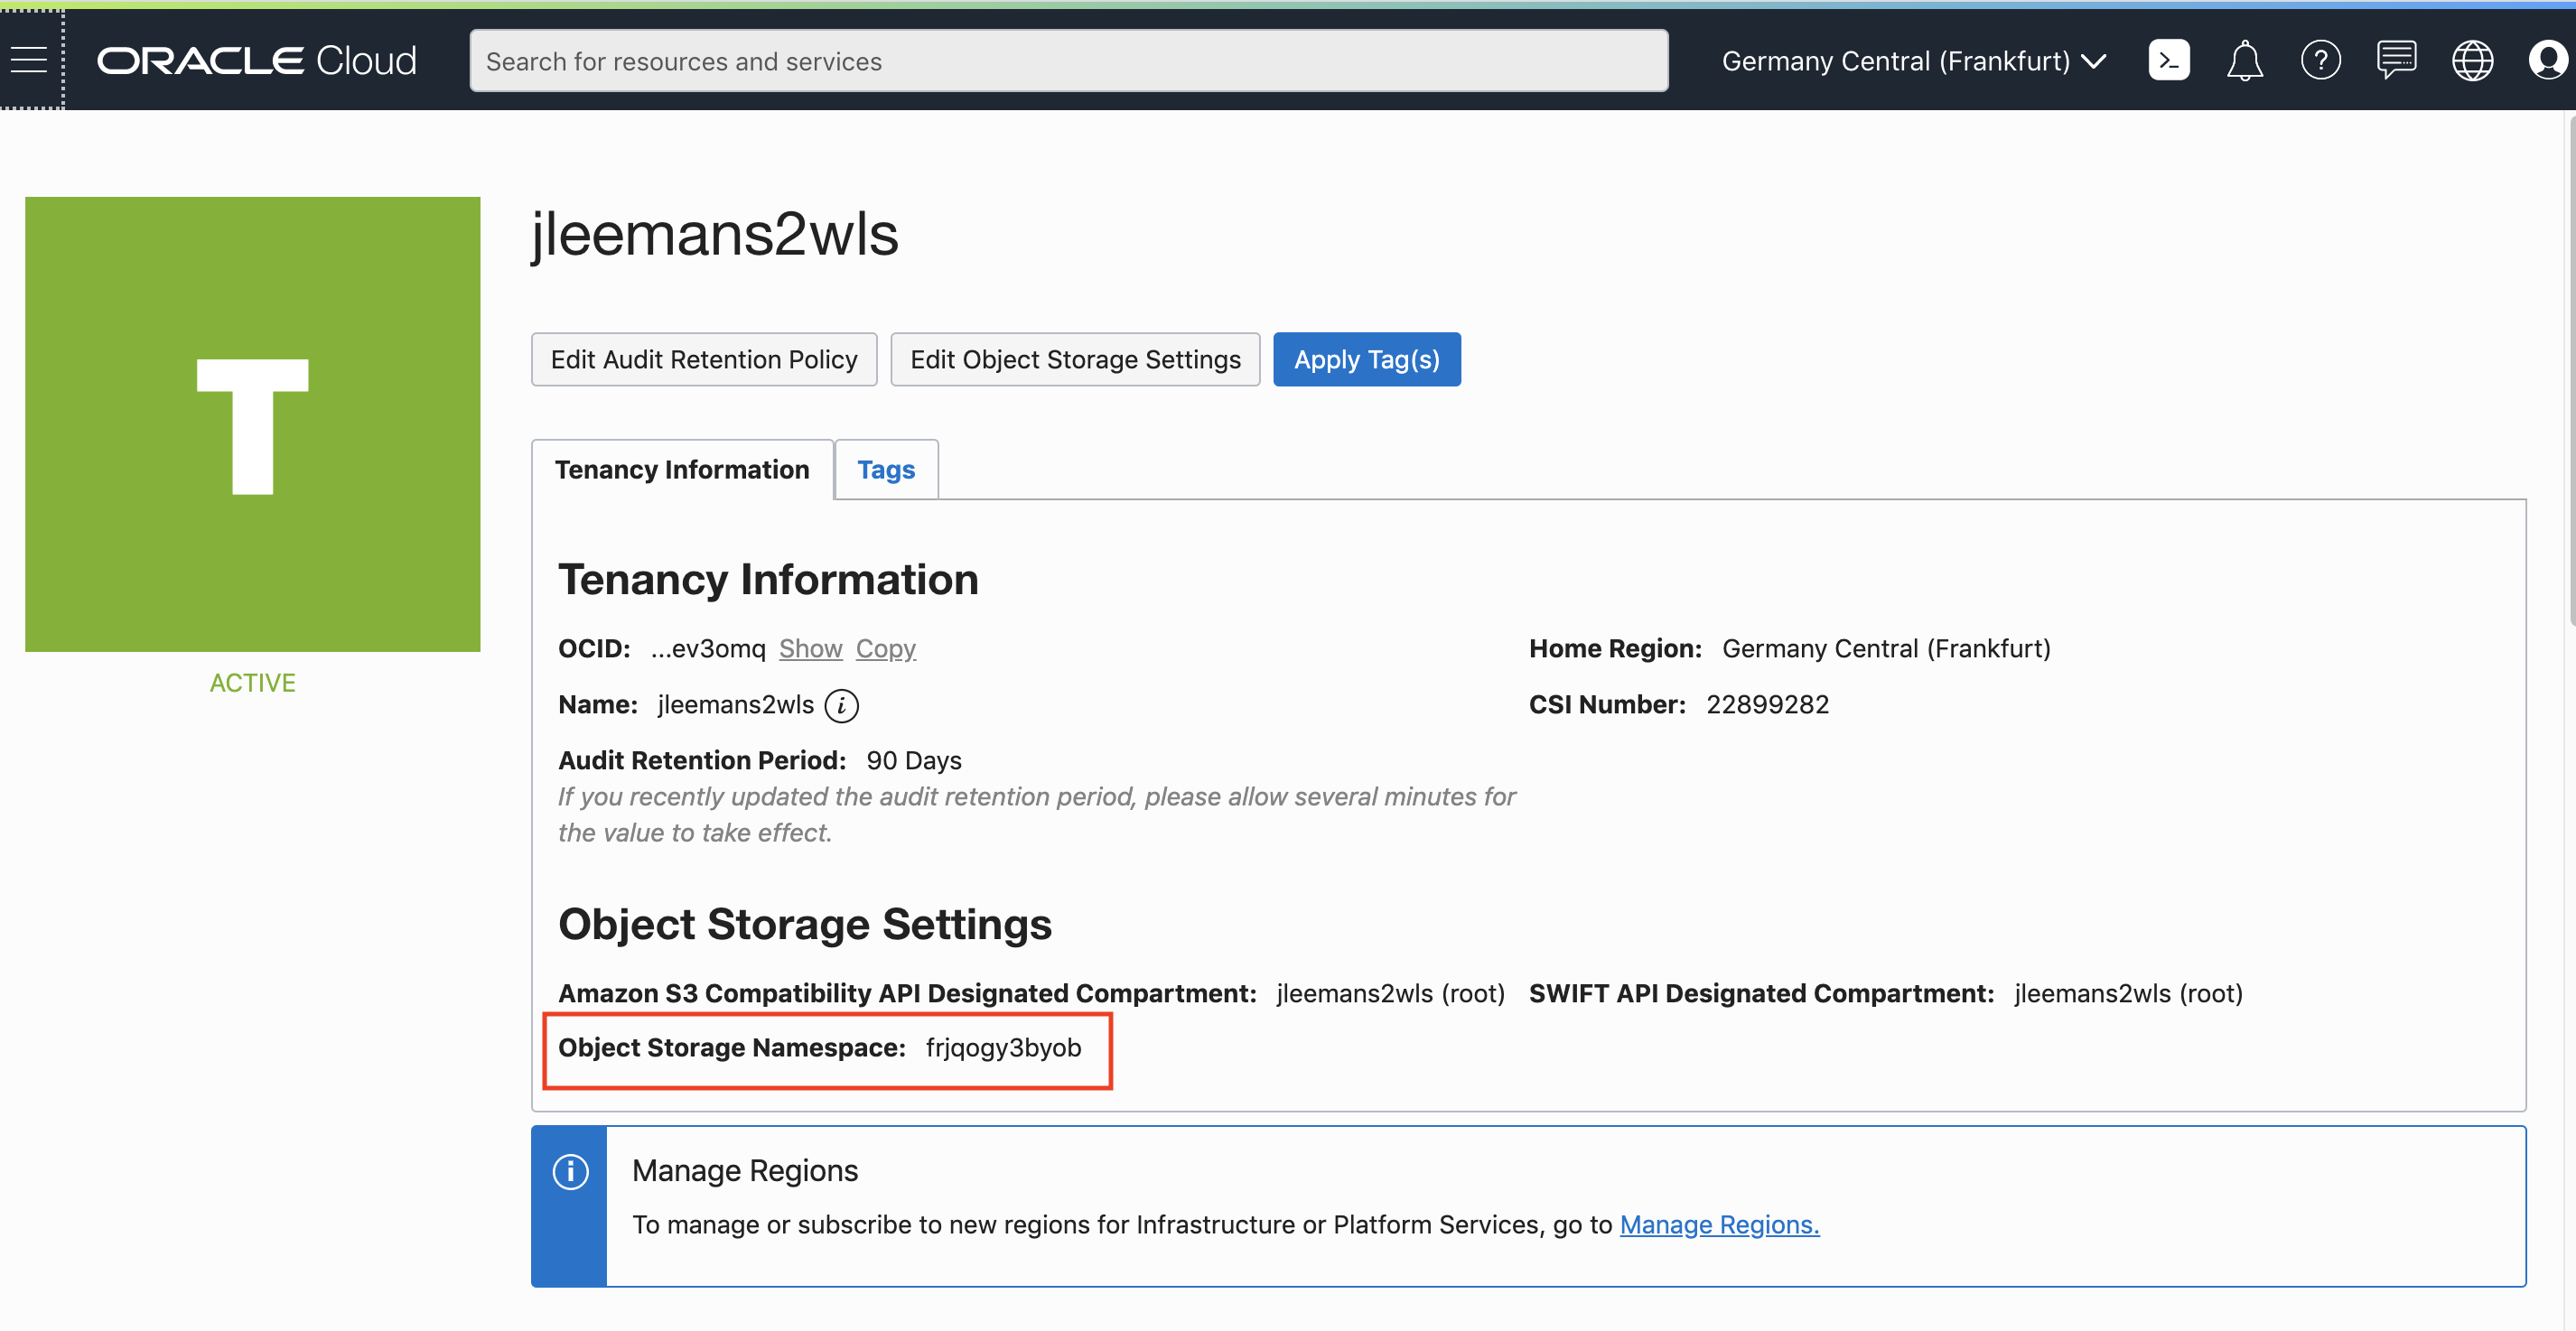
- Note down the Object Storage Namespace of your tenancy, in the example above this is
frjqogy3byobbut yours will be different (this is what we mean when we say mytenancystoragenamespace in these labs)
Getting your Authentication Token
-
OCIR uses an authentication token rather than a password. To set an authentication token you need to take the following steps.
-
Click on the Magnifying glass on the top of your console, and enter your username. For example, if your name was ppan :
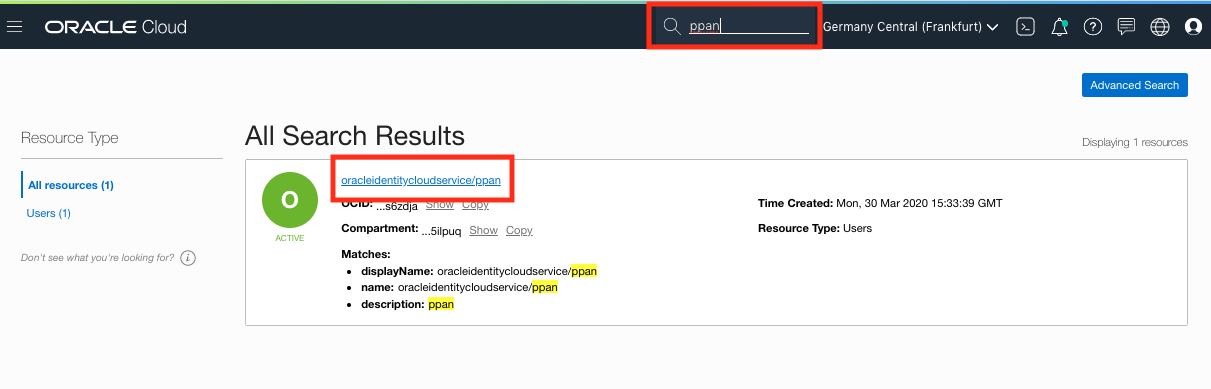
- Select the user that looks like : oracleidentitycloudservice/(your_name)
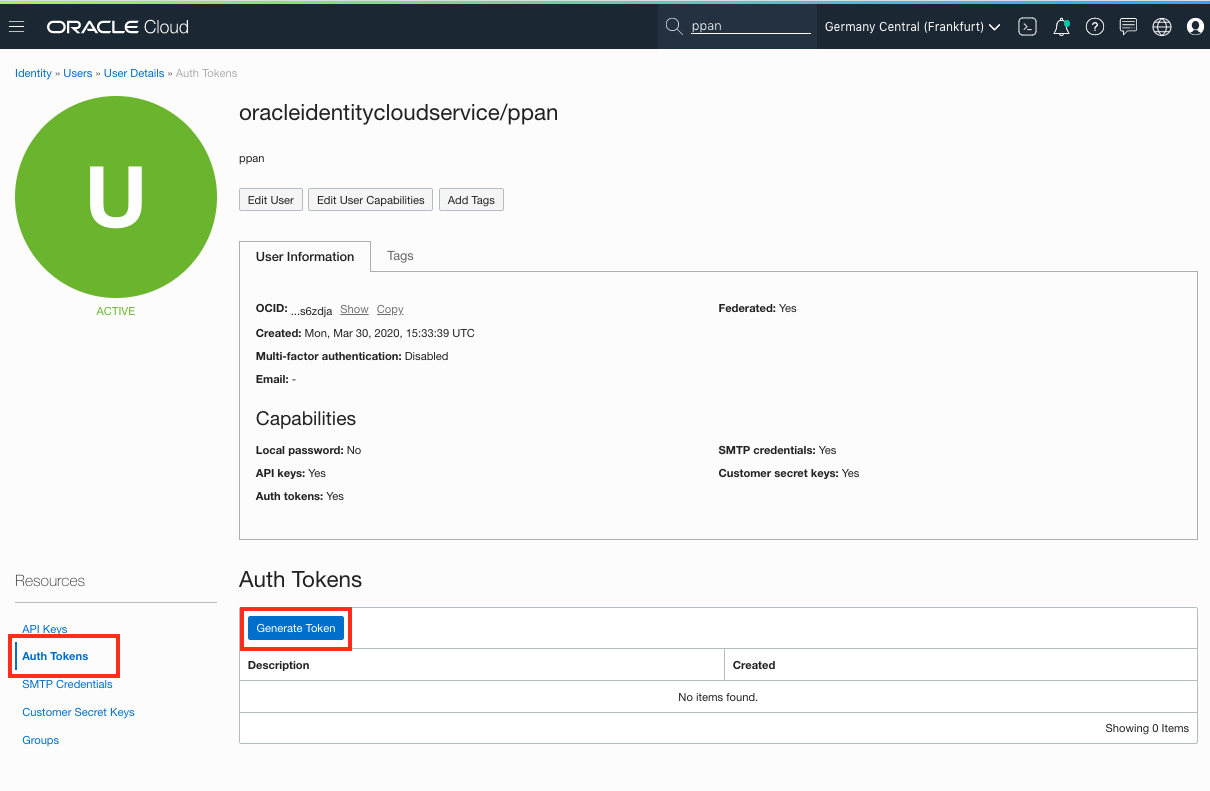
-
Select Token in the right-hand menu, then click the button Create Token.
-
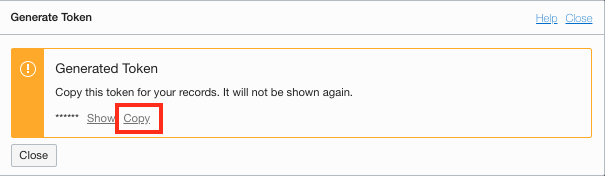
Enter a name for the token
-
Use the Copy button to copy the token in your buffer, and immediately paste it in a notebook of your choice, you cannot retrieve it once you’ve closed this popup and you will need this later.
Chosing the repo name
You now need to chose a name for your repository,this is a combination of the OCIR registry and tenancy you determined above and a repo name you chose.
An OCIR repo name looks like <OCIR region code>ocir.io/<Object Storage Namespace>/<repo_name>
- Chose something unique TO YOU e.g. your initials : tg_repo
- this must be in lower case and can only contain letters, numbers, underscore and hyphen
The ultimate full repository name will look something like fra.ocir.io/oractdemeabdmnative/tg_repo
Task 4b: Docker login in to the Oracle Container Image Registry (OCIR)
We need to tell docker your username and password for the registry.
You will have gathered the information needed in the previous step.
- You just need to execute the login command, of course you need to substitute the fields
docker login <region-code>.ocir.io --username=<mytenancystoragenamespace>/oracleidentitycloudservice/<myusername> --password='<auth token>'
where :
-
<region-code>: 3-letter code of the region you are using -
<mytenancystoragenamespace>: name of your tenancy’s Object Storage namespace -
<myusername>: user name you used to register for your cloud account, usually an email address -
<auth token>: Auth token you associated with your username
For example a completed version may look like this (this is only an example, use your own values)
Important The auth token being used for the password may well contain characters with special meaning to the shell, so it’s important to include it in single quotes as in the example below ( ‘ )
docker login fra.ocir.io --username=cdtemeabdnse/oracleidentitycloudservice/my.email@you.server.com --password='q)u70[]eUkM1u}zu;:[L'
Enter the command with your details into a terminal in the virtual machine to login to the OCIR.
Task 4c: Pushing the images
You need to update both of the repoStockmanagerConfig.sh and repoStorefrontConfig.sh scripts in the helidon-labs-stockmanager and helidon-labs-storefront directories to reflect your chosen details.
- Switch to the terminal for the storefront project directory
As for some instructor labs there are may be many attendees doing the lab in the same tenancy, to allow for that we need to separate the different images out, so we’re also going to use your initials / name / something unique
- Open file repoStorefrontConfig.sh and edit the repo name to reflect your region, tenancy and initials
- Example for region
Frankfurt, in theoractdemeabdmnativetenancy with initialstgyou might have :
    #!/bin/bash
    REPO=fra.ocir.io/oractdemeabdmnative/tg_repo
    echo Using repository $REPO
-
Switch to the terminal for the stockmanager project directory
-
Open file repoStockmanagerConfig.sh and edit the repo name again as above
About the script and the docker tags
The build script is pretty similar to what we had before. It uses mvn package to create the initial image using jib, but the docker build command in the file is different (don't actually run this, just look at it) ``` $ docker build --tag $REPO/storefront:latest --tag $REPO/storefront:0.0.1 -f Dockerfile . ``` Note that we have two --tag commands so the resulting image will be pointed to by two names, not just one. Both of the names include the repository information (we use this later on when pushing the images) but they also have a :\<something\> after the container name we're used to seeing. This is used as the version number, this is not processed in any meaningful way that I've discovered (for example I've yet to find a tool that allows you to do something like run version 1.2.4 or later, but less than 2.0.0) but by convention people tag the most recent version with :latest and all images should also be tagged with a version number in the form of :\<major\>.\<minor\>.\<micro\> e.g. 1.2.4 ---On the dangers of using :latest
On the surface using `:latest` may seem like a really good idea, you want to run the latest version all the time right ? Well actually using `:latest` may not be what you want. In a production environment you probably want to know what your exact configuration is, you may well have accreditation requirements (especially in the finance sector) and in most situations you want the production environment to match your development, and test environment. Certainly if you have problems and want to fix them you would want to know the exact configuration the problem occurs in. To make matters worse `:latest` is just a tag (a sequence of characters) A tag has no actual meaning. you could have a `0.0.1` version which is also tagged `latest`, even though there are many versions after it (`0.0.2`, `0.1.4`, `1.0.2` etc.) docker doesn't ensure that `:latest` is actually the most recent version of an image. In fact it is only convention that `1.2.3` is more recent than `1.2.2`, there is nothing in docker itself that enforces this. ---Now the images are tagged with a name that included version and repo information we can push them to a repository, you will need to have logged in to that docker repository (you did this earlier with the docker login command)
To push an image to the repository just push it, for example (don’t actually run this, just look at it)
$ docker push my.repo.io/some-id/storefront:latest
The push refers to repository [my.repo.io/some-id/storefront]
fd17f594205f: Pushed
f2d4659d7ea1: Pushed
81c949a6999e: Layer already exists
6d4327d22e70: Pushed
84fad9f97da3: Layer already exists
25efa461ccff: Layer already exists
4272c5799ff4: Layer already exists
9a11244a7e74: Layer already exists
5f3a5adb8e97: Layer already exists
73bfa217d66f: Layer already exists
91ecdd7165d3: Layer already exists
e4b20fcc48f4: Layer already exists
latest: digest: sha256:7f5638210c48dd39d458ba946e13e82b56922c3b99096d3372301c1f234772af size: 2839
(While a layer is being pushed you’ll see a progress bar, the above shows the final output).
Note that the first time you run this most if not all of the layers will be pushed, however subsequent runs only the layers that have changes will need to be pushed, which speeds things up a lot, so if the 0.0.1 tagged version is pushed (this is the same actual image, just a different name, again don’t actually run this, just look at it)
$ docker push my.repo.io/some-id/storefront:0.0.1
The push refers to repository [my.repo.io/some-id/storefront]
fd17f594205f: Layer already exists
f2d4659d7ea1: Layer already exists
81c949a6999e: Layer already exists
6d4327d22e70: Layer already exists
84fad9f97da3: Layer already exists
25efa461ccff: Layer already exists
4272c5799ff4: Layer already exists
9a11244a7e74: Layer already exists
5f3a5adb8e97: Layer already exists
73bfa217d66f: Layer already exists
91ecdd7165d3: Layer already exists
e4b20fcc48f4: Layer already exists
latest: digest: sha256:7f5638210c48dd39d458ba946e13e82b56922c3b99096d3372301c1f234772af size: 2839
Notice that for the second example layers all already exist, so nothing needs to be uploaded at all (except of course to establish the name to image hash mapping)
Let’s actually push the images.
-
Switch to the terminal for the stockmanager project directory
-
Run the script to build the image and push it to the repo
<copy>bash buildStockmanagerPushToRepo.sh</copy>
$ bash buildPushToRepo.sh
Using repository fra.ocir.io/oractdemeabdmnative/tg_repo
[MVNVM] Using maven: 3.5.2
[INFO] Scanning for projects...
[INFO]
[INFO] ------------------------------------------------------------------------
[INFO] Building storefront 0.0.1
[INFO] ------------------------------------------------------------------------
[INFO]

<Bunch of mvn output and stuff deleted>

 ---> 63d65abfcf0c
Successfully built 63d65abfcf0c
Successfully tagged fra.ocir.io/oractdemeabdmnative/tg_repo/storefront:latest
Successfully tagged fra.ocir.io/oractdemeabdmnative/tg_repo/storefront:0.0.1
The push refers to repository [fra.ocir.io/oractdemeabdmnative/tg_repo/storefront]
61a16a955381: Pushed
0cae22e386b2: Pushed

<Bunch of deleted docker push output>

1f59a4b2e206: Layer already exists
0ca7f54856c0: Layer already exists
ebb9ae013834: Layer already exists
0.0.1: digest: sha256:c993e660e73e681b7b5a8200b0a2e8baed0af1a52c334ef03284f13c27d4ed7c size: 2839
build and pushed with tags 0.0.1
The script will do the build then push the container images. The first time you push the image to the repository it may take a while because you’ve pushing all of the layers in the runtime, the next time however only changed layers will need to be pushed.
-
Once it’s finished switch to the terminal for the storefront project directory
-
Run the script to build the image and push it to the repo
<copy>bash buildStorefrontPushToRepo.sh</copy>
(Lots of output similar to the above)
The script will do the build then push the container images. The first time you push the image to the repository it may take a while because you’ve pushing all of the layers in the runtime, the next time however only changed layers will need to be pushed.
Upload denied error?
If during the docker push stage you get image upload denied errors then it means that you do not have the right policies set for your groups in your tenancy. This can happen in existing tenancies if you are not an admin or been given rights via a policy. (In a trial tenancy you are usually the admin with all rights so it's not generally an issue there). You will need to ask your tenancy admin to add you to a group which has rights to create repos in your OCIR instance and upload them. See the [Policies to control repository access](https://docs.cloud.oracle.com/en-us/iaas/Content/Registry/Concepts/registrypolicyrepoaccess.htm) document. ---Task 4d: Running the pushed images
You can now re-run the images that have been pushed the cloud.
-
Switch to the terminal for the storefront project directory
-
Run the image you just pushed
<copy>bash runStockmanagerRepo.sh</copy>
(Usual output from the stockmanager starting)
-
Wait for it to start, switch to the terminal for the storefront project directory
-
Run the image you just pushed
<copy>bash runStorefrontRepo.sh</copy>
(Usual output from the storefront starting)
- Make a request to confirm it works
<copy>curl -i -X GET -u jack:password http://localhost:8080/store/stocklevel</copy>
HTTP/1.1 200 OK
Content-Type: application/json
Date: Mon, 23 Dec 2019 16:45:36 GMT
connection: keep-alive
content-length: 184
[{"itemCount":4980,"itemName":"rivet"},{"itemCount":4,"itemName":"chair"},{"itemCount":981,"itemName":"door"},{"itemCount":25,"itemName":"window"},{"itemCount":20,"itemName":"handle"}]
Task 5: Cleaning up
This is the end of this section of the lab, let’s stop the running images
-
Open a new terminal window
-
Stop the Storefront and Stockmanager apps:
<copy>docker stop storefront stockmanager</copy>
- Stop the zipkin instance running
<copy>docker stop zipkin</copy>
End of the Module, what’s next ?
Congratulations, you are now able to run your microservices on Docker, separate the configuration from the container, and push the container to a repository
If you are doing only the Helidon and Docker lab you’ve finished. If you’re doing the “mega” lab then it’s time to start with the Kubernetes labs introduction
Acknowledgements
- Author - Tim Graves, Cloud Native Solutions Architect, Oracle EMEA Cloud Native Application Development specialists Team
- Contributor - Jan Leemans, Director Business Development, EMEA Divisional Technology
- Last Updated By - Tim Graves, May 2023